G1026 Heavy-Duty Shaper
-23-
Cutter Installation
Your shaper operates at speeds of 7,000 and
10,000 RPM. 3
1
⁄
2
" or larger cutters must be oper-
ated at the slower speed. Always use the largest
spindle size possible, and never use a cutter bore
more than one size larger than the spindle size.
To install a cutter:
1. DISCONNECT SHAPER FROM POWER
SOURCE!
2. Loosen the knurled lock knob and temporarily
move the main safety guard out of the way.
3. If needed, place an appropriate spacer or col-
lar at the base of the spindle for support.
4. Place the cutter on the spindle. Make sure
the rotation is correct for your application.
5. Use spacers or collars to suit your particular
application.
6. Place a spindle washer above the cutter and
screw on the nut and locknut as shown in
Figure 27.
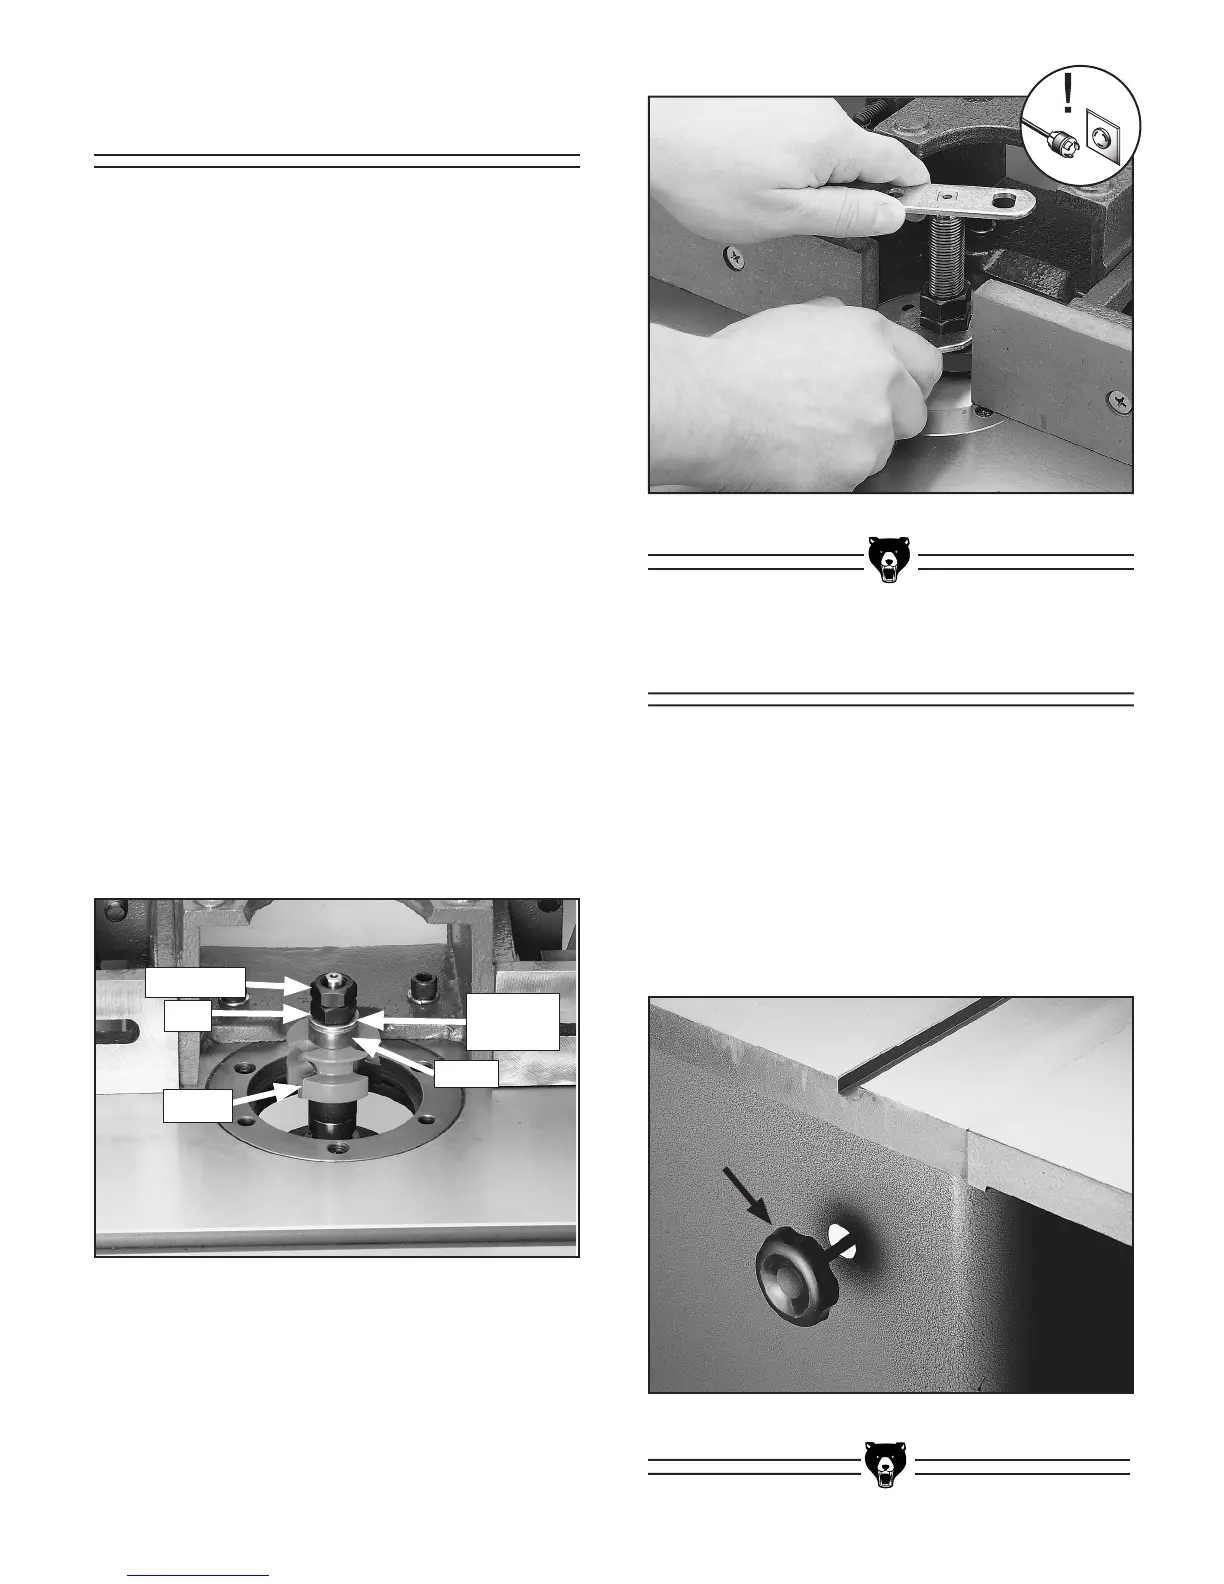
7. Tighten the nuts while holding the spindle
stationary. Place a spindle wrench on the
notches at the top of the spindle for leverage
as shown in
Figure 28.
8. Replace the safety guard.
Figure 27. Cutter and fasteners.
Lock Nut
Nut
Spindle
Washer
Cutter
Collar
Spindle Height
To adjust the cutter height:
1. Loosen the spindle lock. See Figure 29.
2. Move the spindle up or down with the eleva-
tion handwheel until the desired position is
obtained.
3. Lock the spindle into position.
Figure 29. Spindle lock knob.
Figure 28. Tightening spindle nuts.
 Loading...