G1026 Heavy-Duty Shaper
-27-
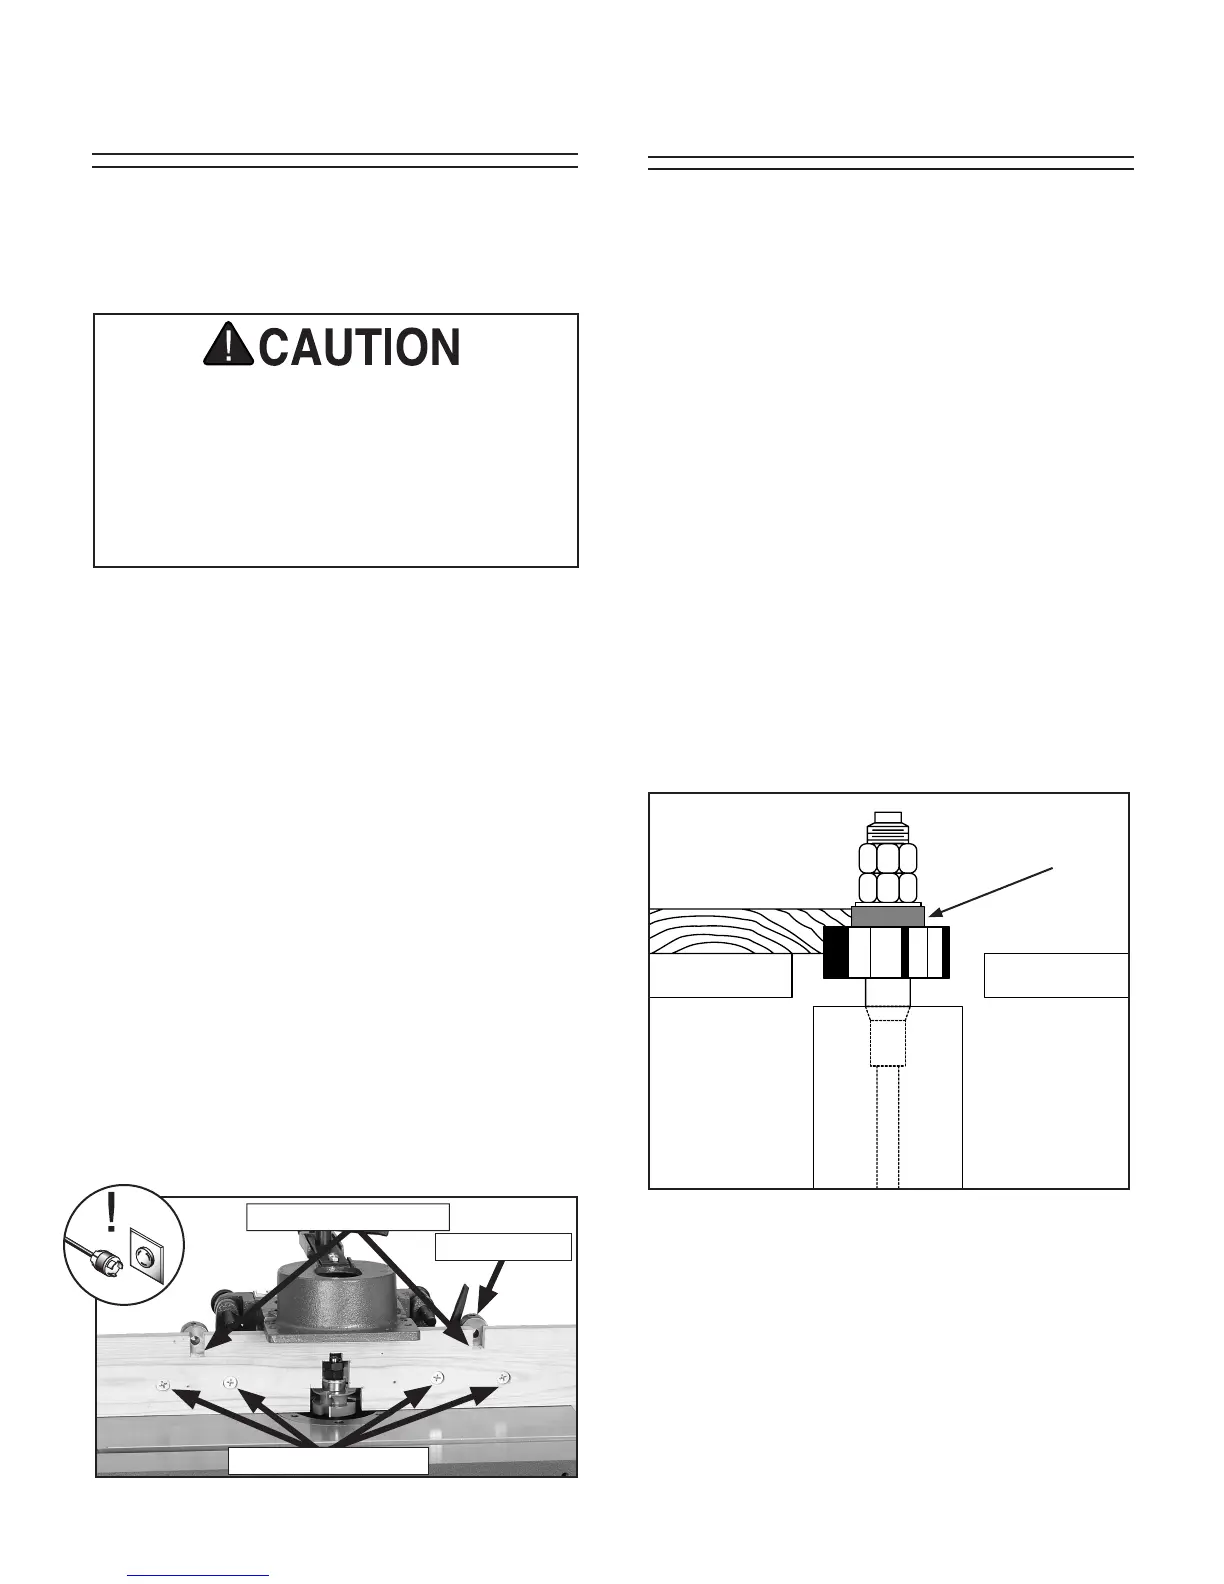
Figure 38. Rub collar installed above cutter.
2. Rub collar below the cutter: When the rub
collar is used below the cutter (See Figure
39), the progress of the cut can be observed.
However, any unintentional movement may
lift the workpiece into the cutter, damaging
your work and creating a dangerous situa
-
tion. We DO NOT recommend this setup.
Rub Collars
Rub collars are used when shaping curved or
irregular workpieces, such as arched doors or
round table tops, and to limit the depth of your
cut.
There are two types of rub collars—solid and
ball-bearing. We recommend using ball bearing
collars and we carry an extensive line that is
designed for use with Grizzly shapers. See our
current catalog or website for listings.
Rub collars may be used in any of the follow
-
ing positions:
1. Rub collar above the cutter (preferred):
When the rub collar is used above the cut
-
ter, the cut cannot be seen. See Figure
38.
This offers some advantage: the stock is
not affected by slight variations in thickness
and accidental lifting will not damage the
workpiece. If lifting occurs, simply correct the
mistake by repeating the operation.
Rub Collar
Shaping Small Stock
Shaping small stock is inherently dangerous on
a shaper. Consider making a zero-clearance
fence
(Figure 37) to provide more support than a
standard fence and reduce tearout on narrow or
fragile stock.
Figure 37. Example of a zero clearance fence.
Always use hold downs or featherboards
when shaping small or narrow stock. These
devices will keep your hands away from the
spinning cutterhead and support the stock
sufficiently to allow a safe and effective cut.
Failure to follow this warning may lead to
severe personal injury.
Fence Mount
Holes for Fasteners
Hold Down Notches
To make a zero-clearance fence:
1. DISCONNECT SHAPER FROM POWER
SOURCE!
2. Remove the wood facing and fasteners on
the split fence.
3. Place a 1 x 4 over the fence mounts and mark
and drill four holes for securing the board to
the mounts.
4. Transpose an outline of the spindle, cutter,
and its components onto the board, leaving
room for the moving parts so they will not hit
the board.
5. Using a bandsaw, cut out the outline.
6. Cut out notches in the top of the board for
attaching hold downs, as shown in
Figure
37 and secure it to the fence mounts with the
fasteners removed in Step 1
.
 Loading...