Chapter 3: Installation
Installing the Flighting Shield
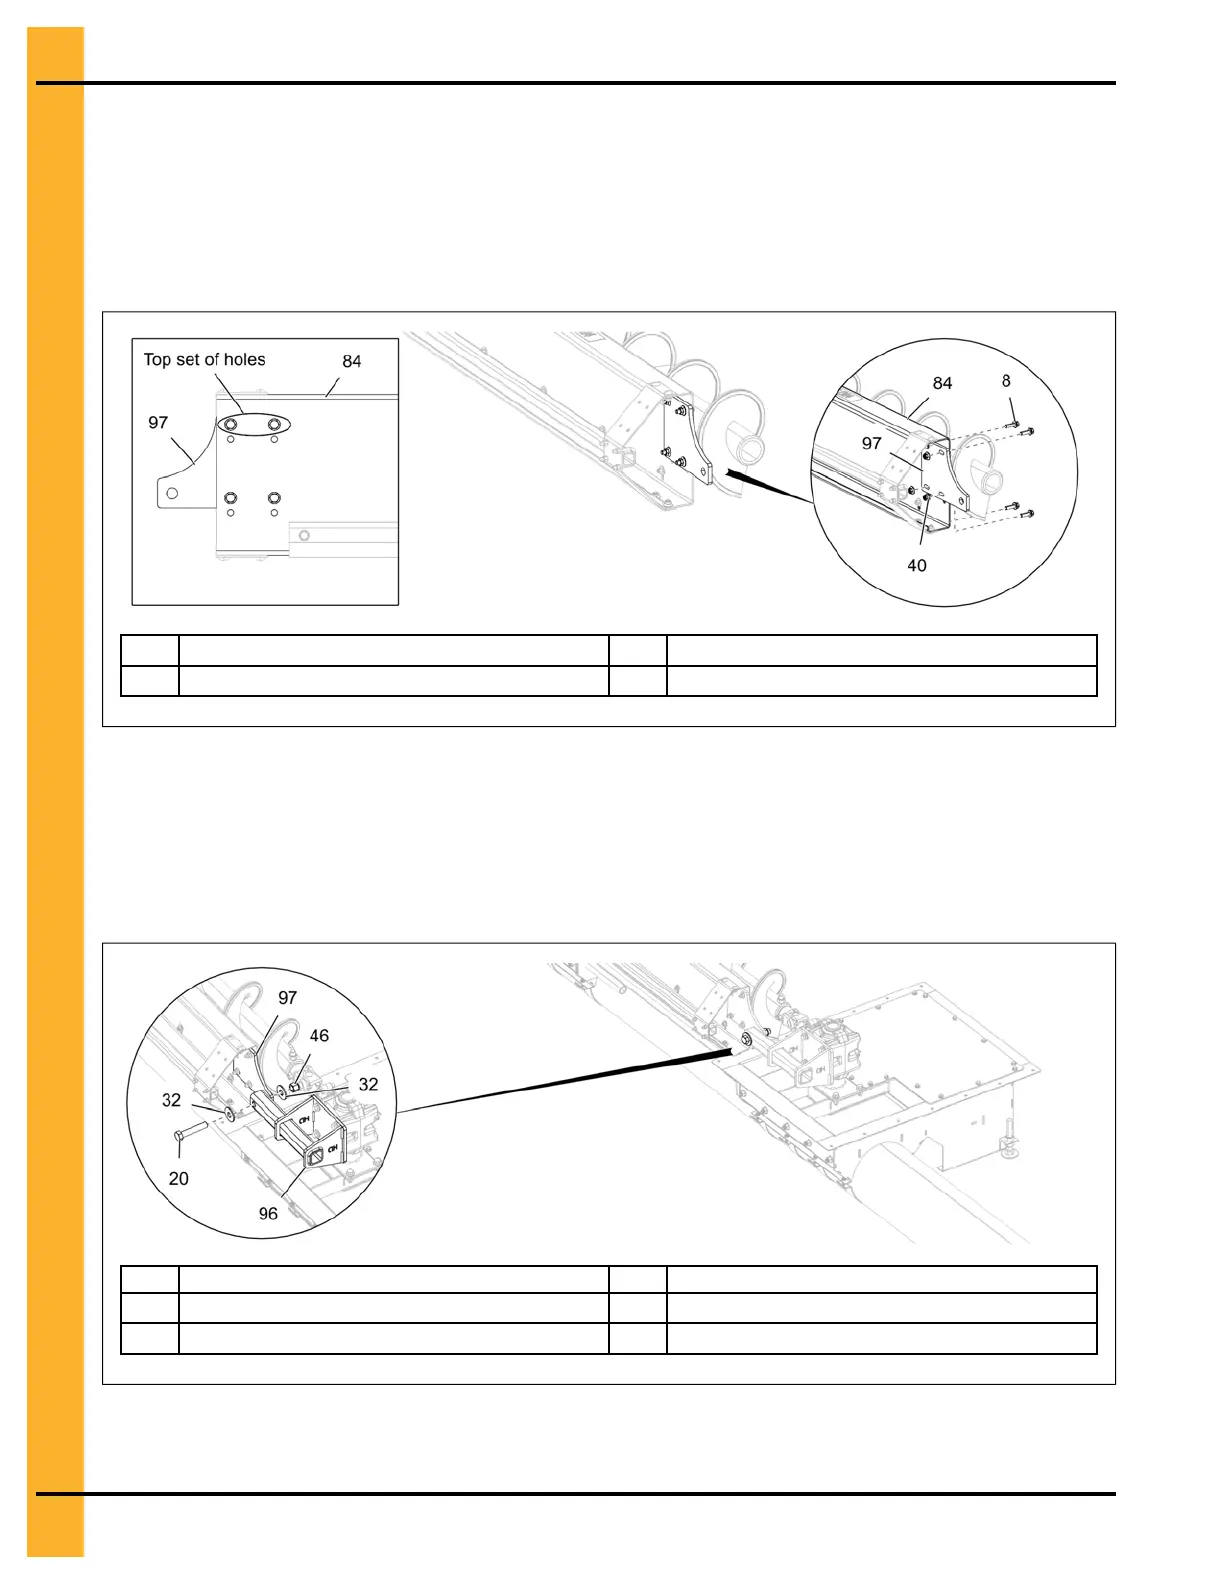
1. Assemble the shield pivot bracket (97) to the flighting shield assembly (84) using four 3/8" x 1-1/4"
flange bolts (8) and 3/8" flange nuts (40).
NOTE: Use the top set of holes in the flighting shield assembly (84). Do not tighten the flange bolts
(8).
Figure 3-27 Assembling the flighting shield to shield pivot bracket
8
3/8" x 1-1/4" flange bolt
84 Flighting shield assembly
40 3/8" flange nut 97 Shield pivot bracket
2. Attach the shield pivot bracket (97) to the pivot bracket (96) using a 3/4" x 4" HHCS bolt (20), two
3/4" flat washers (32) and a 3/4" nylock nut (46).
NOTE: Do not tighten the HHCS bolt (18) and nut (40). It should be snug-tighten to pivot freely.
There should only be 1-2 threads visible on the HHCS bolt (20) after nut (46) is snug-
tightened.
Figure 3-28 Installing the flighting shield pivot bracket assembly to pivot bracket
20 3/4" x 4" HHCS bolt 96 Pivot bracket
32
3/4" flat washer
97
Shield pivot bracket
46 3/4" nylock nut
NOTE: Pick up at pivot bolt location PRIOR to tightening the four gearbox bolts and four backshield
bolts. This will help raise the sweep arm for additional floor clearance.
36
PNEG-2308 Chain Loop Power Sweep