10
9
8
7
6
5
4
3
2
1
Appendix
Reference
Guides
Alarms and
Emergencies
Patient
Management
Surgical
Implant and
Explant
Monitor
Peripherals
and
Accessories
HVAD
®
Pump Overview
Introduction
116 HVAD® Instructions for Use
6.4 Surgical Implant Procedure (continued)
Pump Implantation Preparation
1. Make a standard median sternotomy incision.
2. Open the pericardium to expose and access the left ventricle (LV) apex.
3. Consider a transesophageal echocardiography (TEE) prior to placing the patient on
cardiopulmonary bypass to assess for a patent foramen ovale (PFO). If present, correct the
defect prior to HVAD
®
Pump implantation.
4.
2
when appropriate to reduce residual intracardiac air
during surgery.
Left Ventricle (LV) Apex Cannulation
1. Elevate the LV apex.
2. Select the insertion site for the HVAD
®
septum. Evaluate where the HVAD
®
Pump will sit when implanted. If it appears it will directly
contact adjacent rigid structures, such as the chest wall, consider placing the pump on the
diaphragmatic surface, opening the left pleural space, or wrapping it in a sheet of PTFE.
CAUTION:
to the interventricular septum to optimize HVAD
®
Pump operation.
3. Attach the sewing ring to the myocardium using 8-12 pledgeted, double-armed polypropylene
sutures. Use felt strips or a felt ring for reinforcement if necessary.
CAUTION: ALWAYS position the sewing ring to permit access to its screw after cannulation.
4. Perform a full-thickness cruciate incision inside the sewing ring using an 11-blade scalpel.
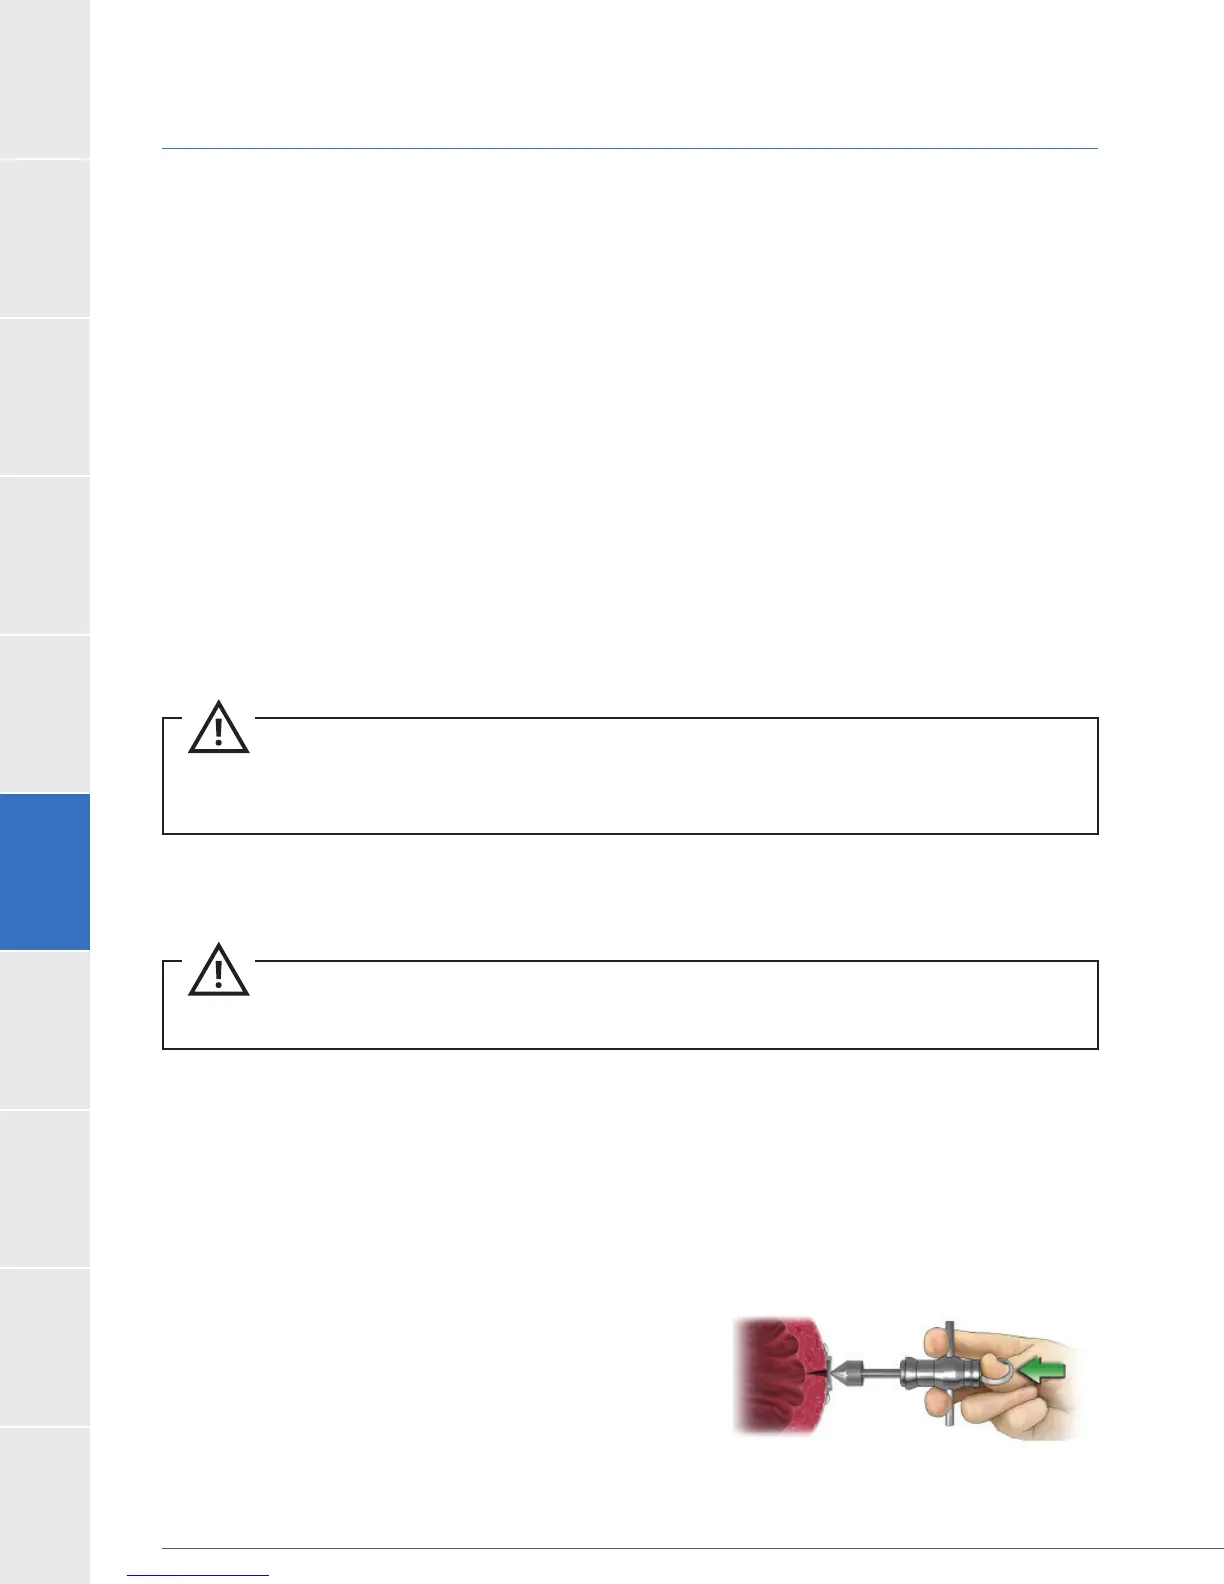
5. Using the apical coring tool (Figure 105), create and remove the apical core. To use the
apical coring tool:
the ring forward with your thumb, extending the cutting head.
myocardium. Release tension.
to rotate the cutting head as it retracts.
Figure 105: Apical coring tool