117Surgical Implant and Explant of the HVAD® Pump
10
9
8
7
6
5
4
3
2
1
Appendix
Reference
Guides
Alarms and
Emergencies
Patient
Management
Surgical
Implant and
Explant
Monitor
Peripherals
and
Accessories
HVAD
®
PumpOverviewIntroduction
6.4 Surgical Implant Procedure (continued)
Left Ventricle (LV) Apex Cannulation (continued)
NOTE:
sewing ring. If tight, loosen the screw on the sewing ring to prevent damaging of the O-ring during
pump insertion (Figure 106).
6. Perform a visual inspection of the left ventricle and remove any thrombus or potential
7. Place a clamp on the HVAD
®
8.
®
®
Pump
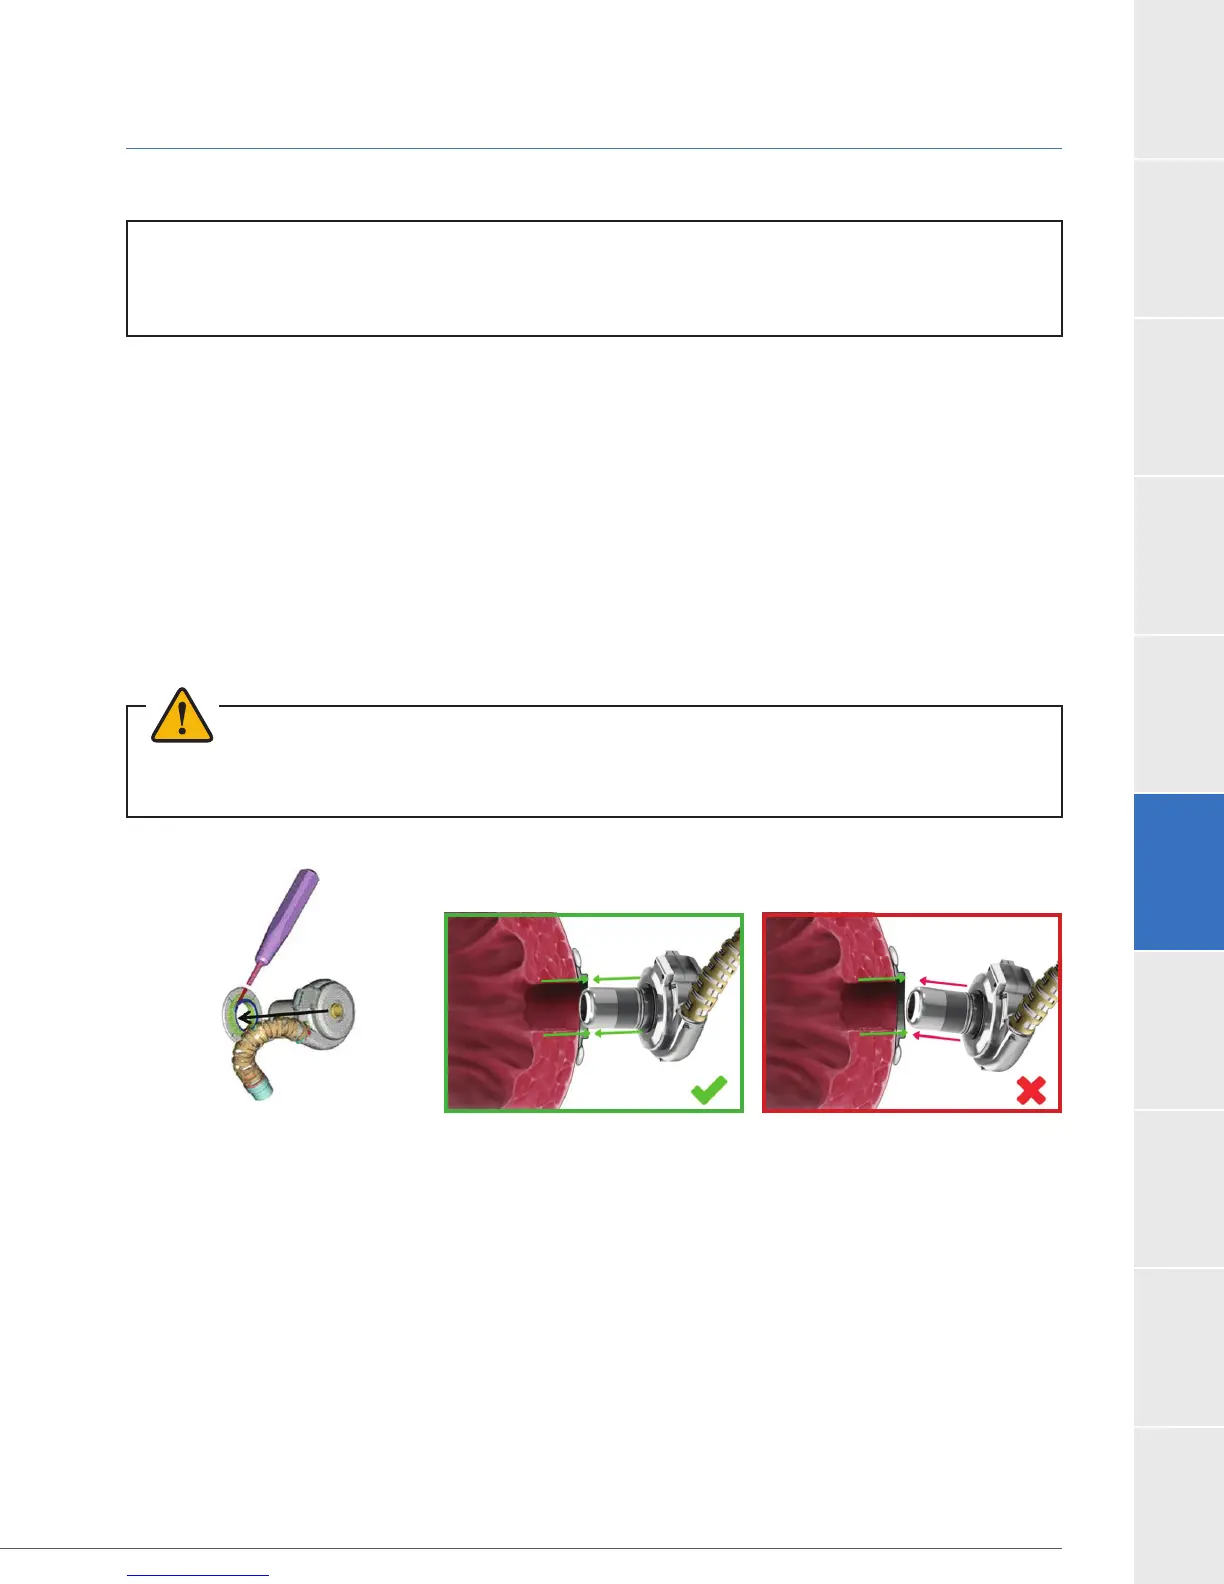
9. Insert the HVAD
®
to the sewing ring (Figure 107 and 108)
10. Ensure that the HVAD
®
11. Use the sewing ring wrench to tighten the sewing ring’s screw around the HVAD
®
conduit (tighten the screw until an audible “click” is heard).
WARNING!
12. Verify no blood or air leakage around the sewing ring. Add reinforced pledgeted sutures as
needed. If bleeding or an air leak is observed:
a. loosen the sewing ring screw,
b. remove the HVAD
®
Pump,
c.
Replace the HVAD
®
Pump if the O-ring is damaged.
13. Add reinforced pledgeted sutures as needed.
Pump Insertion into the left ventricle
Figure 107: Correct Figure 108: IncorrectFigure 106: Sewing ring wrench