2-4
Disassembly of External Parts
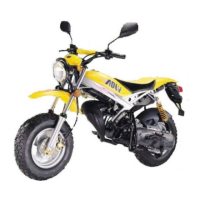
Remove the external parts for checking and adjustment
Read cover
* Open the seat.
* Remove the 2 hex-nuts, 1 bolt to
remove the luggage rack.
* Remove 10 self-tapping screws and 2
round-headed bolts..
* Remove the central and body cover
* Install with reverse sequence.
ATTENTION:
- Please do keep away the unit of the
body and the pedal from damages.
- Before tightening the screws, be
sure of correct matching of all units.
Cowling
* Remove 4 tapping screws and 2
round-head bolts.
* Separate the joint of inner parts and
remove the cowling.
* Install with reverse sequence.
Front Cover
* Remove 4 tapping screws and 3 hex-
nuts.
* Separate the joint of inner parts and
remove the cowling.
* Install with reverse sequence.
ATTENTION:
- Be sure of not damaging the front
pane land the front inner union (the
convex and concave portions).
- While tightening the screws, be sure
of the matching with the luggage
case.
Floor panel
* Remove the L/R side cover and body
cover.
* Remove 4 hex bolts.
* Separate the front interior covering
joint (the claw and the groove) and
remove the pedal.
* Follow the sequence in reverse order
for assembly.
ATTENTION:
- After joining the pedal and the front
interior covering, mount it onto the
chassis.
Luggage case
* Open the luggage case cover.
* Remove 4 tapping screws and 1nut,
separate the join with the chassis (the
concave and the convex) and remove
the front cover.
* Remove the main switch cap.
* Follow the sequence in reverse order
for assembly.
ATTENTION:
- Be sure the joint of front cover and
cowling jointing correctly before
tie-up the screws and nuts.
Tail light assembly
* Remove 2 hex bolts and rear fender
assembly.
* Remove the left and right body
covers.
* Remove 2 hex bolts and the tail light
assembly.
* Follow the mounting sequence in
reverse order.
ATTENTION:
- Match the rear guard holes and the
convex of the chassis.
Handle covering
* Remove the rear mirror
* Remove 3 tapping screws, separate
the joint from the handle rear cover
and remove the cover.
* Dismantle the speedometer cable
adapter.
* Remove the speedometer and head
light assembly.
* Dismantle the handle switch wiring.
* Follow the reverse sequence for ass’y
ATTENTION:
- Matching the joint of handle cover
with the head light case.
- Load the cables and wires
accordingly.
- After the assembly, check the
function of all switches.
Adjustment of the head light
* Adjustment of the beam of the head
light is by loosening the screw
underneath the head light
Chapter 2 Check and Adjust