AB4701en_SARev.: 05 / 11.2023
Installing the rotor with a
clamping nut
Inserting buckets
Removing the bucket
Personnel:
■ Trained user
The lid is open.
1. Clean the motor shaft (
2
) and rotor hole (
4
).
2. Lightly grease the motor shaft (
2
), see ⮫
Chapter 8.2 ‘Cleaning and
disinfection instructions’ on page 52
.
3. Place the rotor vertically on the motor shaft (
2
).
The driver (
3
) of the motor shaft must be in the groove (
1
) of the
rotor. The orientation of the groove is marked on the rotor.
4. Hand-tighten the rotor clamping nut using the supplied spanner.
5. Check that the rotor is rmly seated.
6.3
Inserting and removing buckets
NOTICE
Damage to the device due to imbalances caused by incor-
rect loading of the rotor.
− Load all swing-out rotor locations with the same
buckets.
Buckets marked with the number of the rotor location may
only be used there.
Buckets marked with a set number may only be used
together.
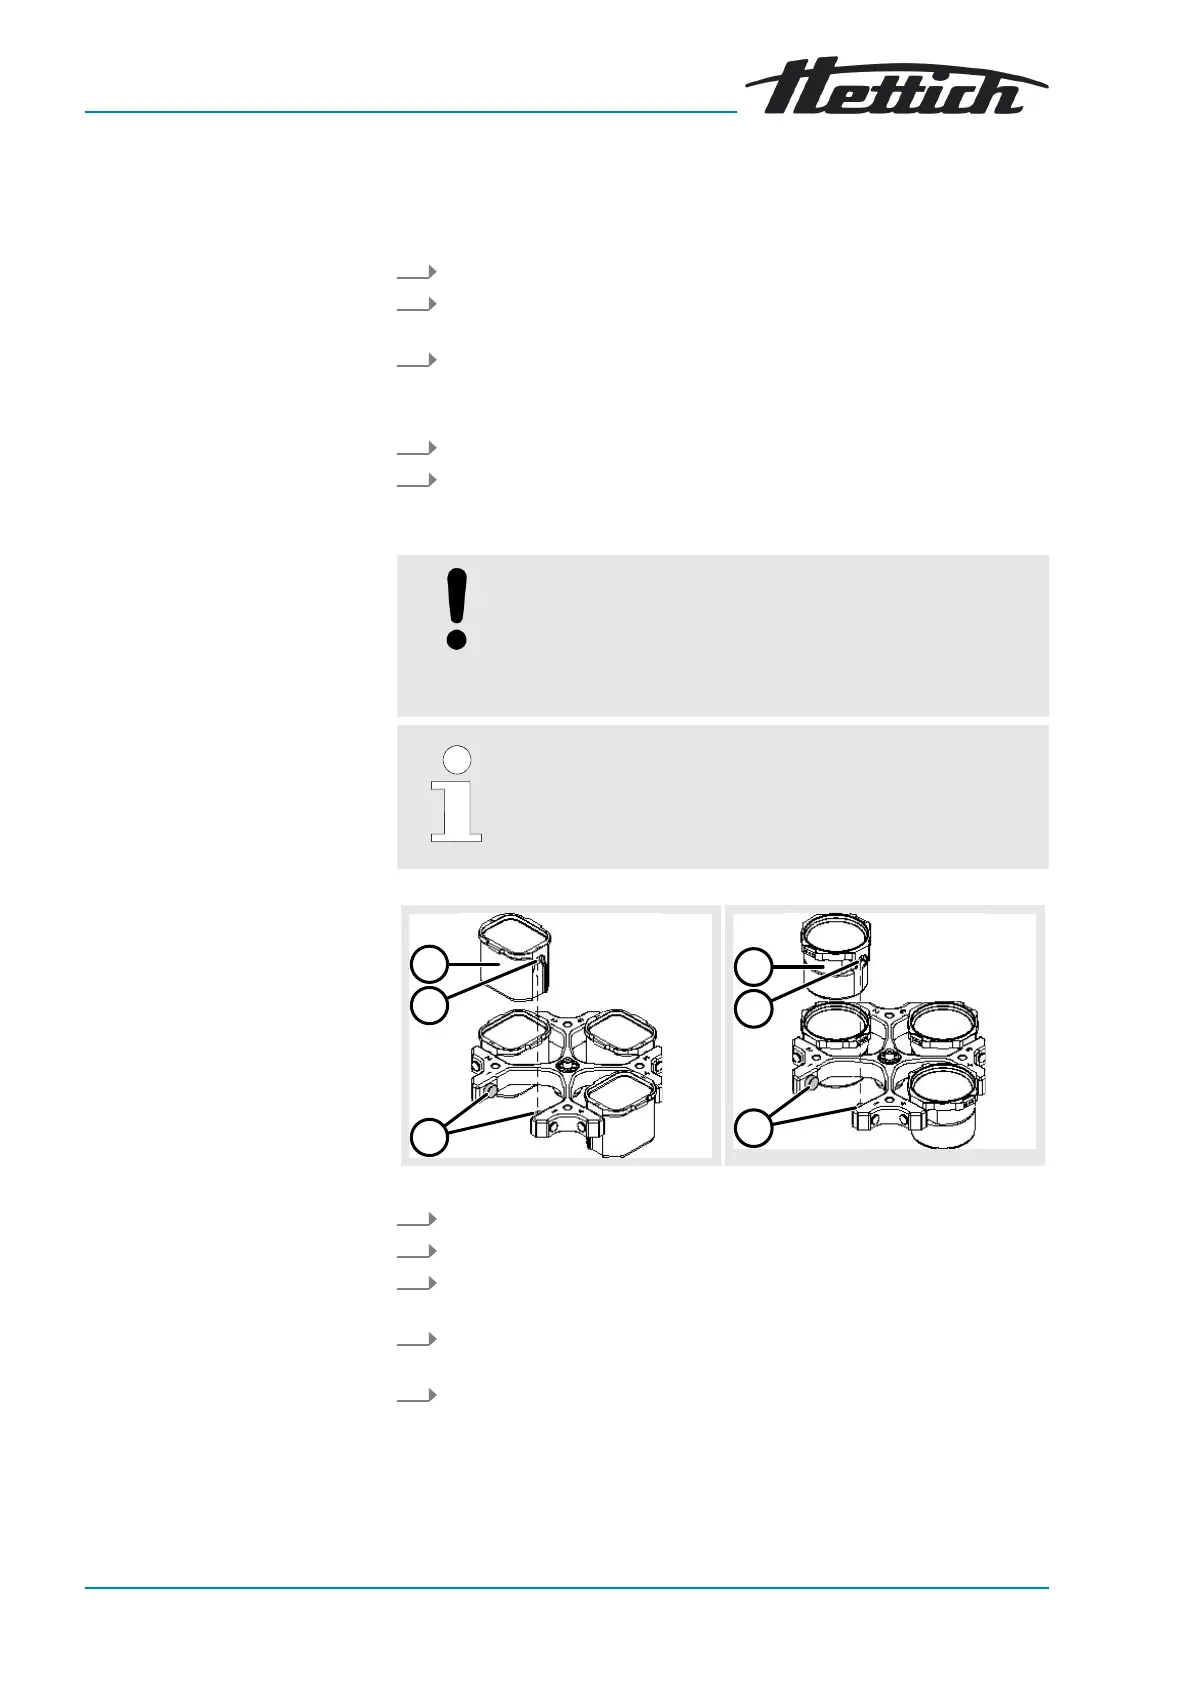
1. Check that the rotor is rmly seated.
2. Grease the trunnions (3).
3. Insert the bucket (1) into the rotor from above. The trunnions (3) must
be in the grooves (2).
4. Push the bucket (1) down as far as it will go.
Pull the bucket (1) vertically upwards out of the rotor.