7
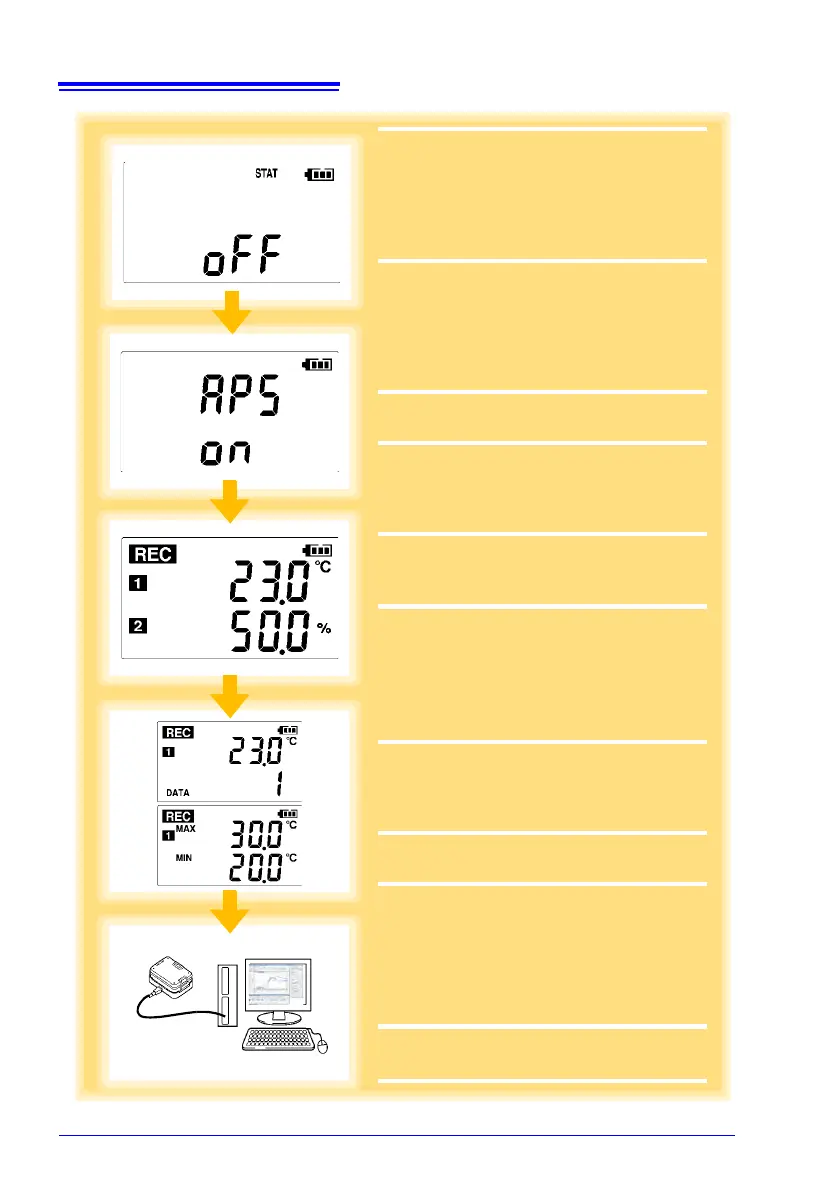
Set the recording mode to [OFF].
(This setting provides instantaneous mea-
surement.)
See:
"Recording Mode Setting" (p.31)
(The setting can be made also from the
LR5000 Utility Program.) (p.35)
8
Set the power save setting to [ON].
(The on (enabled) setting is recommended
for long-term recording.)
See:
"Power Save Setting" (p.31)
(The setting can be made also from the
LR5000 Utility Program.) (p.34)
9
Pre-measurement inspection (p.39)
10
Install the logger at the measurement
site in the warehouse.
See: "4.2" (p.40)
(It can be wall-mounted.)
11
Hold REC/STOP on the logger for two
seconds to start recording.
See: "4.3" (p.42)
12
Press (+) and (-) on the logger to confirm
that the recording count is incrementing,
and that recording data (maximum and
minimum values) are displayed.
(Confirm that recording is actually occurring.)
See:
"4.4" (p.45)
13
After a month, hold REC/STOP on the
logger again for two seconds to stop
recording.
See: "4.3" (p.42)
14
Retrieve the logger from the warehouse.
15
Import recorded data from the logger to
a connected computer. For analysis, dis-
play the data in a graph.
See: "4.5" (p.45)
ÅiThe data is automatically saved when
imported to the computer. By default, it is
also automatically displayed in a graph.)
16
Print recorded data as needed.
See: "4.8" (p.60)
8
11
7
15
12
 Loading...


