4.1 Zero Adjustment
47
4
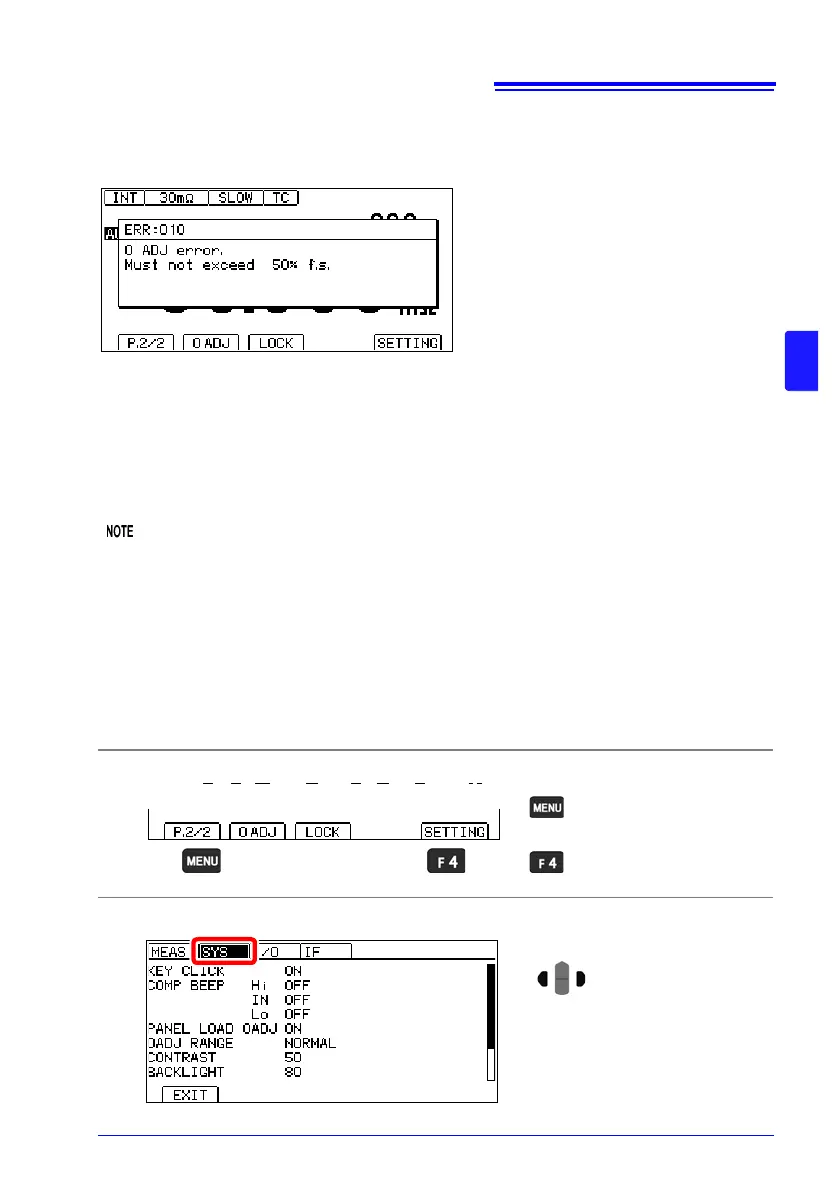
Zero Adjustment Faults
If zero adjustment fails, the following error message appears.
Before attempting zero adjustment again, confirm the following:
• Verify that the measured value is within each range (NORMAL: -3%f.s. to 50%f.s.,
TIGHT: -3%f.s. to 3%f.s.).
• When using measurement leads that you made, reduce the wiring resistance.
• Confirm that the measurement leads connections are correct.
See: "*2 Current Fault Detection Function" (p. 39)
• If zero-adjustment fails for auto-ranging, zero-adjustment will be canceled for all ranges.
• If zero-adjustment fails for a manually set range, zero-adjustment will be canceled for the
current range.
Changing the zero-adjustment range
Although the default setting of the zero-adjustment range is -3%f.s. to 50%f.s. (the warning
will be issued when the value is more than 3%f.s.), the zero-adjustment range can be
changed to the setting that a value exceeding 3%f.s. results in an error without issuing any
warning.
1
Open the Settings Screen.
2
Open the System Setting Screen.
The Settings screen
appears.
Switch the function menu
to P.2/2.
1
2
Move the cursor to the [SYS]
tab with the left and right cur-
sor keys.