Do you have a question about the Hioki RM3544-01 and is the answer not in the manual?
Check all included items and ensure no damage occurred during shipping.
Explains symbols used in the manual and on the instrument to indicate hazards and important information.
Verify the instrument is undamaged and all connections are safe before first use.
Details on where and how to install the instrument to ensure proper operation and safety.
Precautions for safe operation, transport, and avoiding damage to the instrument.
Steps and precautions for safely connecting the instrument's power cord to the mains outlet.
Specific precautions to avoid damaging the instrument or sensor when connecting the temperature sensor.
Safety precautions and connection guidelines for the EXT I/O connector.
Critical precautions to take before initiating a measurement to prevent electric shock or instrument damage.
Introduces the RM3544/RM3544-01 resistance meter and its key specifications and features.
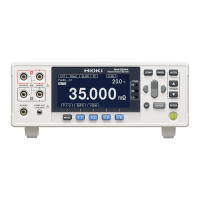
Identifies and explains the functions of the components on the instrument's front panel.
Identifies and explains the functions of the components on the instrument's front panel.
Identifies and explains the functions of the connectors and switches on the instrument's rear panel.
Step-by-step guide to setting up and performing a measurement with the instrument.
Explains the instrument's screen layout, display information, and basic operational flow.
Detailed instructions for safely connecting the instrument to a power source.
Guide on how to properly connect measurement leads to the instrument terminals and test sample.
Instructions for connecting the temperature sensor for temperature correction function.
Procedures for powering the instrument on, off, and placing it into standby mode.
Essential checks to perform before the first use of the instrument to ensure safety and functionality.
How to select the appropriate measurement range, including manual and auto-ranging options.
Explains how to adjust the measurement speed (FAST, MED, SLOW) for optimal precision and stability.
Illustrates methods for connecting measurement leads to various types of test targets.
How to change the information displayed on the measurement screen, such as temperature or pre-calculation values.
How to change the information displayed on the measurement screen, such as temperature or pre-calculation values.
Explains how to identify and interpret measurement faults like over-range or connection errors.
Procedure for setting the instrument's zero point to compensate for residual resistance or thermal EMF.
How to use the averaging function to reduce measurement variations and improve stability.
Steps to enable and configure temperature correction for accurate resistance measurements at varying temperatures.
How to apply scaling to convert resistance values into other physical properties or apply offsets.
How to adjust the display resolution or number of digits shown for measured values.
How to set absolute upper and lower limits for pass/fail judgment of measured values.
How to set absolute upper and lower limits for pass/fail judgment of measured values.
How to set a reference value and tolerance for pass/fail judgment based on relative deviation.
Setting to delay the judgment until the measurement value stabilizes, improving accuracy.
How to configure audible beeps for different judgment results (Hi, IN, Lo).
Instructions for using an optional attachment to visually indicate judgment results.
Procedure for saving current instrument settings and parameters as a panel for quick recall.
How to load previously saved instrument settings (panels) to quickly configure measurements.
How to edit the names of saved measurement panels for better organization.
Procedure for removing saved measurement panels that are no longer needed.
How to lock or disable front panel keys to prevent unintended operations or unauthorized changes.
How to manually set the power line frequency (50 Hz or 60 Hz) for optimal measurement.
How to turn the key press beep sound on or off for user preference.
How to adjust the screen contrast for better visibility under different ambient conditions.
How to adjust the screen backlight brightness for readability.
Procedures for resetting the instrument to factory default settings for measurement or system configurations.
A table listing the default settings for various instrument functions and screens.
How to configure the EXT I/O for NPN or PNP output compatibility with external devices.
How to configure the EXT I/O for NPN or PNP output compatibility with external devices.
Detailed information on the EXT I/O connector pin assignments and signal functions.
Explains the function and behavior of individual input and output signals for EXT I/O.
How to select output modes for EXT I/O signals (judgment results or BCD data).
Visual representation of signal timings for external control operations like triggers and outputs.
Technical specifications for the instrument's input/output signals, power, and isolation.
Technical specifications for the instrument's input/output signals, power, and isolation.
Practical wiring diagrams illustrating various input and output circuit connection scenarios.
Configuration options for external I/O functions, including trigger sources and output modes.
How to configure the instrument to start measurements using internal or external triggers.
How to set the trigger signal logic (ON edge or OFF edge) for external control.
Using a filter function to prevent false triggers or prints caused by noisy signals.
How to configure the EOM signal output mode (hold or pulse) for measurement completion notification.
How to select between JUDGE mode or BCD mode for outputting measurement results via EXT I/O.
Procedure to test the instrument's external I/O signals and verify controller communication.
Procedure to test the instrument's external I/O signals and verify controller communication.
Instructions for assembling the EXT I/O connector and shell.
Technical specifications for USB and RS-232C communication interfaces.
Technical specifications for USB and RS-232C communication interfaces.
Steps for connecting and configuring the instrument for USB communication.
Steps for connecting and configuring the instrument for USB communication.
Instructions for installing the necessary USB driver for computer connection.
Steps for connecting and configuring the instrument for RS-232C serial communication.
How to control the instrument remotely using commands and retrieve data.
Explanation of how the instrument operates in remote control mode versus local (front panel) control.
How to use the built-in monitor to view commands sent and received for debugging.
How to automatically send measured data to a computer upon completion of measurement.
Instructions for physically connecting an RS-232C printer to the instrument.
How to configure the instrument's communication settings to work with a printer.
How to print the results of measurements and comparator judgments.
How to print the results of measurements and comparator judgments.
How to print the current configuration of the instrument's settings.
How to adjust the print output format to use one or three columns per row.
How to enable automatic printing of measured values at a set time interval.
Lists the available resistance measurement ranges supported by the instrument.
Lists the available resistance measurement ranges supported by the instrument.
Describes the measurement technique used by the instrument, such as four-terminal.
Defines terms like f.s., rdg., and dgt. and explains how measurement tolerances are specified.
Lists and briefly describes the various functions and features of the instrument.
Overview of supported communication interfaces (RS-232C, USB, Printer).
Specifications for the instrument's LCD display.
Lists the front panel keys and their primary functions.
Details on how to lock or unlock the instrument's front panel keys.
Overview of supported communication interfaces (RS-232C, USB, Printer).
Details on remote control, data output, and communications monitor functions.
Details on remote control, data output, and communications monitor functions.
How to configure the instrument's trigger source for measurement initiation.
Lists the items included with the instrument.
Information on calibration conditions and the equipment required for maintaining accuracy.
Common problems and their solutions, including Q&A for general operational issues.
Common problems and their solutions, including Q&A for general operational issues.
Troubleshooting specific problems related to measurement results, such as instability or faults.
Troubleshooting common problems encountered when using the External I/O interface.
Troubleshooting problems related to USB, RS-232C, or printer communication.
Troubleshooting common issues when printing data from the instrument.
Explains instrument error codes and provides solutions for resolving them.
Step-by-step instructions for safely replacing the instrument's protective fuse.
Information on instrument inspection, replaceable parts, and operating lifetimes.
Environmental and power requirements for performing instrument calibration.
Lists the recommended equipment needed for instrument calibration.
Specifies the resistance and temperature points used during calibration.
Illustrates the proper connection methods for calibration using various equipment.
| Brand | Hioki |
|---|---|
| Model | RM3544-01 |
| Category | Measuring Instruments |
| Language | English |