E
Emily EscobarSep 9, 2025
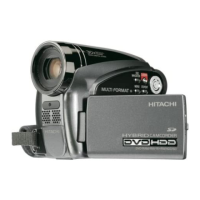
What to do if my Hitachi DZ-GX5080A Camcorder says 'Write protected. Check card'?
- JJames JonesSep 10, 2025
If your Hitachi Camcorder displays 'Write protected. Check card', it means the SD memory card's erasure prevention switch is locked. Unlock the erasure prevention switch on the SD memory card.