3-5
- In the case where the EZJ124 board is replaced in a state allowing NO backup, follow the
procedure below.
[ Replacement procedure of EZJ124 board in a state allowing NO back up]
(1) Turn off the power.
(2) Replace the EZJ124 board.(Do not replace the EZJ93 board simultaneously.)
(3) Before turning on the power, insert the system data memory card into the slot of
EZJ124 board.
(4) Turn on the power. (With the system data memory card inserted)
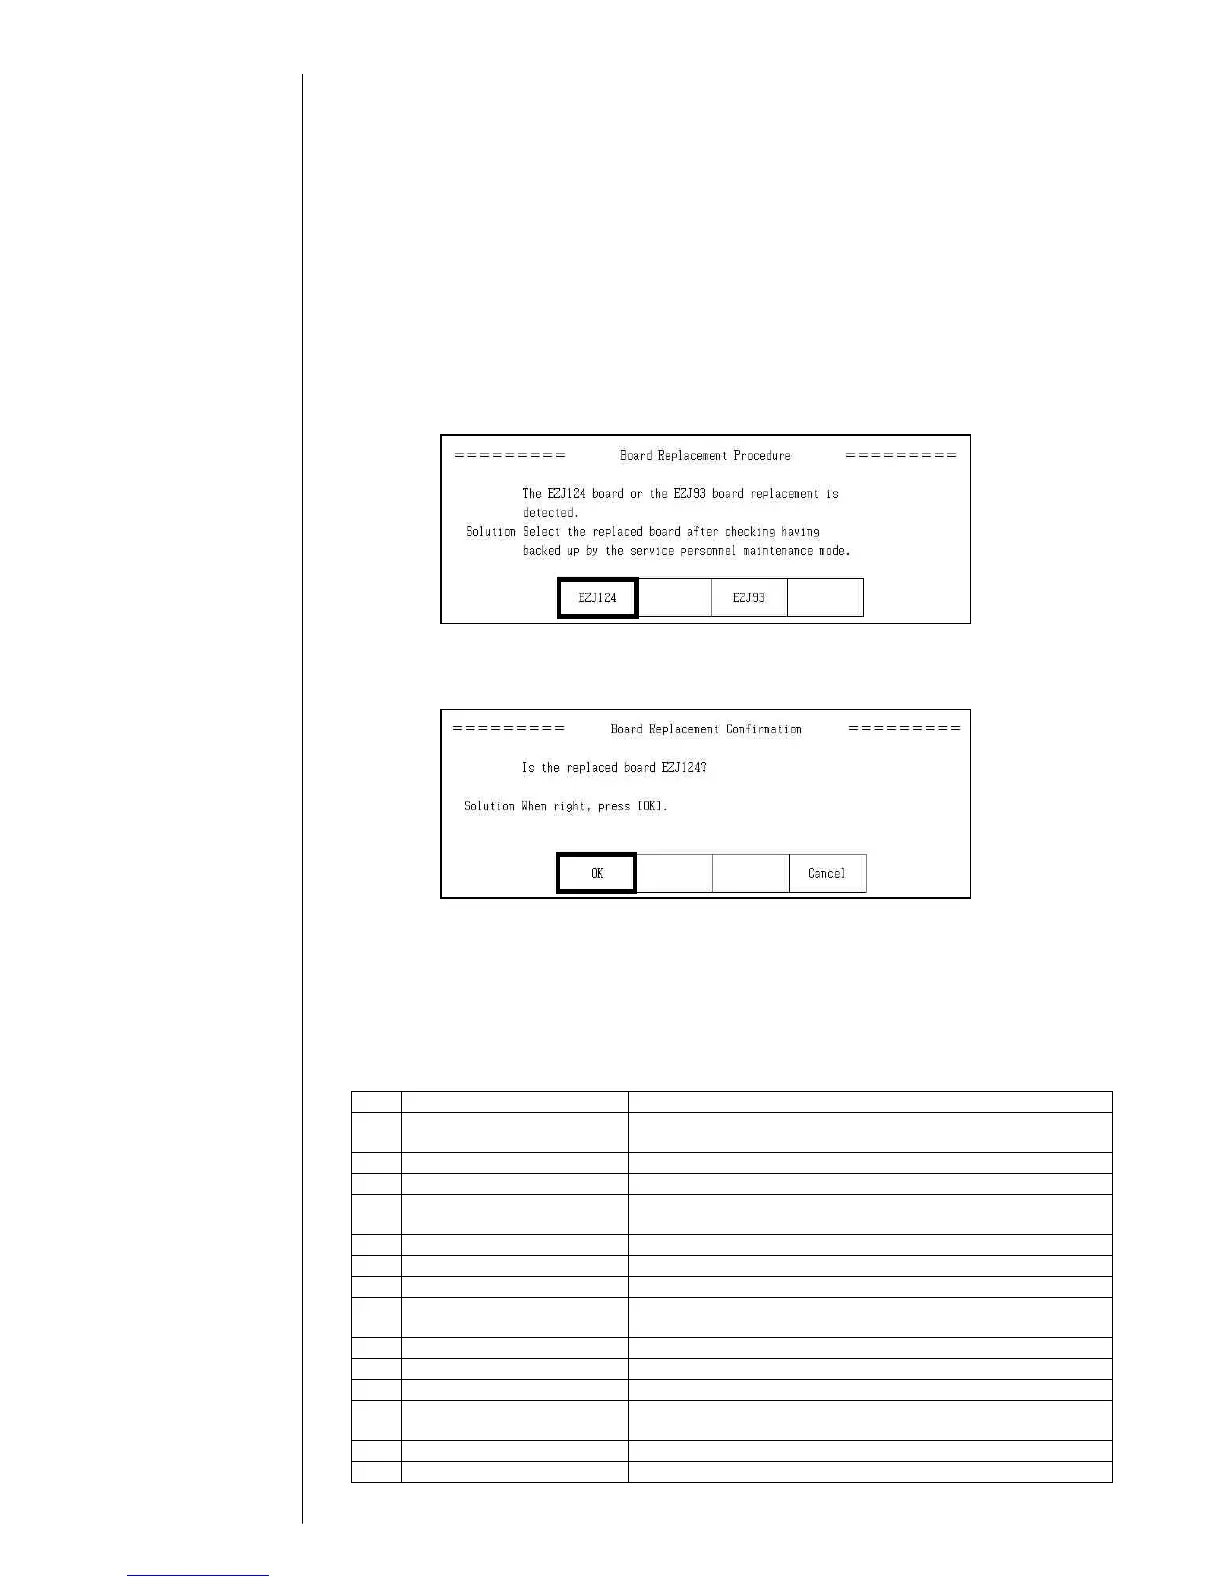
(5) It is displayed, "Wait for a minute", and progresses the indicator bar.
When the specific data stored on EZJ124 board are different from the data stored
on the EZJ93 board, following message screen “Board Replacement Procedure” is
displayed.
Select “EZJ124” on the message. (When the specific data stored on EZJ124
board and on EZJ93 board are same, this message is not displayed.)
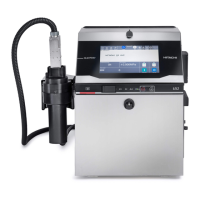
(6) After pressing the replaced board button, following confirmation message will be
displayed. Check the message and press the button. After pressing the “Board
Replacement Confirmation“ button, the indicator bar progresses again.
The initialization of the board ends with step (5) and (6).
(7) When the initialization of the board ends, the print description screen is displayed.
(8) Execute “Select language” on the auxiliary function screen.
(Refer to “2.12 Language registration”)
(9) Execute “System reset” on the second page of the service maintenance screen.
(10) Perform setup and/or adjustment according to the following table.
No. Item Reference manual
1 Calibrate touch screen
coordinates
Instruction manual
“5.4 Calibrating the Touch Screen coordinates"
2 Touch screen setup Instruction manual “4.7 Touch screen setup”
3 Excitation adjustment “2.3.1 Excitation adjustment”
4 Acquisition of auto phase
gain value
“2.3.4 Auto phase gain adjustment”
5 Viscometer adjustment “2.6 Calibration of viscometer”
6 Excitation voltage setting Instruction manual “7.13 Excitation Setting Adjustment”
7 Editing print data Instruction manual “3.Editing print data and printing”
8 Setting of substitution rules Instruction manual
“3.7 Printing with Date/Time Changed to other Characters”
9 Creating a User pattern Instruction manual “5.2 Creating a user pattern”
10 User environment setup Instruction manual “4.2 Setting the user environment”
11 Setting the Date and Time Instruction manual “4.3 Setting a Date and Time”
12 Setting Communication
environment
Instruction manual “6.2 Setting communication environment”
13 Setting the Password Instruction manual “4.4 Setting the password”
14 Setting the serial number “2.10 Unit information”