2-25
SERVICING
(2.1 Outdoor Unit)
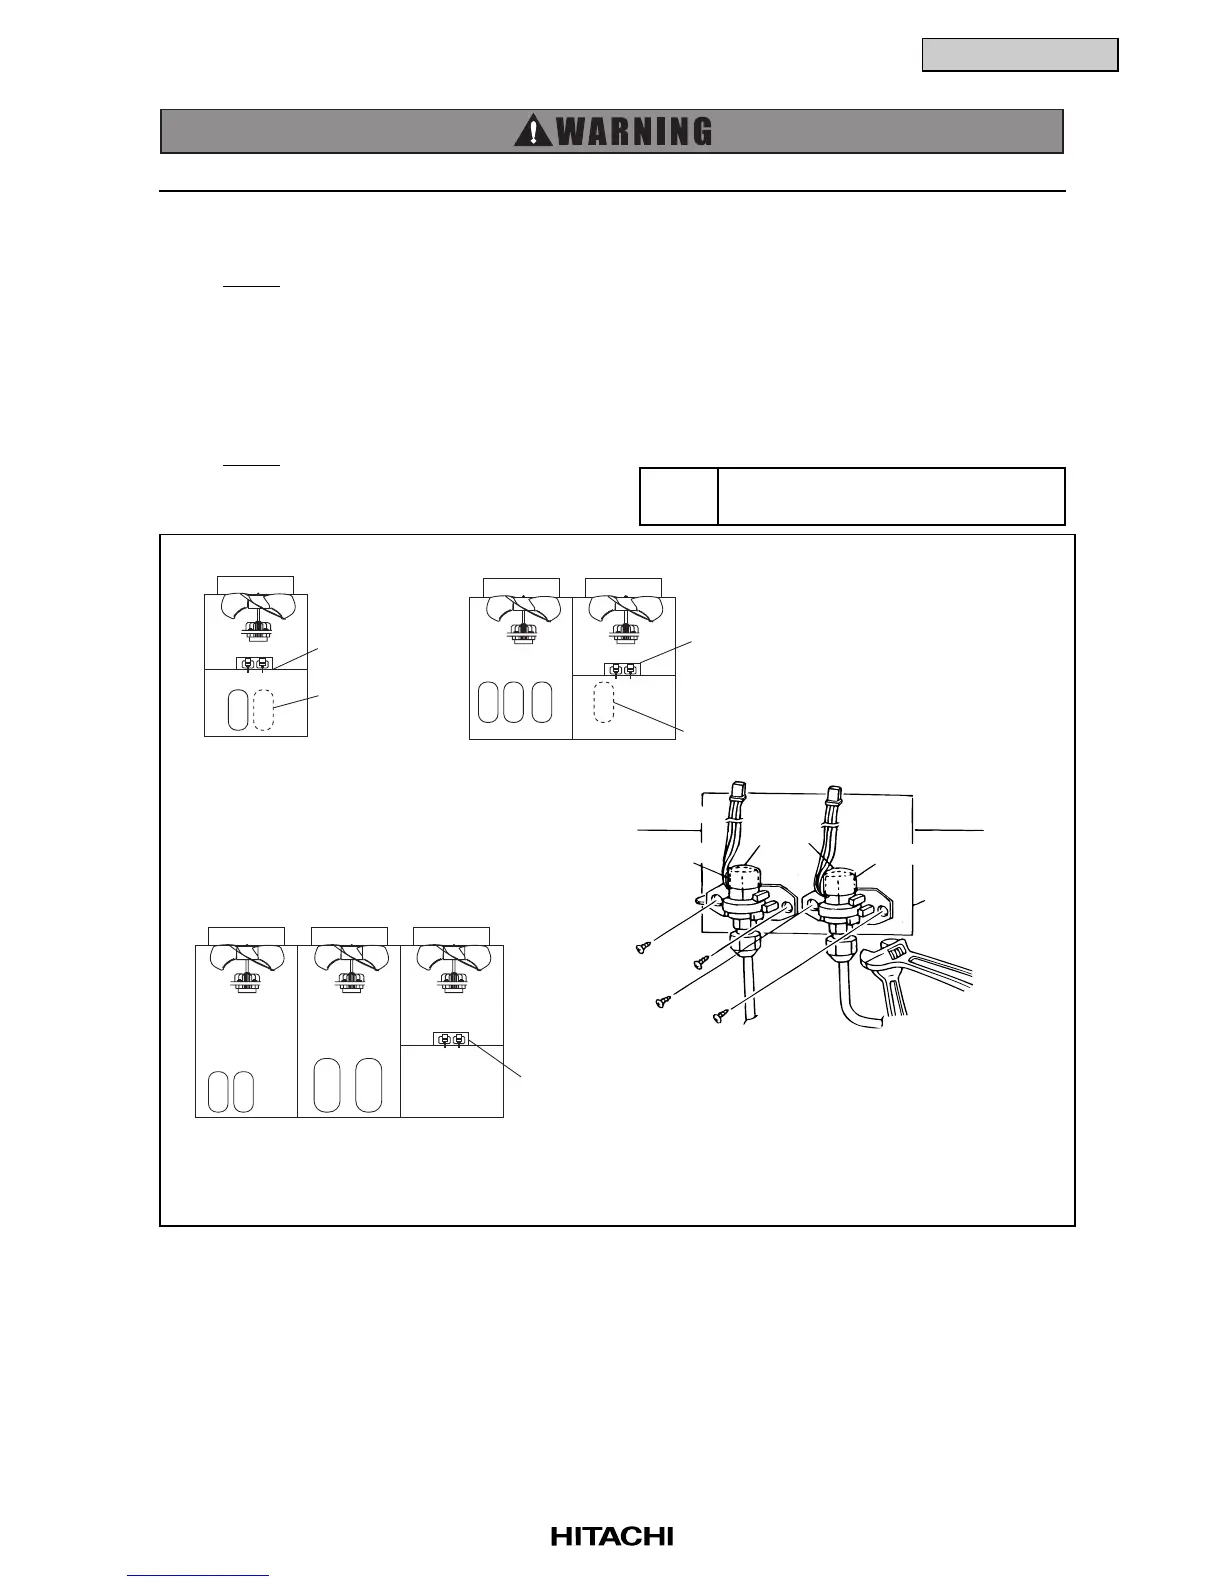
B. Removing High Pressure Sensor and Low Pressure Sensor
(1) Remove the water-proof caps.
NOTE:
The water-proof caps are used after replacing pressure sensors.
(2) Remove the pipe of the high pressure sensor or low pressure sensor using two spanners. Firstly,
remove the check joint at the main pipe side as shown figure in 2.1.9.
(3) Remove the connector for the pressure sensors.
(4) Remove the high pressure sensor or low pressure sensor after removing each two (2) fixing screws
for the pressure sensors.
NOTE:
Put the water-proof caps on the pressure
sensors again after replacing pressure sensors.
TURN OFF all power source switches.
Adjustable Wrench or Spanner,
Phillips Screwdriver
Tool
RAS-5FSG, 5FS3
8FSG, 8FS3
10FSG, 10FS3
RAS-8FXG, 8FX3
10FXG, 10FX3
RAS-16FSG, 16FS3
20FSG, 20FS3
RAS-24FSG1, 24FS5
30FSG1, 30FS5
Firstly remove the check joint
at the main pipe.
If the sensor side is removed,
refrigerant will be discharged.
Screw
Screw
Two Spanners
Mounting Plate for
Pressure Sensors
High Pressure Sensor
Water-proof
Cap
Electrical Box
Low Pressure Sensor
Position of
Pressure Sensors
Position of
Pressure Sensors
Position of
Pressure Sensors
8 and 10HP
Only
20HP Only
 Loading...