2-10
SERVICING
(2.1 Outdoor Unit)
2.1.6 Removing Compressors (RAS-8FSG, RAS-10FSG, RAS-16FSG, RAS-20FSG, RAS-8FS3,
RAS-10FS3, RAS-16FS3, RAS-20FS3, RAS-8FXG, RAS-10FXG, RAS-8FX3 and RAS-10FX3)
Do not expose the inner refrigeration cycle to the atmosphere for a long period of time when
replacing a compressor to protect the cycle from mixing water or foreign particles.
If exposed for a long time, seal pipe ends using caps or tape certainly.
Remove the caps for the compressor just before replacing the compressor.
Check to ensure each terminal No. when connecting compressor power wires.
If incorrectly connected, the compressor will fail due to reverse rotation.
Before starting this work, collect refrigerant into a cylinder from the cycle.
(1) Remove front service panel according to the item 2.1.2 “Removing Front Service Panel”.
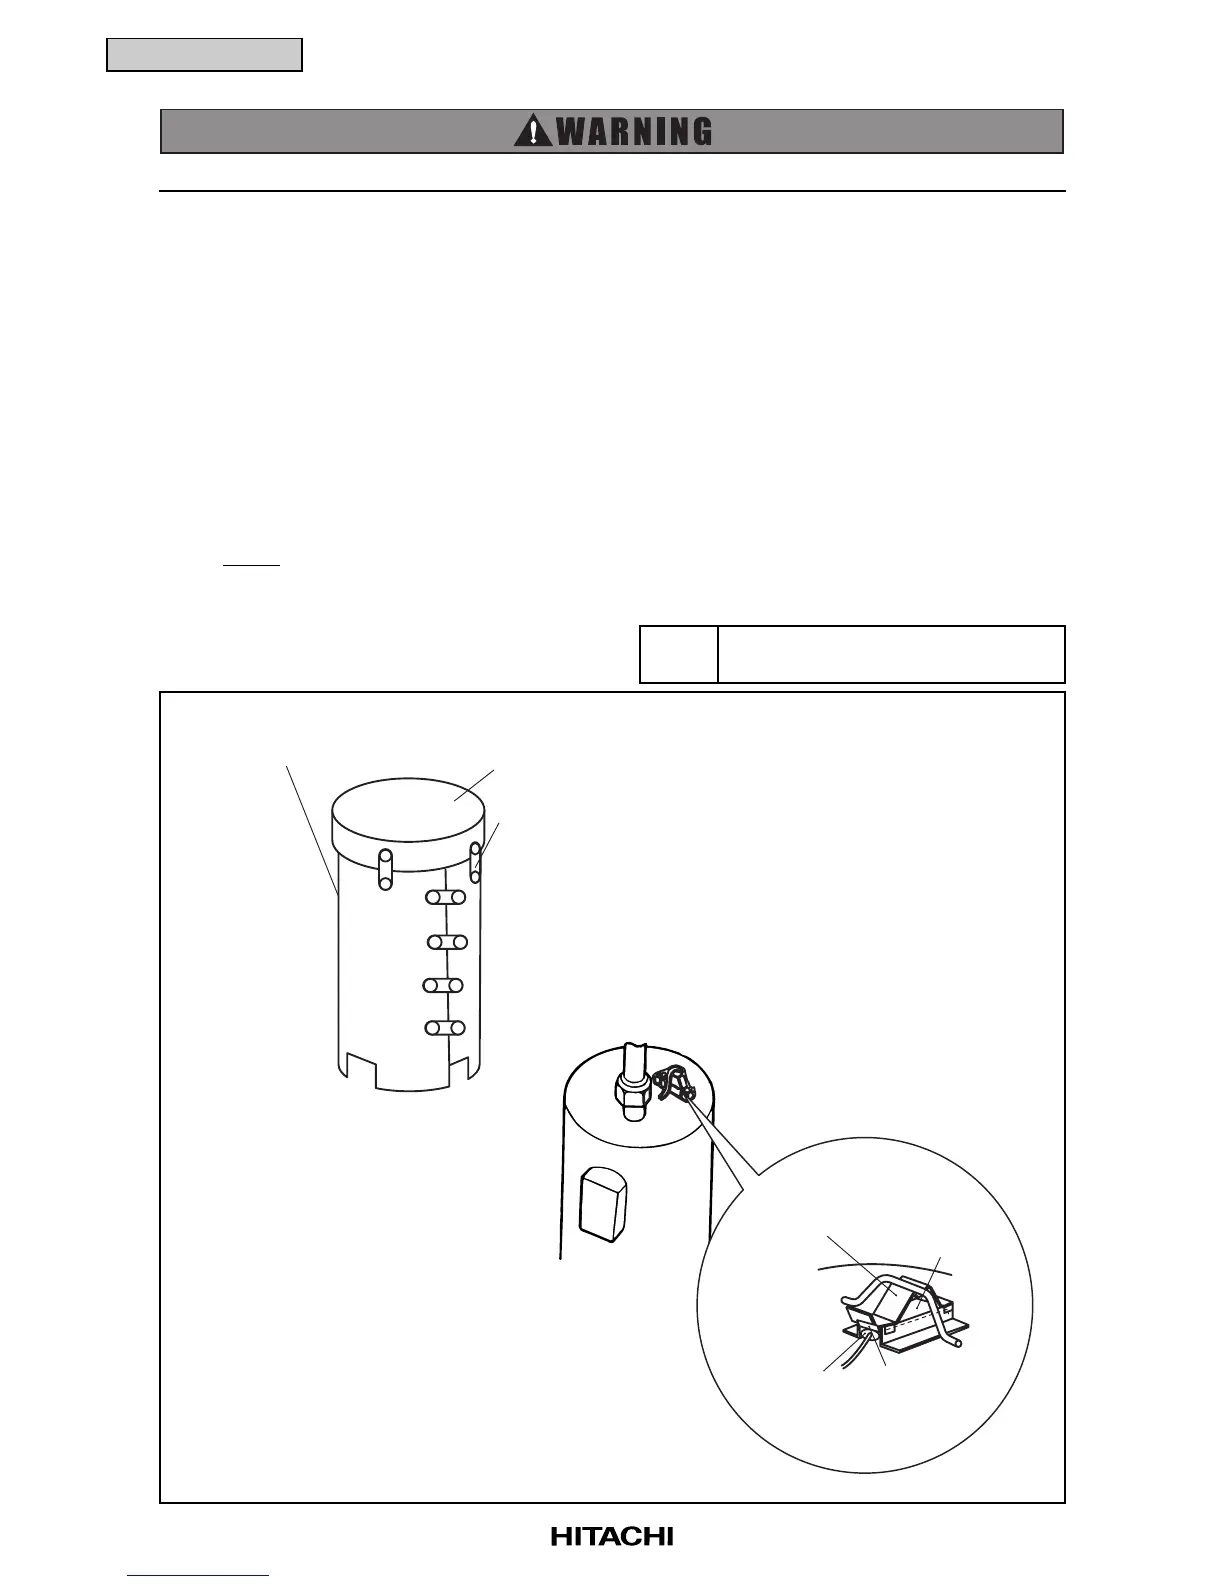
(2) Release the lace for top cap of the compressor and remove the top cap.
(3) Remove the Td thermistor on the top of the compressor.
NOTE:
The thermostat fixer, holder, thermostat holder are used again when reassembling.
Keep them in a box so that the parts are stored correctly.
TURN OFF all power source switches.
Phillips Screwdriver, Charge-Hose,
Adjustable Wrench or Spanner
Tool
Cap
Lace
Water-proof Cover
Thermostat
Holder
Holder
Td
Thermistor
Thermostat
Fixer
 Loading...