1/99 SMV 3000 Transmitter User’s Manual 105
9.4 Replacing Electronics Module or PROM, Continued
Procedure, continued
Table 28 Replacing Electronics Module or PROM, Continued
Step Action
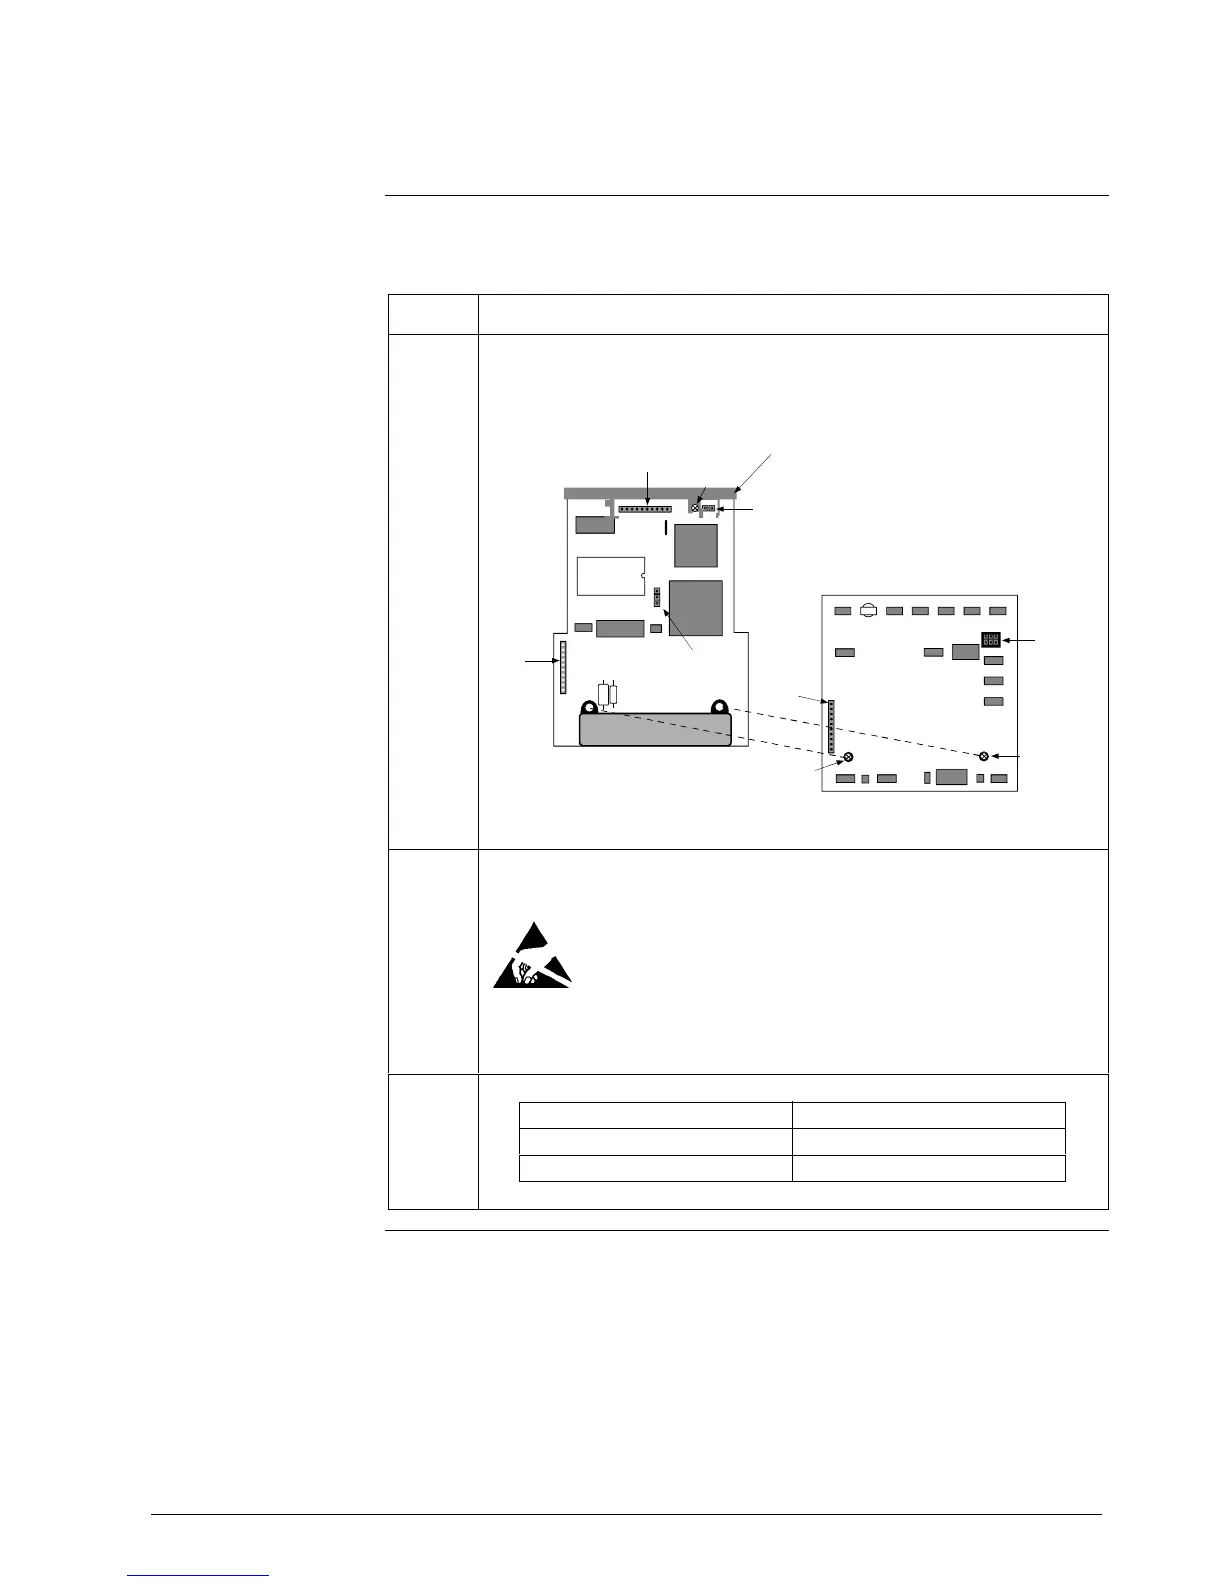
5
Remove two retaining screws and carefully pull Daughter PWA
straight up to unplug it from Main PWA.
Screw
Temperature
Input
Connector
Daughter PWA
Screw
PWA
Connector
PROM
Location
Flex Tape
Connector
Power
Connector
Write
Protect
Jumper
Screw
PWA
Connector
Main PWA
Plastic
Bracket
6
With component side of main PWA facing you, use an IC extraction
tool to remove plug-in PROM.
We recommend that you use a ground strap or ionizer
when handling the plug-in PROM, since electrostatic discharges can
cause PROM failures.
7
If you are replacing the… Then…
Electronics module go to Step 8
PROM go to Step 9
Continued on next page
 Loading...


