3
You cannot use the Modify Knob for editing the date.
Press
NNNNNNNNNNNNNN
Time
to set the time (you may have to press
NNNNNNNNNNNNNN
More
to get to this softkey).
You can type in the four numbers for the time directly from the numeric
keypad, or you can use the arrow keys and the numeric keypad to edit the time.
The time is changed when you press the
4
Enter
5
key.
The time is in the format hours:minutes.
You cannot use the Modify Knob for editing the time.
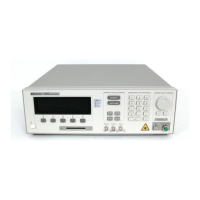
Performing a Selftest
Press
NNNNNNNNNNNNNNNNNNNNNNN
SelfTst
to start the internal instrument self-test. The instrument
performs a full self-test, indicating after each test, the test that has just been
performed, and the result (
passed
or
failed
):
P1 Board indicates the test of the rst microprocessor board.
P2 Board indicates the test of the second microprocessor board.
Cal. Data is the test of the calibration data, which is stored in the
instrument.
HW-Interface tests the hardware interface.
ADC is the test of the analog to digital converter
.
Laser Board tests the laser driver board.
Motor 1 tests the rst of the two motors used to control the tuning of
the laser.
Motor 2 tests the second of the two motors used to control the tuning of
the laser.
Attenuator
Motor 3 tests the motor used to control the attenuation.
When the test is completed, the message
Selftest
.... ...
passed
is shown
on the display. If the instrument fails a selftest, the end of the test is signalled
by three short beeps and the message
Selftest
.... ...
failed
is displayed.
Even if the instrument fails the selftest, it will continue to operate as far as
possible.
Other Functions 3-5