1
If the Parameter Will Not Change
If, when you press
4
ENTER
5
after editing, the tunable laser source returns
immediately to the previous value for the parameter, then the value you tried to
enter is outside the calibrated range. Press
4
HELP
5
, and select the
Input Limits
help topic to see the calibrated range.
A Sample Session
There are two short tasks in this sample session. The rst is to measure the
power of a modulated signal at a single wavelength, and then a wavelength
characteristic at a xed power.
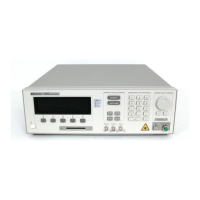
The sample session is written for an HP 8168E/F Tunable Laser Source
, and
an HP 8153A Lightwave Multimeter with an HP 81532A P
ower Sensor (It
is assumed that the power sensor is inserted in channel A). T
o perform the
sample session as described here, you also need a connector interface for the
multimeter (for example, an HP 81000AI), and a patchcord (if you are using
the HP 81000AI, then a Diamond HMS-10/HP/HRL to Diamond HMS-10/HP
patchcord, HP 81109AC).
These same procedures are repeated in \Example 3 - Measuring the Power of
a Modulated Signal" in Chapter 6 and \Example 4 - Measuring a Wavelength
Characteristic" in Chapter 6, where they are performed using the HP-IB.
Measuring the Power of a Modulated Signal
We want to measure the power of a 1540nm signal, modulated by a 100kHz
square wave, at 500
W.
1. Make sure that all your connectors and connector interfaces are clean.
2. Make sure that the Optical Output on the laser source is not Active.
3. Connect the output of the laser source to the input of the power sensor (as
shown in the gure below). Make sure that the connector with the orange
strain-relief sleeve is connected to the tunable laser source (the orange
sleeve indicates an angled connector).
1-8 Getting Started