1
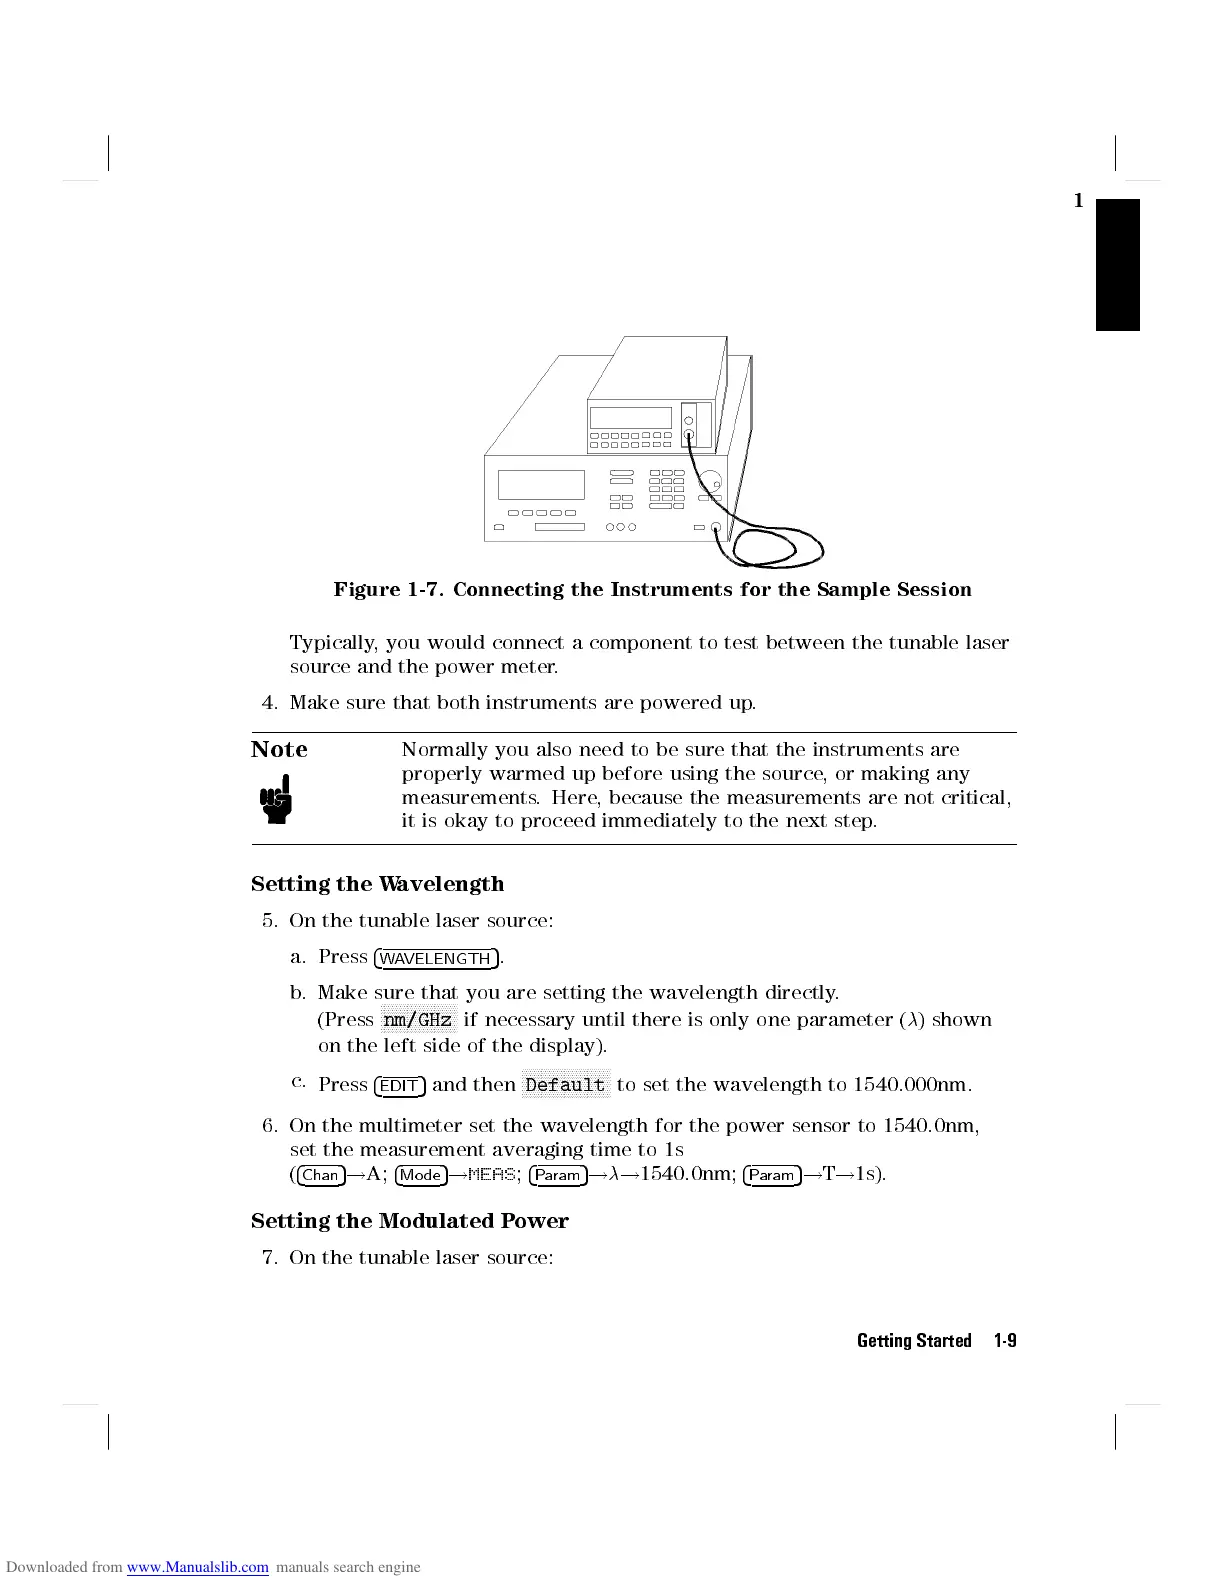
Figure 1-7. Connecting the Instruments for the Sample Session
Typically, you would connect a component to test between the tunable laser
source and the power meter.
4. Make sure that both instruments are powered up.
Note
Normally you also need to be sure that the instruments are
properly warmed up before using the source, or making any
measurements. Here, because the measurements are not critical,
it is okay to proceed immediately to the next step.
Setting the Wavelength
5. On the tunable laser source:
a. Press
4
WAVELENGTH
5
.
b. Make sure that you are setting the wavelength directly.
(Press
NNNNNNNNNNNNNNNNNNNN
nm/GHz
if necessary until there is only one parameter (
) shown
on the left side of the display).
c.
Press
4
EDIT
5
and then
NNNNNNNNNNNNNNNNNNNNNNN
Default
to set the wavelength to 1540.000nm.
6. On the multimeter set the wavelength for the power sensor to 1540.0nm,
set the measurement averaging time to 1s
(
4
Chan
5
!
A;
4
Mo de
5
!
MEAS
;
4
Param
5
!
!
1540.0nm;
4
Param
5
!
T
!
1s).
Setting the Modulated Power
7. On the tunable laser source:
Getting Started 1-9