1
a. Press
4
OUTPUT POWER
5
.
b. Make sure that you have a modulated signal selected
(Press
NNNNNNNNNNNNNNNNNNNN
Mod/CW
if necessary until there are two parameters (
POWER
and
FREQ
) shown on the right side of the display).
c. Make sure that
POWER
is selected
(the label of the selected parameter is displayed in inverse, press
NNNNNNNNNNNNNNNNN
Power
if it is not selected).
d. Make sure that the power is being shown in
Watts
(if necessary, press
NNNNNNNNNNNNNNNNN
W/dBm
to change the units).
e. Type 500 on the keypad and press
4
ENTER
5
.
8. On the multimeter, make sure that Watts are selected and that the
instrument is autoranging
(
4
dBm/W
5
!
W;
4
Auto
5
!
AUTO
).
9. On the tunable laser source:
a. Press
NNNNNNNNNNNNNN
Freq
.
b. Type in 100 on the keypad.
c. Make sure that the units are set to kHz
(If necessary, press
NNNNNNNNNNNNNNNNNNNN
Hz/kHz
to change the units).
d. Press
4
ENTER
5
.
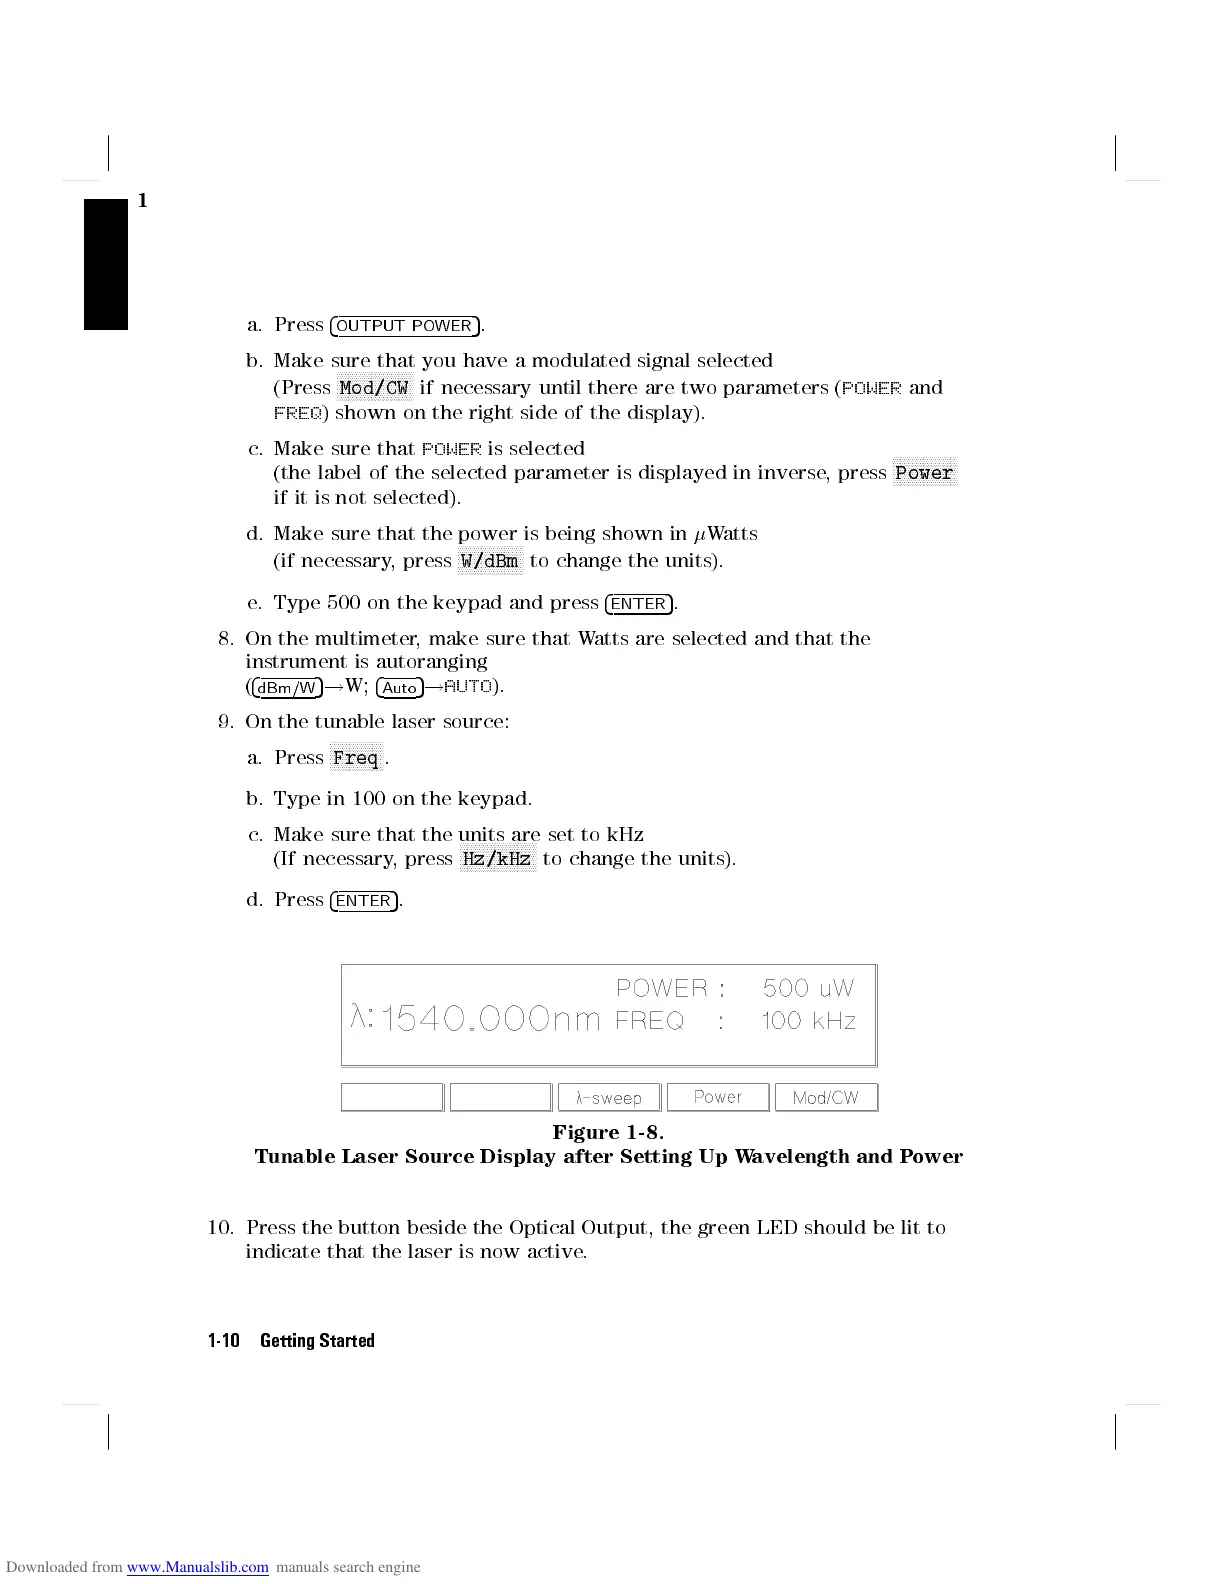
Figure 1-8.
Tunable Laser Source Display after Setting Up Wavelength and Power
10. Press the button beside the Optical Output, the green LED should be lit to
indicate that the laser is now active.
1-10 Getting Started