EasyManuals Logo

HP ProLiant ML110 G7 Maintenance And Service Guide

HP ProLiant ML110 G7
96 pages
To Next Page IconTo Next Page
To Previous Page IconTo Previous Page
Page #33 background imageLoading...
Page #33 background image
Removal and replacement procedures 33
6.
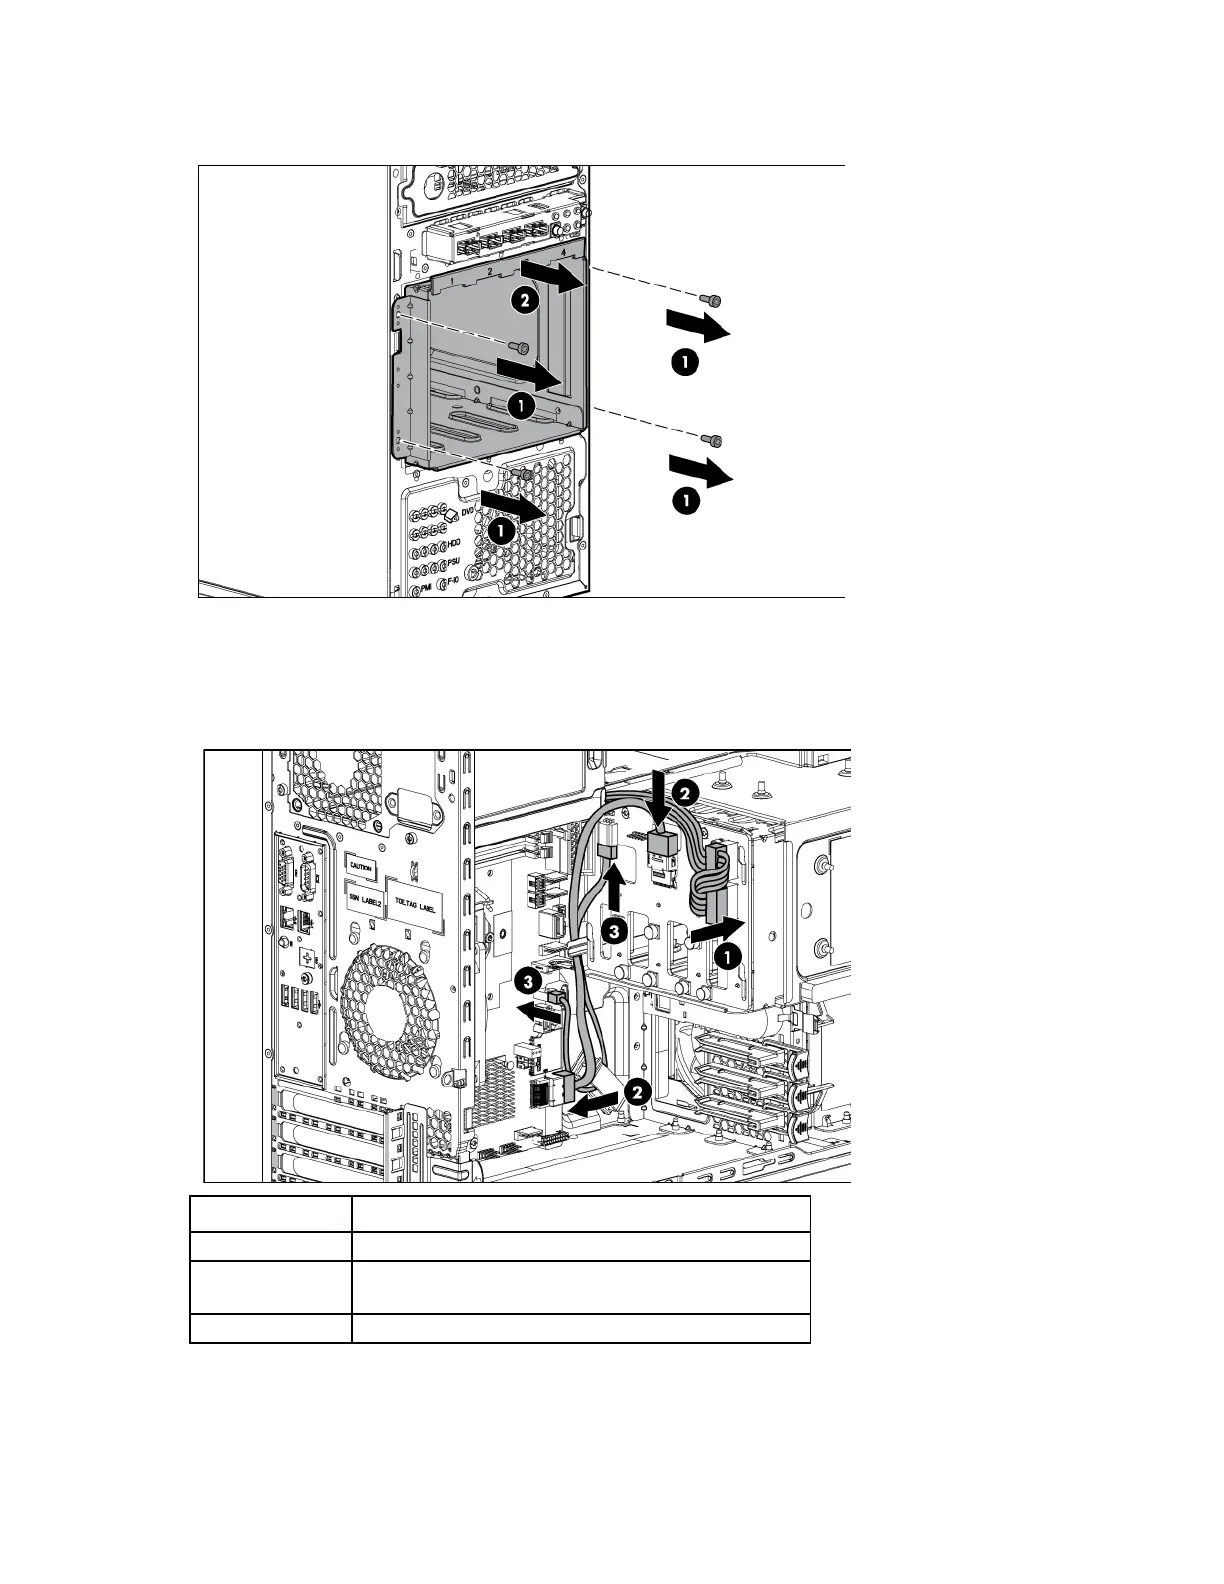
Using a T-15 Torx screwdriver, remove the four screws, and then remove the hard drive cage from the
drive cage bay.
7. Slide the optional drive cage assembly partially into the server chassis.
8. Connect the cabling to the hard drive cage. Connect the mini-SAS cable by choosing one of the
following:
o For SATA RAID support, connect the cable directly to the system board.
Item Description
1
Connect the power cable
2
Connect the mini-SAS cable to the system board mini-
SAS
cable connector
3
Connect the I
2
C cable

Table of Contents

Other manuals for HP ProLiant ML110 G7

Questions and Answers:

Question and Answer IconNeed help?

Do you have a question about the HP ProLiant ML110 G7 and is the answer not in the manual?

HP ProLiant ML110 G7 Specifications

General IconGeneral
Product TypeServer
Form FactorTower
Processor Sockets1
ChipsetIntel C202
Memory TypeDDR3 UDIMM
Maximum Memory16 GB
Memory Slots4
ProcessorIntel Xeon E3-1200 series
StorageSAS or SATA
Drive Bays4 LFF or 8 SFF
Hard DrivesOptional
Optical DriveOptional
Network ControllerHP NC112i Gigabit Ethernet Adapter (1 port)
Operating System SupportMicrosoft Windows Server, Red Hat Enterprise Linux, SUSE Linux Enterprise Server
Storage ControllerHP Dynamic Smart Array B120i

Related product manuals