Install a supercapacitor to replace the one that has failed or cannot provide sufficient power.
Before installing a supercapacitor, power off the server and observe electrical safety
precautions.
Procedure
Step 1 Wear an ESD wrist strap. For details, see 1 Safety Instructions.
Step 2 Remove the supercapacitor to be replaced. For details, see 7.33 Removing the
Supercapacitor (Screw-in RAID Controller Card).
Step 3 Take the supercapacitor out of its ESD bag.
Step 4 Place the supercapacitor downwards and exert even force to install it in the tray. Ensure that
the supercapacitor is secured by the plastic latches. See step (1) in Figure 7-67.
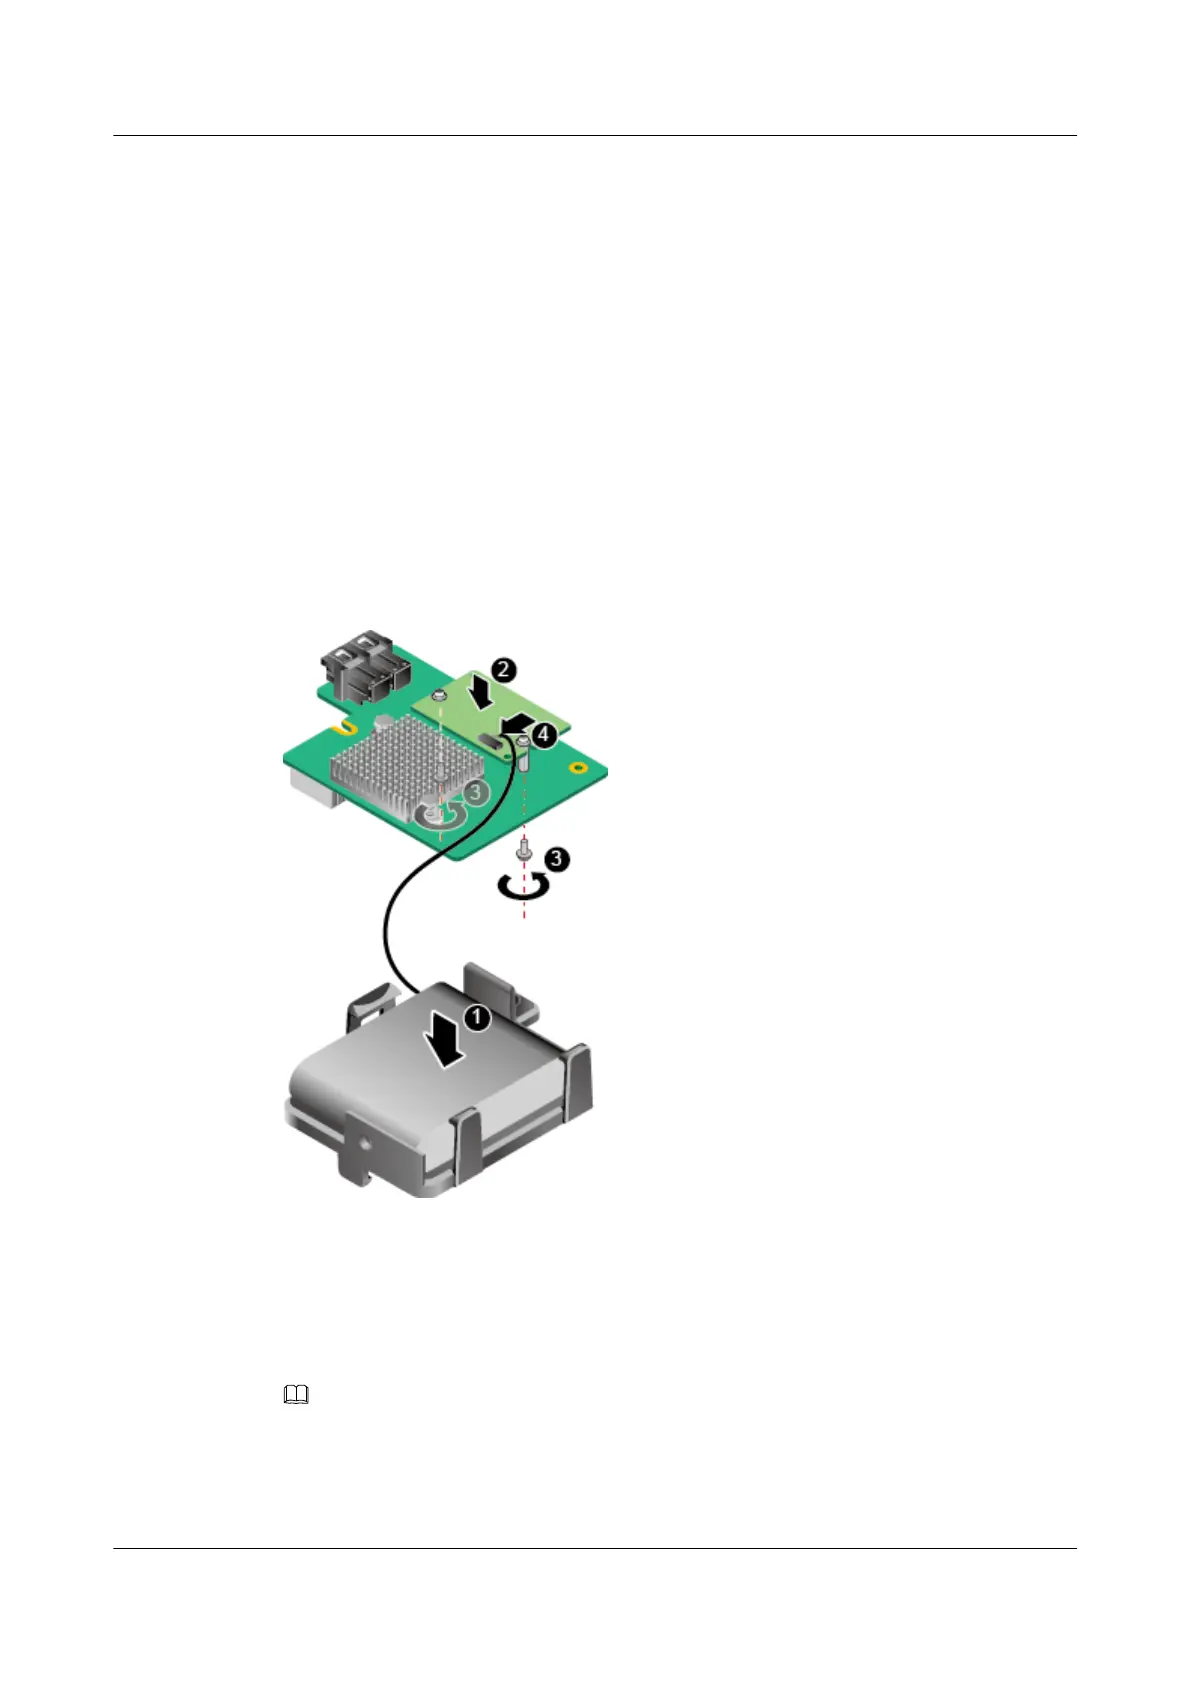
Figure 7-67 Installing the supercapacitor
Step 5 Insert the TFM vertically into the RAID controller card. See step (2) in Figure 7-67.
Step 6 Tighten the screws on the TFM. See step (3) in Figure 7-67.
Step 7 Connect the cable between the supercapacitor and the TFM. See step (4) in Figure 7-67.
NOTE
Insert the connector with pins to the TFM socket.
Step 8 Install the riser card above the RAID controller card. For details, see 7.19 Removing the
Riser Card.
RH2288 V3 Server
User Guide
7 Replacing Parts
Issue 32 (2019-03-28) Copyright © Huawei Technologies Co., Ltd. 190

 Loading...


