Installation
XPR170 Instruction Manual 810060 11 3
Connect the gas connect console (VWI or OptiMix) to the TorchConnect console
The following installation steps are for the VWI or OptiMix gas connect console.
If you have a Core gas connect console, refer to Connect the gas connect console (Core) to
the TorchConnect console on page 109.
Connect the pilot arc, coolant hose set, and shield water assembly (VWI or OptiMix)
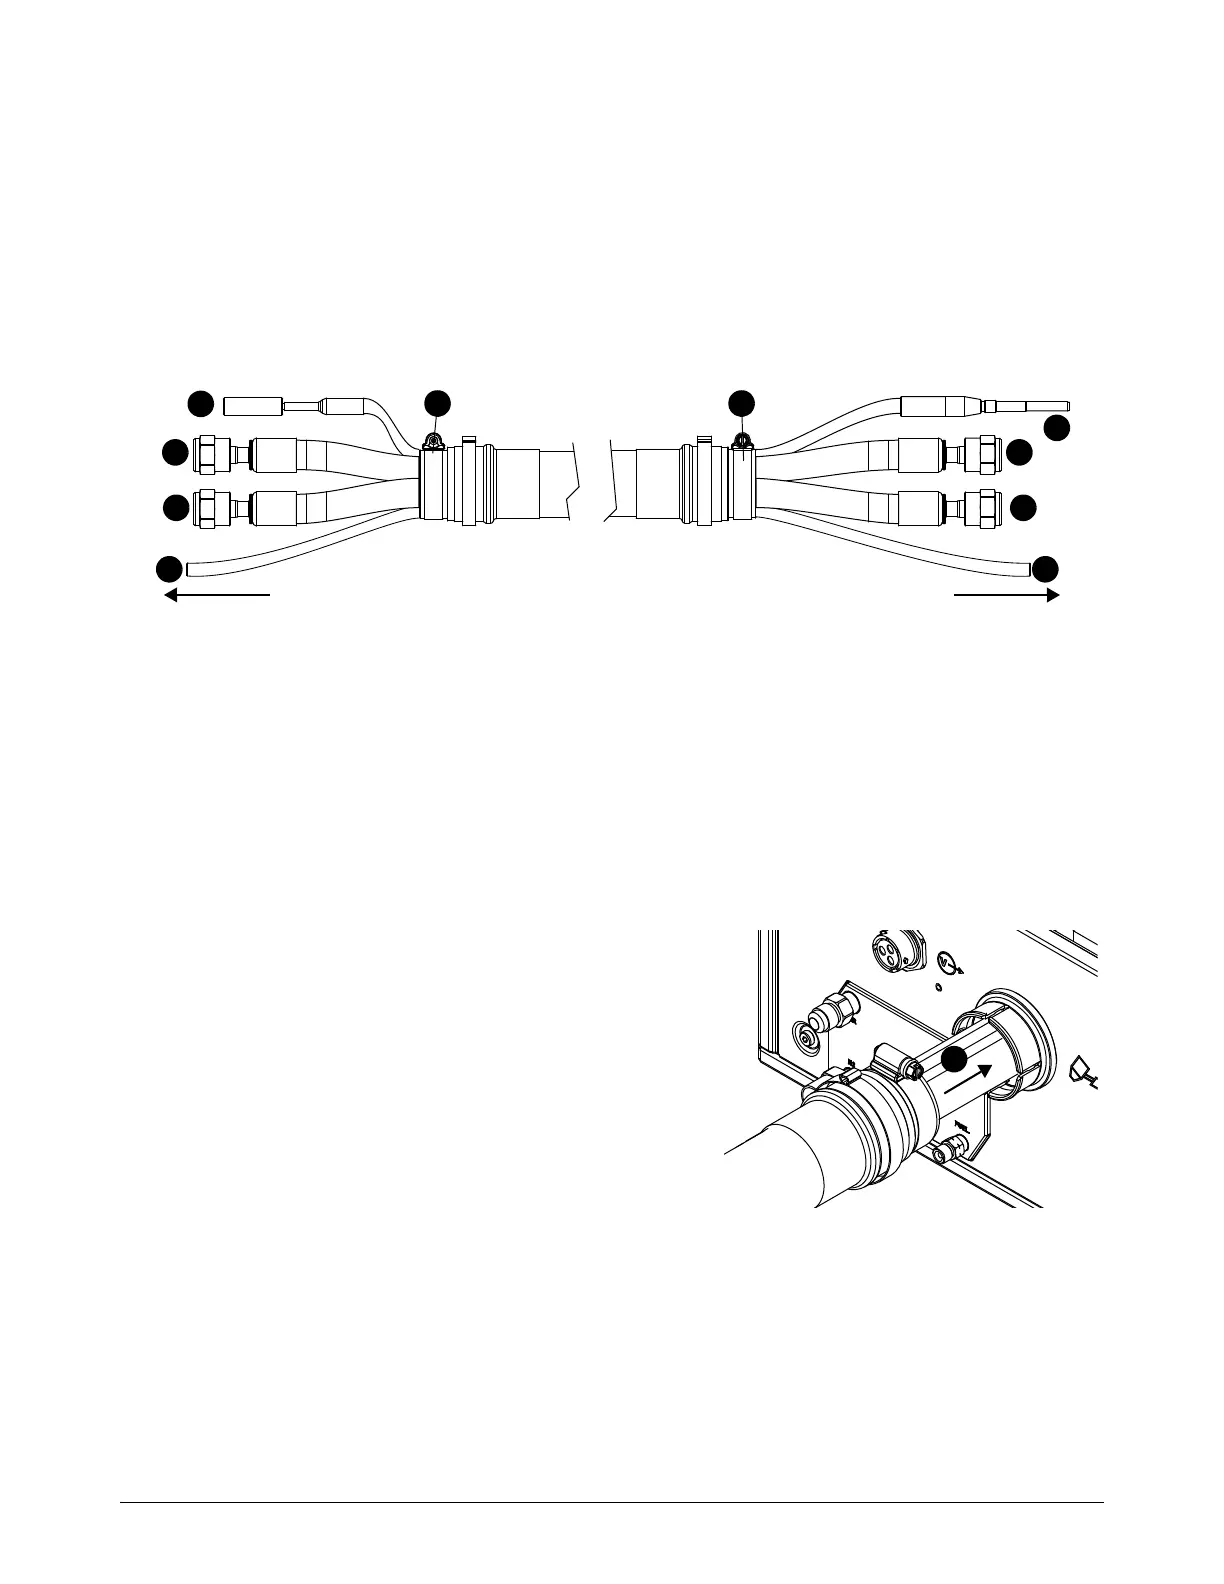
Figure 28 – Pilot arc, coolant hose set, and shield water assembly
For lengths, refer to Pilot arc, coolant hose set, and shield water assembly
(VWI or OptiMix) on page 386 of the Parts List.
1. Connect the lead assembly to the gas connect console:
a. Put the hoses and lead through the hole in the
gas connect console.
To gas connect console
To torch connect console
5
1
2
3
5
1
2
3
44
1 Pilot arc lead (yellow)
2 Coolant return hose (red band)
3 Coolant supply hose (green band)
4 Shield water hose
5 Lead coupler