60
Typical interface activities performed on an OPTImizer
2
to
acknowledge and cancel an alarm include:
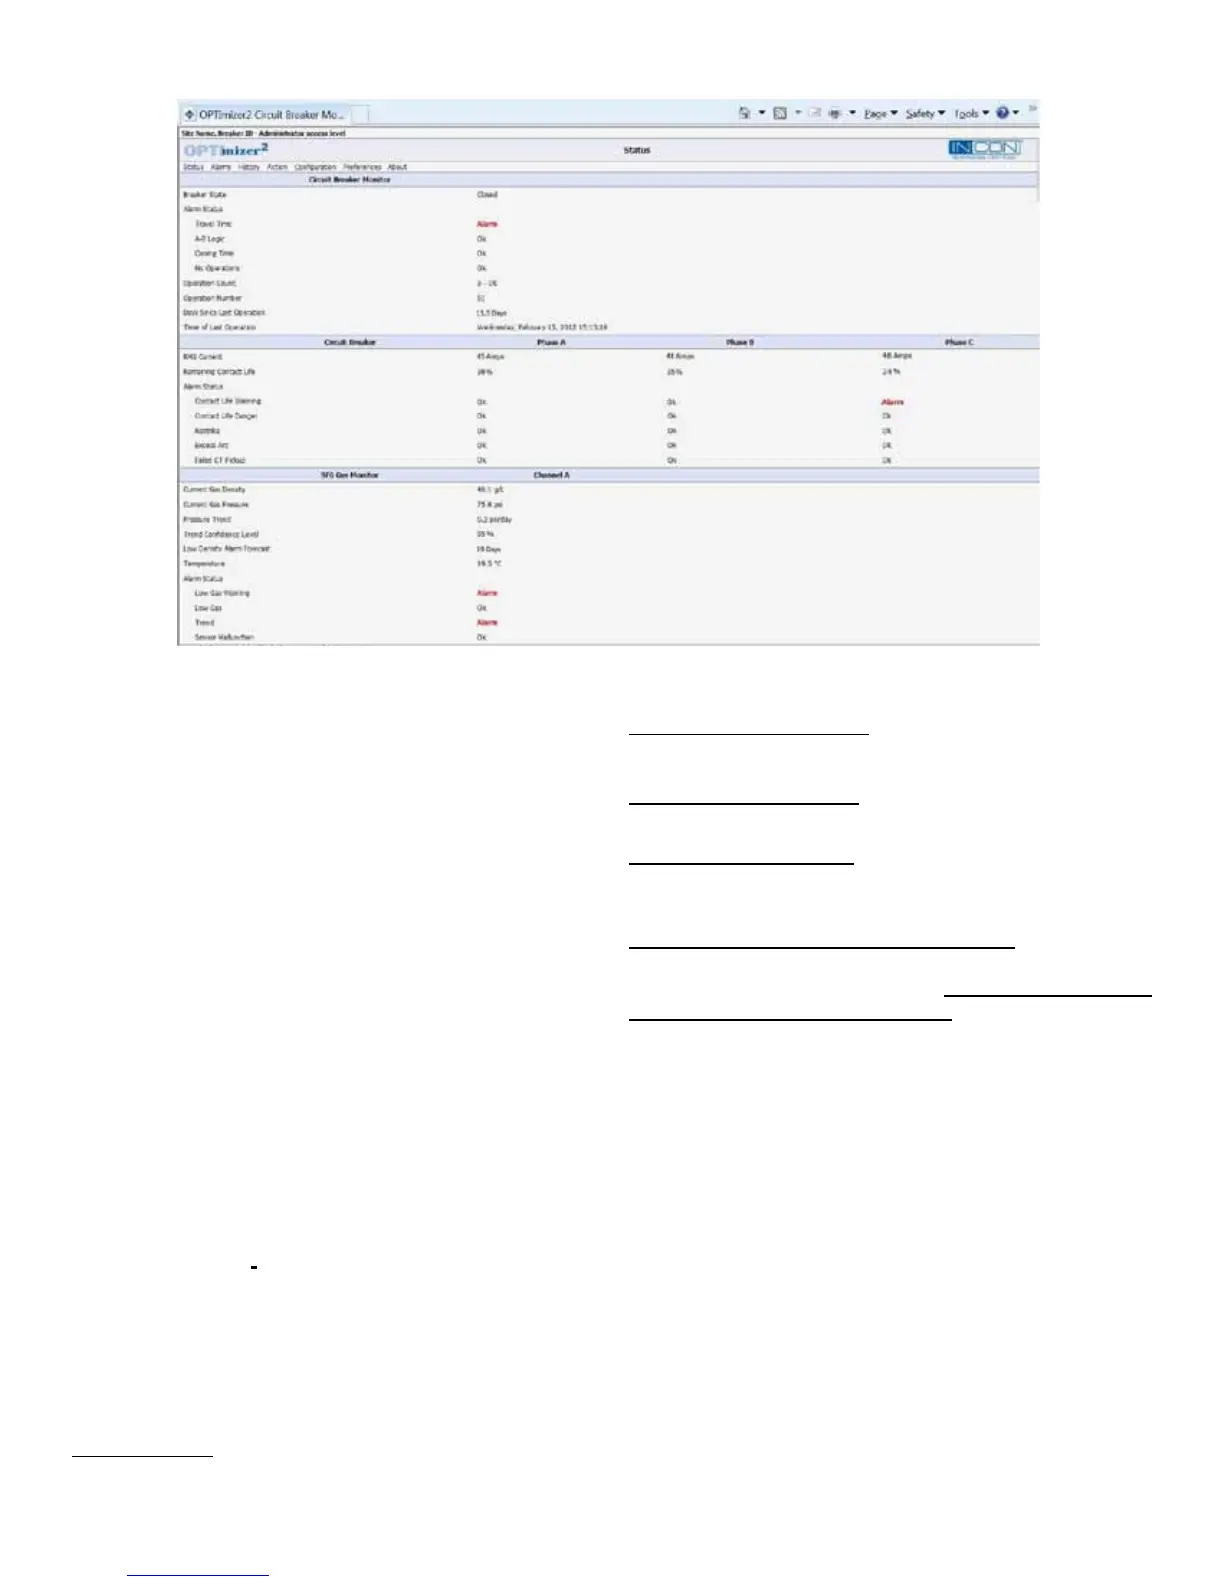
• Some active alarms appear as red “ALARM”
hyperlinks on the STATUS page (see Figure 22).
Clicking on the red hyperlink will automatically move
you to the ACTION page (see Figure 11).
• CLEAR LATCHED ALARMS (Latched Alarms include:
Trip Time; Travel Time; Closing Time; Restrike;
Excess Arc and Clearing Time. These alarms can be
cleared by clicking the “Clear Latched Alarms” button.)
• Move to the ALARMS Page to view a list of active
alarms.
• Contact Life (I
2
T or I T) Warning and Danger alarms
must be cleared by presetting the Contact Life (by
phase, see Figure 11) to a value lower than the alarm
limit. This should only be done after maintenance
to replace or recondition the interrupter contacts is
completed.
• See below for instructions for clearing alarms using a
USB Script.
5.4 USB Scripts
The OPTImizer
2
has the special capability to perform
certain operations from script les installed on a USB
memory stick. These operations include: clearing alarms;
downloading the full database; resetting the IP address;
uploading new rmware. INCON Technical Support can
provide these scripts on memory sticks or through e-mail.
Clearing Alarms: All latched alarms will be automatically
cleared.
Downloading the Database: The full database will be
automatically downloaded to the USB memory stick.
Resetting the IP Address: The OPTI
mizer
2
’s IP address
will be automatically reset to “192.12.27.1”.
Uploading New Firmware: The new rmware will be
automatically uploaded. All conguration settings and
recorded history will be retained.
Transferring a script to a USB memory stick: Insert a USB
memory stick into the USB port on the computer. Copy the
les provided to the memory stick. (Only one script may be
installed at a time on a memory stick). Remove the USB
memory stick from the computer. It is ready to use. Insert it
into the OPTImizer
2
’s USB port.
While the USB script is running, all LED’s will be lit. If
there is a problem with the USB script or an error occurs
while running the script, the LED’s will ash rapidly. When
a script has completed its operation, the OPTI
mizer
2
will
ash all its LED’s slowly. When the LED’s are ashing the
USB memory stick can be removed and the OPTImizer
2
will return to normal operation. If the USB memory stick is
not removed, after 5 minutes the LED’s will stop ashing
and the OPTImizer
2
will return to normal operation.
5.3 Alarm Acknowledgement / Cancellation
Figure 24: User Interface, Status Page with Active Alarms