69
Maintenance
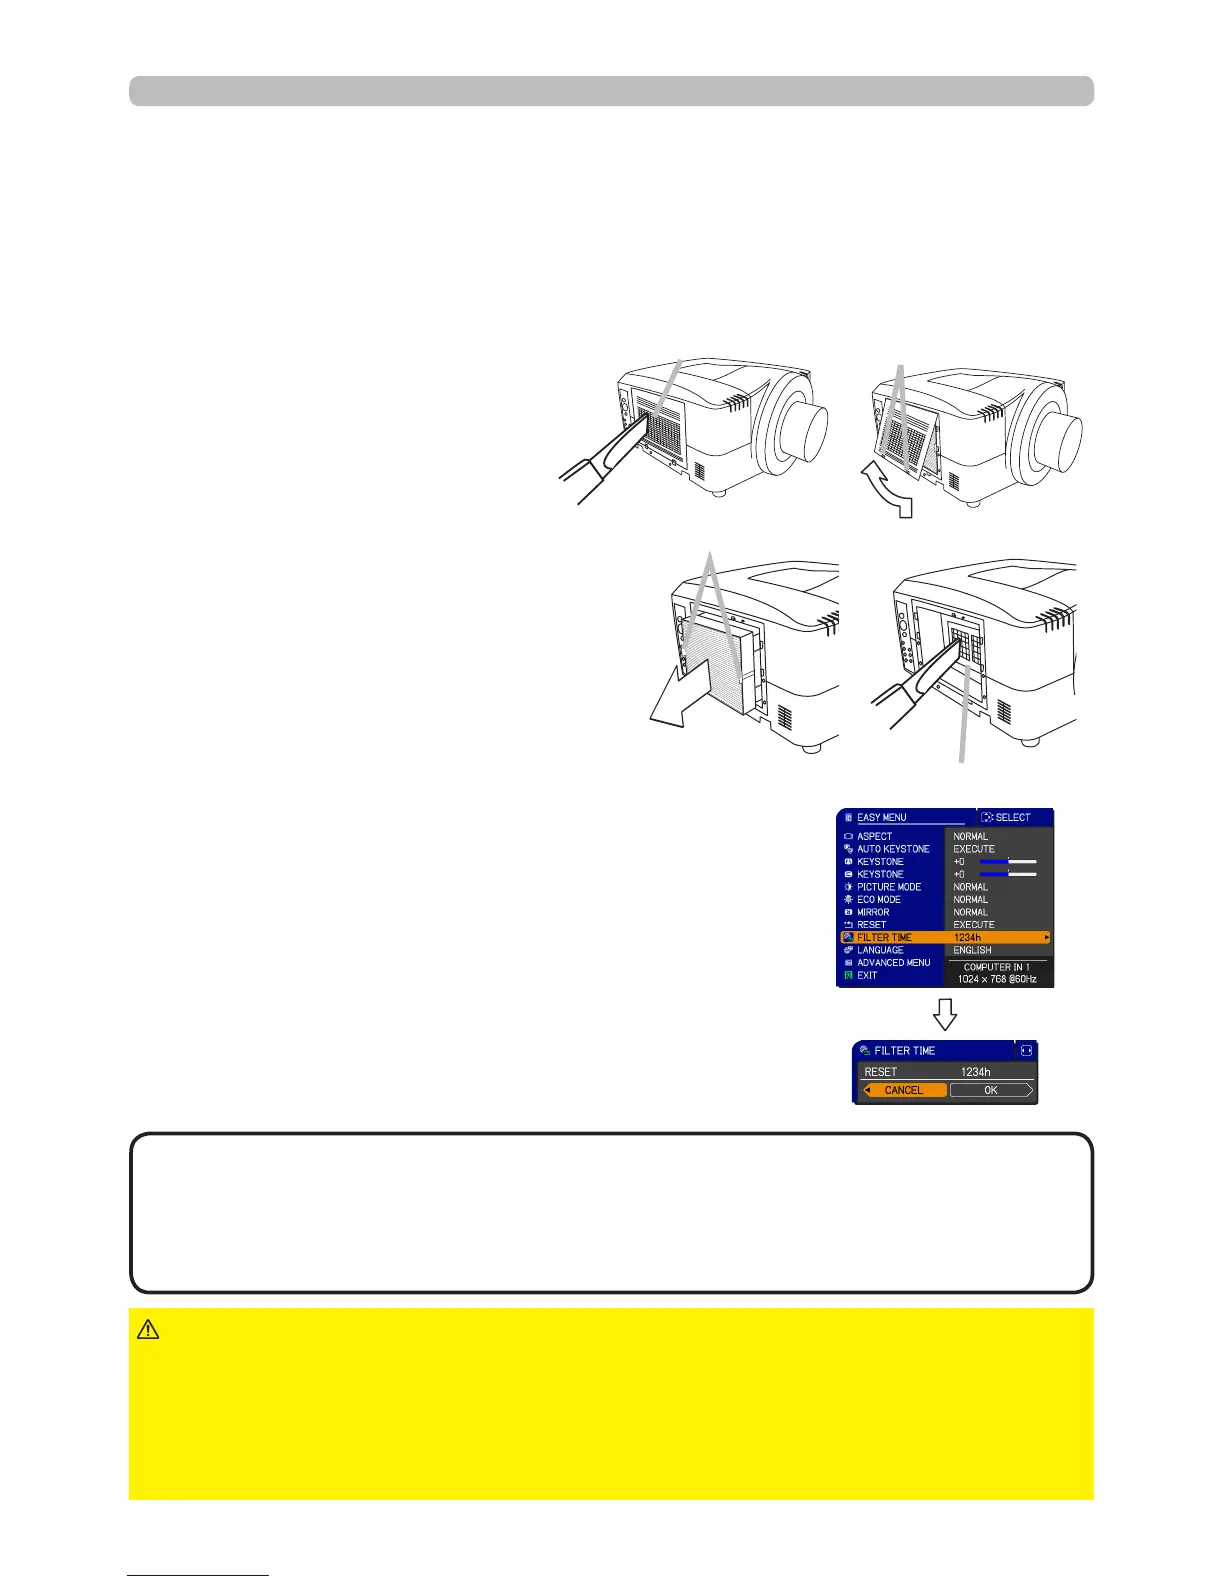
Filter cover
Filter unit knobs
Intake vents
To keep the interior venting properly, keep a spare and replace the lter unit
periodically, although frequent replacement is not needed for this product.
To purchase a spare, contact your dealer and tell the following type number.
Optional lter part number: SP-FILTER-01
1.
Make sure that the projector is
unplugged and cooled down.
2.
Use a vacuum cleaner on
and around the lter cover.
3.
Pick and pull up the lter
cover knobs to take it off.
4.
5.
Use a vacuum cleaner on and around
the intake vents of the projector.
6.
Set the new lter unit into the place.
Filter unit
Pinch and pull out the lter unit
knob to take it off.
• The value shown on the EASY menu as the FILTER TIME is the
amount of usage which has occurred since the last time the FILTER TIME was
reset. Refer to the value for proper maintenance.
• You can use the message function, which is set up by the item FILTER TIME
of the OPTION menu, to notify you when to replace the lamp.
NOTE
►Before checking or replacing the lter unit, turn off, unplug,
and cool down the projector.
►To keep the interior venting properly, check and replace the lter unit
periodically.
►Use only the manufacturer specied type of the lter unit.
►Be sure to reset the FILTER TIME after you have replaced the lter unit.
WARNING
NOTICE
The following walks you through the steps to replace the lter unit.
7.
Put the lter cover back into the place.
8.
Reset the FILTER TIME value.
Turn the projector on.
To display the FILTER TIME dialog, select the
“FILTER TIME” using the ▲/▼ cursor buttons,
then press the ► cursor button.
Use the ► cursor button according to the dialog,
Selecting “OK” resets the FILTER TIME value.
(1)
(3)
(4)
To display the EASY MENU, press the MENU
button (on the control panel or the remote
control). On the ADVANCED MENU, select the
“EASY MENU” using the ▲/▼ cursor buttons in
the left column, then press the ► cursor button.
(2)
Filter cover knobs