3 SET UP THE SPLICING SYSTEM
3-2
Belt Splicing System v.2.0
Prepare Clamping Fixture
Secure Clamping Fixture
to Conveyor
1. Choose a location to set up the Clamping
Fixture.
Use the conveyor carryway frame when
possible. For returnway setup, see Set Up at the
Returnway on page 11-1.
2. Place the Clamping Fixture on the conveyor
frame under the two (2) belt ends or belt section
to be removed.
Figure 3A: Clamping Fixture on horizontal
conveyor
3. Use F- or C-clamps to secure the Clamping
Fixture at the conveyor frame.
• Place clamps on Clamping Fixture ends
on a horizontal conveyor.
• Ensure Crank Handle can rotate 360°.
• Place clamps ahead of the Clamping Fix-
ture on an inclined conveyor to prevent
sliding.
Figure 3B: Add clamps ahead of Clamping
Fixture on an inclined conveyor
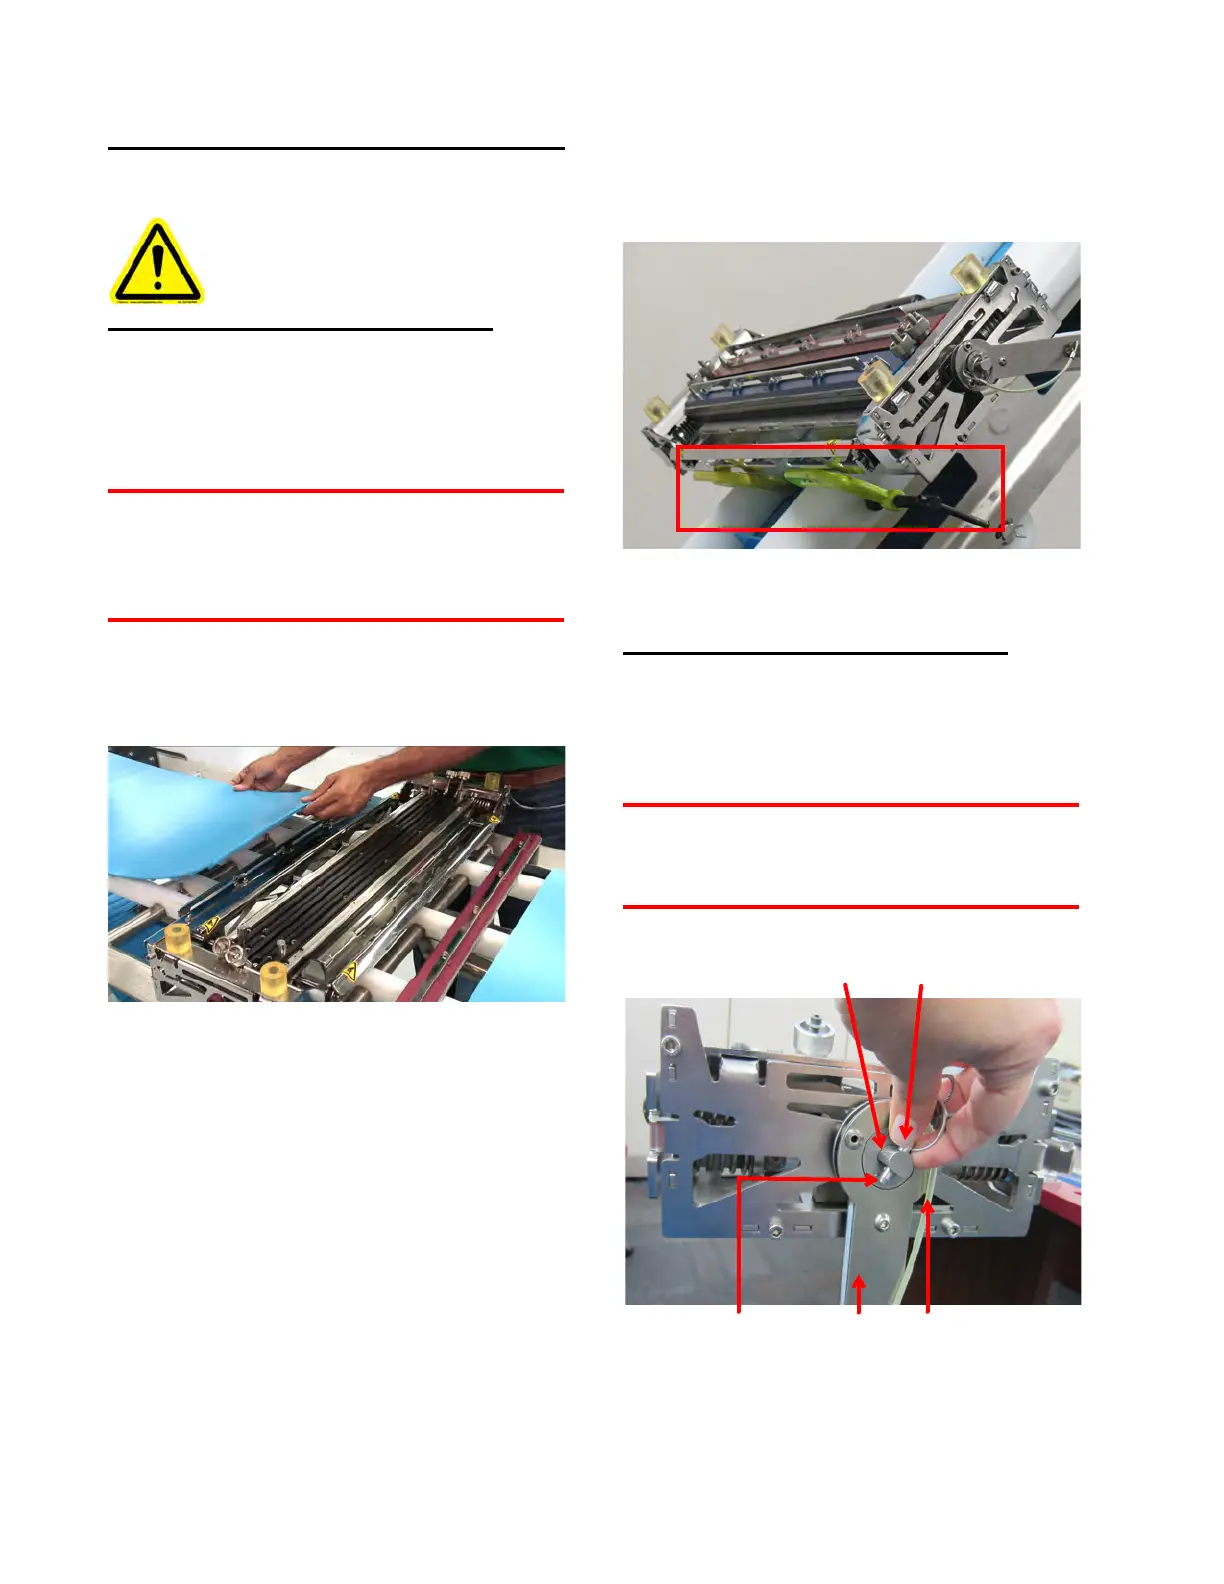
Attach Crank Handle
1. Align the Crank Handle slot to the Clamping
Fixture shaft and push the handle toward the
Fixture frame.
Ensure the tether and its fastener face away
from the Clamping Fixture.
Figure 3C: Attach Crank Handle
Request assistance when moving or
splicing with the 42" Splicing System.
retaining pin Crank Handle tether
1. Push Handle onto shaft 2. Insert retaining pin