6 SPLICE THE BELT
6-4
Belt Splicing System v.2.0
Allow the Belt to Cool
1. While the splice cools, hold the Heat Wand
handle(s) and wipe plastic residue from the
Heat Wand. Use a clean, dry cloth. An assistant
may be needed.
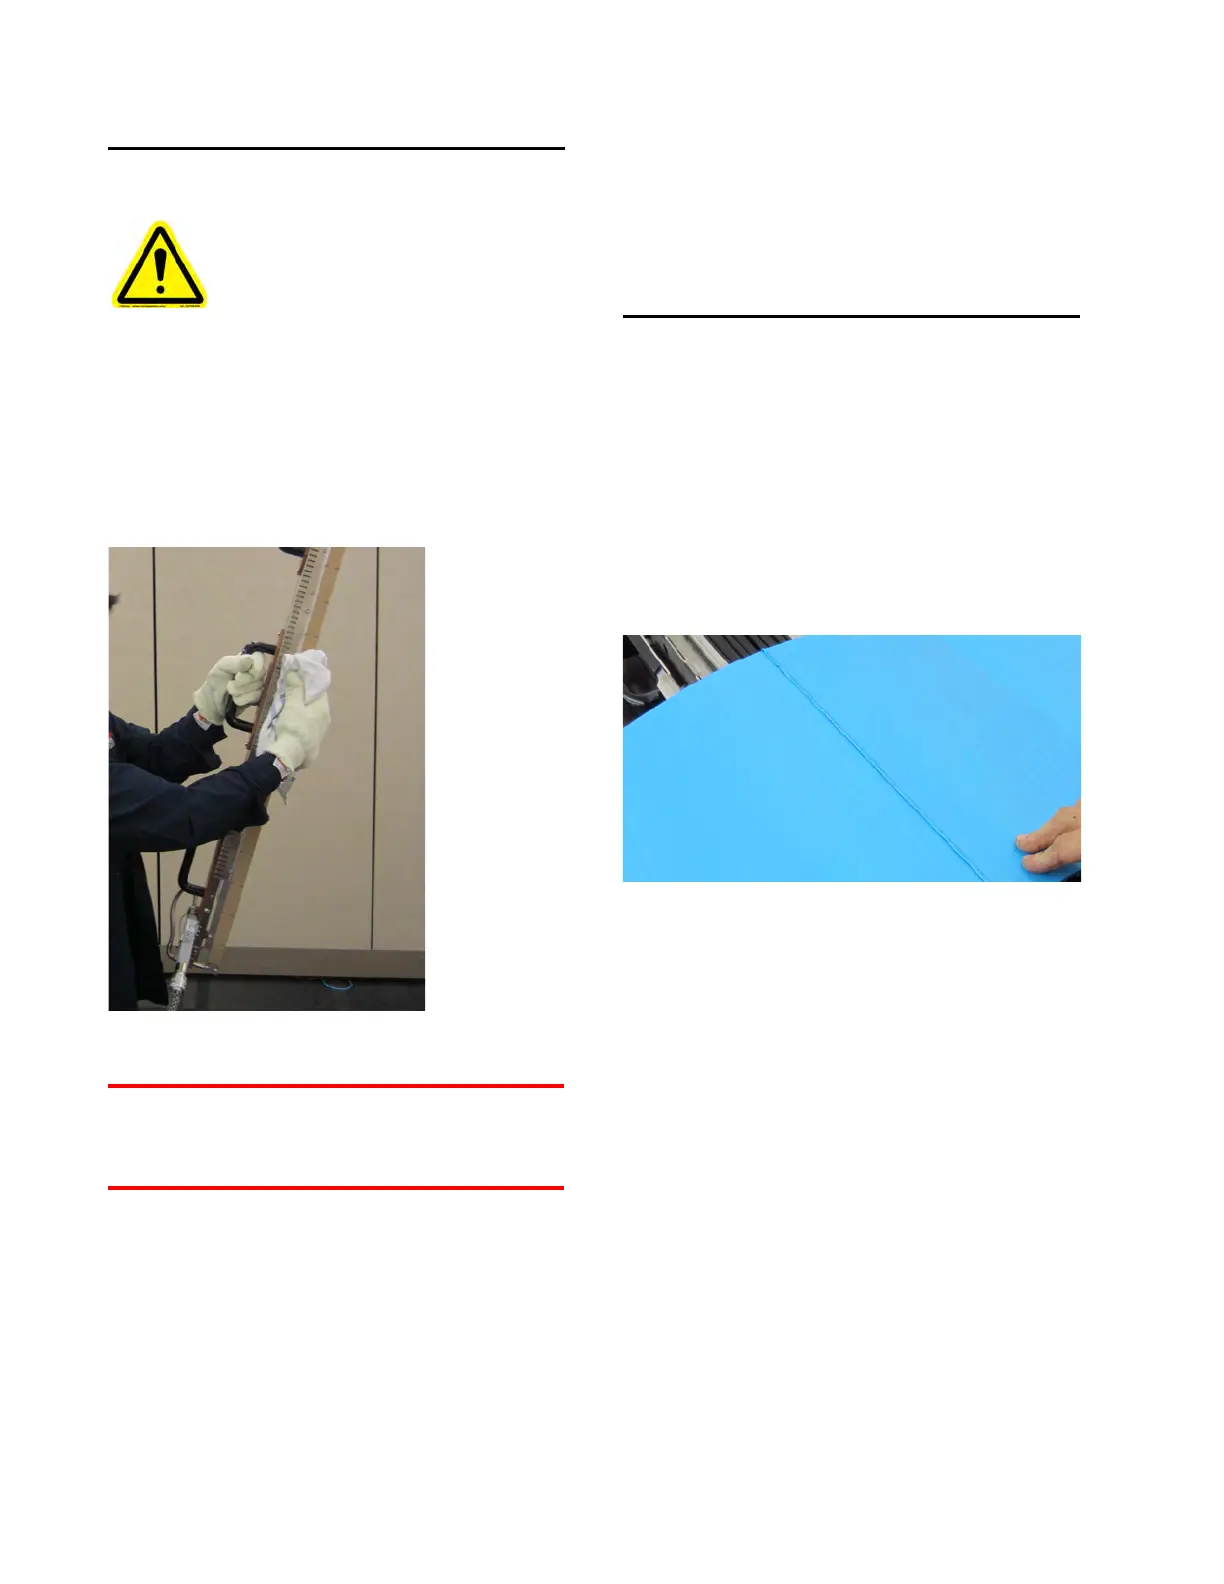
Figure 6I: Wipe residue from the Heat Wand
Wipe the Heat Wand even if plastic residue is
not visible. Residue can cause faulty splices.
2. Return the Heat Wand to the Stand. Latch in
place.
3. After two (2) minutes of cooling (in normal
room temperature conditions), remove the Cut
Guides from the belt and inspect the splice.
Inspect the Splice
Ensure these requirements are met before trim-
ming the belt.
Belt ends are joined with a bead of molten
material.
Molten material appears as a small, even
bead on the top, bottom, and sides of the
splice.
Figure 6J: Small, even weld bead
FAIL: If the splice does NOT meet these
requirements, troubleshoot until all require-
ments are met. See TROUBLESHOOT on page
10-1.
PASS: When the splice meets all requirements,
trim and inspect the belt. See TRIM &
INSPECT THE BELT on page 7-1.
Contact with hot Heat Wand or Stand
will cause skin burns; using heat-
resistant gloves and sleeves is recom-
mended.
Keep Heat Wand in Stand between
each splice.