6 SPLICE THE BELT
Belt Splicing System v.2.0
6-3
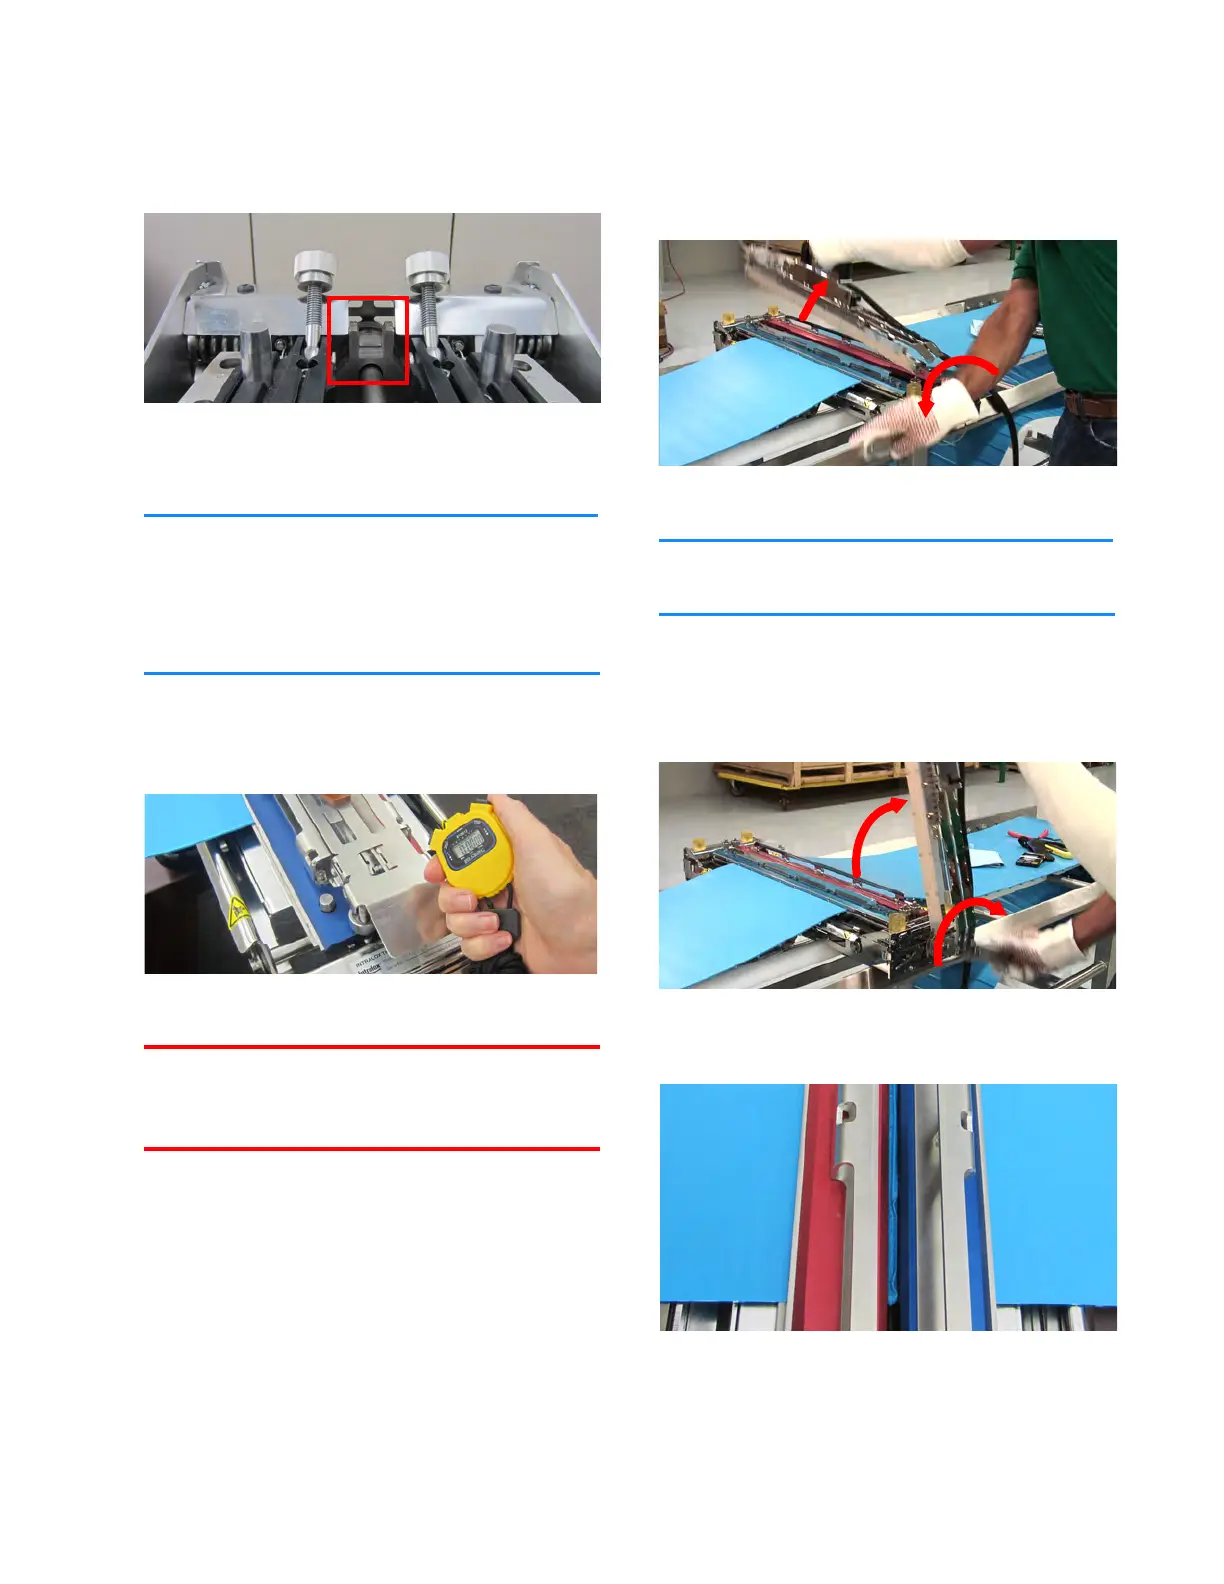
2. With the Clamping Fixture fully open, set the
Heat Wand on both Wand Rests.
Figure 6D: Wand Rest at one end
3. Prepare the stopwatch.
The Heat Wand temperature can
vary ±20°F (12ºC) from the setpoint
when removed from the Stand. If needed,
see TROUBLESHOOT on page 10-1.
4. Close the Clamping Fixture gently, but
quickly on the Heat Wand until the Clamping
Fixture locks, i.e., a “click” sound occurs.
Figure 6E: Close Clamping Fixture on Heat Wand
Do not allow the Clamping Fixture to close
suddenly or with force.
5. When the melt time is reached, quickly open
the Grooved Decks fully and remove the Heat
Wand.
Figure 6F: Remove Heat Wand
Steps 5 and 6 should occur as fluid motions.
6. While holding the Heat Wand, close the
Grooved Decks within 3 seconds to push the
melted belt ends together without force before
they begin to cool.
Figure 6G: Close Grooved Decks as Heat Wand is
lifted
Figure 6H: Heat Wand removed and belt cooling