SECTION 8—WHEELS
Solara
™
and Solara
™
Limited 48 Part No 1085787
REPOSITIONING AXLE PLATE
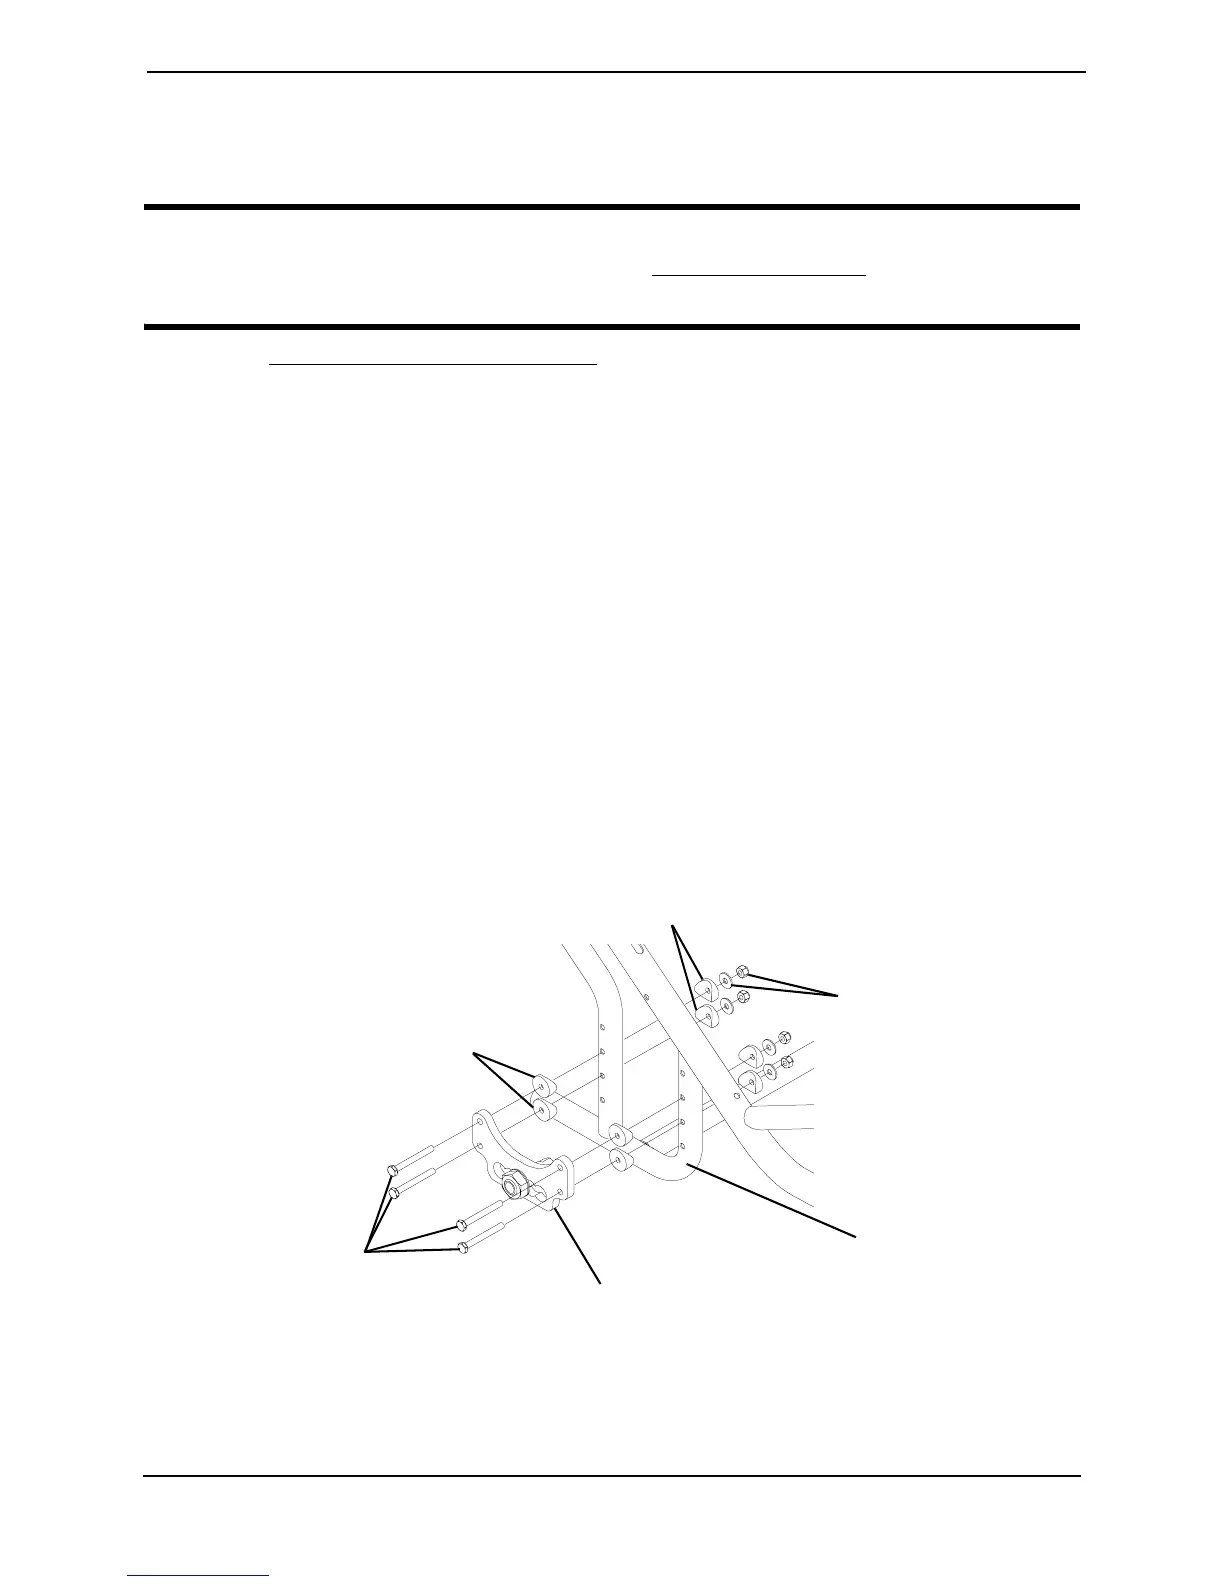
NOTE: Refer to FIGURE 8.4 for this procedure.
WARNING
BEFORE performing this procedure, refer to General Guidelines on page 13 for
additional requirements.
1. Refer to Adjusting Seat-to-Floor Height on page 27 for corresponding axle mounting
position for desired seat-to-floor height.
2. Remove the rear wheels from the wheelchair. Refer to Owner's Manual, part number
1080556.
3. Remove the four (4) mounting screws, locknuts, washers and eight (8) coved spacers
that secure the axle plate to the wheelchair frame.
4. Reposition the axle plate to the desired position.
5. Secure the axle plate to the wheelchair with the four (4) mounting screws, locknuts,
washers and eight (8) coved spacers.
6. Repeat STEPS 2-5 for opposite side.
7. Reinstall the rear wheels to the wheelchair. Refer to Owner's Manual, part number
1080556.
8. Adjust the wheel locks. Refer to the Owner's Manual, part number 1080556.
9. Adjust the anti-tippers to maintain proper clearance. Refer to the Owner's Manual,
part number 1080556.
FIGURE 8.4 - REPOSITIONING AXLE PLATE
Mounting Screws
(STEPS 3,5)
Coved Spacers
(STEPS 3,5)
Axle Plate
(STEPS 3,4,5)
Coved Spacers
(STEPS 3,5)
Wheelchair Frame
(STEPS 3,5)
Washer and Locknut
(STEPS 3,5)