SECTION 8—WHEELS
Solara
™
and Solara
™
Limited 50 Part No 1085787
REMOVING/INSTALLING WHEEL LOCKS
NOTE: Refer to FIGURE 8.6 for this procedure.
REMOVING
NOTE: BEFORE removing the wheel lock, note position of wheel lock on the wheelchair frame for
proper reinstallation.
1. Remove the two (2) socket screws that secure the existing wheel lock to the wheelchair
frame.
2. Do one (1) of the following:
A. 12 inch Wheels - Remove the socket screw and locknut that secures the foot release
lever to the wheel lock. Proceed to STEP 3.
B. 20 or 22 inch Wheels - Proceed to STEP 3.
3. Repeat STEPS 1-2 for opposite side, if necessary.
4. Install the wheel lock(s). Refer to Installing on page 50.
INSTALLING
1. Position the new wheel lock on the wheelchair frame as shown in FIGURE 8.6.
2. Do one of the following:
A. 12 inch Wheels - Install the socket screw and locknut to secure the foot release lever
to the wheel lock. Proceed to STEP 3.
B. 20 or 22 inch Wheels - Proceed to STEP 3.
3. Install the two (2) socket screws to secure the new wheel lock to the wheelchair frame.
4. Repeat STEPS 1-3 for opposite side, if necessary.
5. Adjust the wheel lock(s). Refer to the Owner's Manual, part number 1080556.
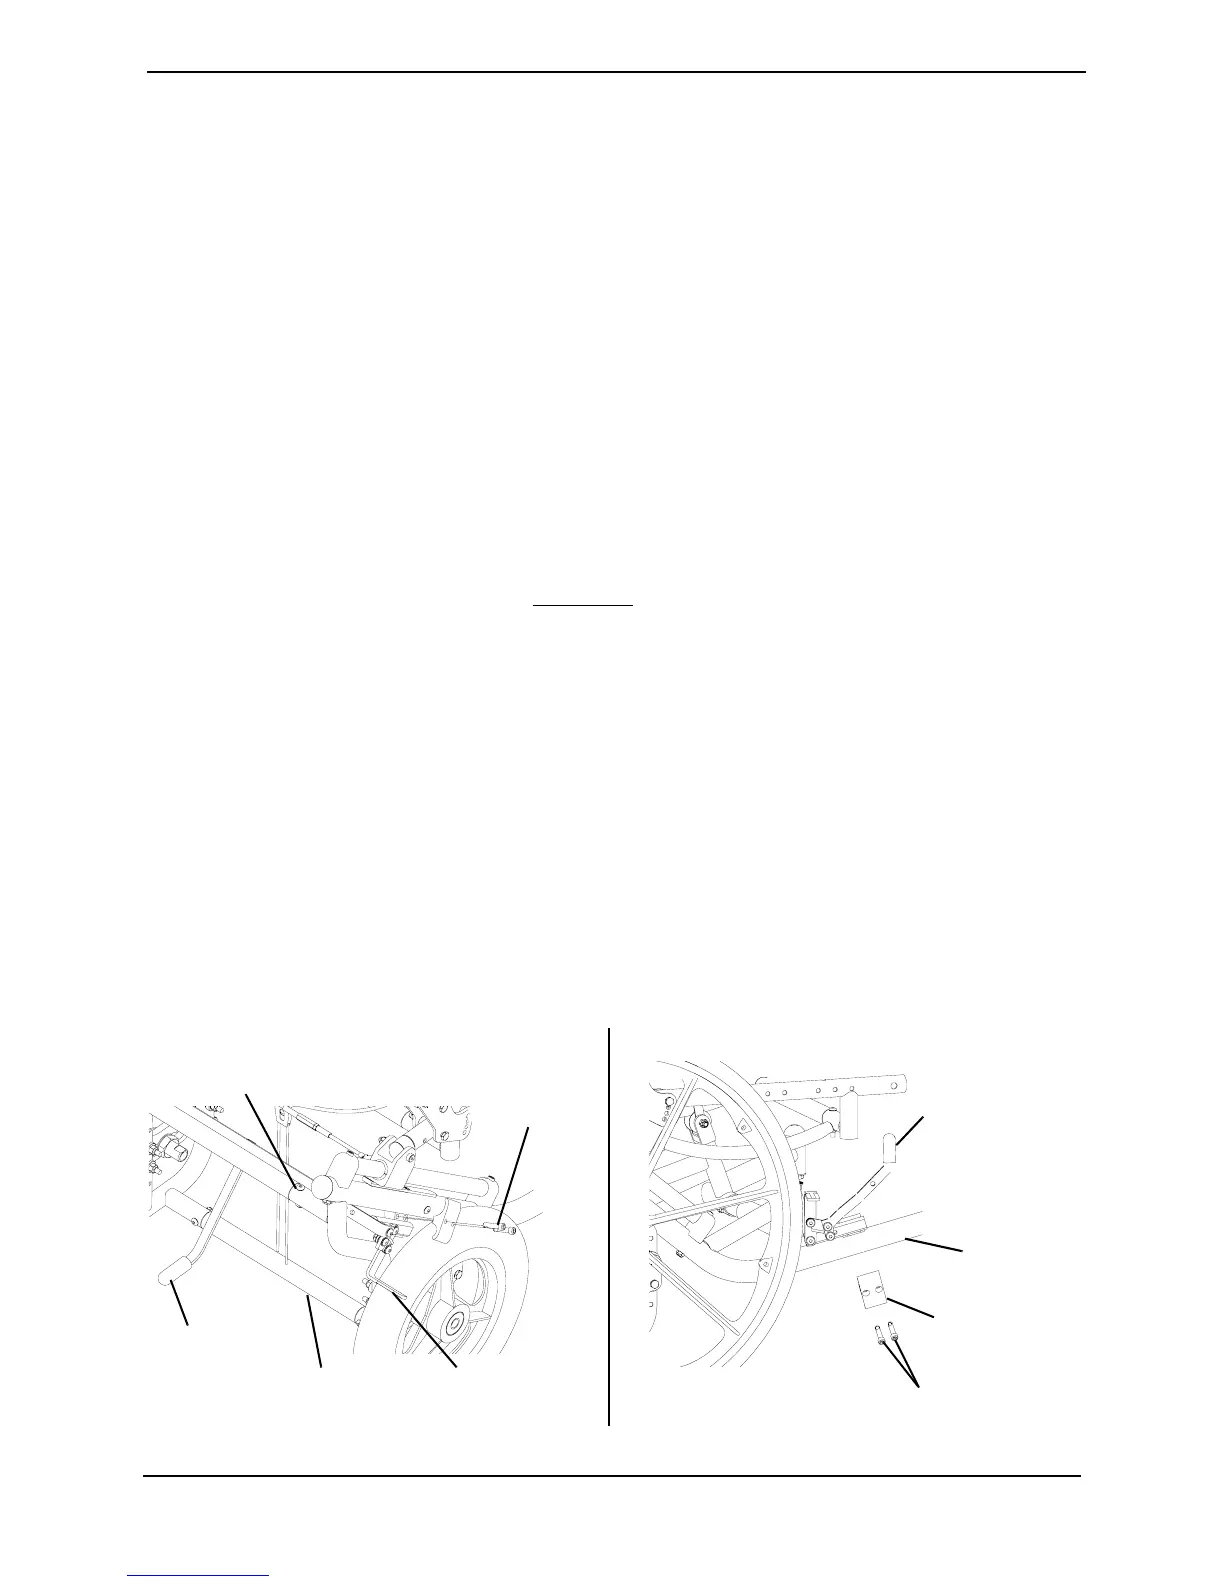
FIGURE 8.6 - REMOVING/INSTALLING WHEEL LOCKS
Front Release
Lever
Socket Screw
and Locknut
Wheelchair
Frame
Socket
Screw
Wheel Lock
12-INCH WHEEL
20 OR 22-INCH WHEEL
Wheel Lock
Wheelchair
Frame
Wheel Lock
Socket Screw