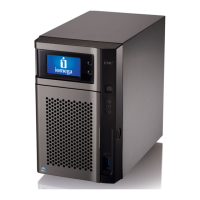
Backing up to and Restoring from Your px4-400d Network
Storage
Backing up Macs with Time Machine
You can use Time Machine to back up a Mac client computer to the px4-400d network storage device.
Follow the instructions below to set up Time Machine backups to your px4-400d:
1. Connect your Mac to your px4-400d using Apple File Protocol (AFP). You can do this using
LenovoEMC Storage Manager for Mac or Bonjour.
2. Mount the Backup Share from the px4-400d network device.
If you want to create a new Share for Time Machine backups, you can do so using the px4-400d
management console. Mount the Share you want to use before proceeding to the next step.
3. Select System Preferences... from the Apple Menu.
4. Select Time Machine (listed under System).
5. Click ON to enable Time Machine.
6. From the list of available drives, choose the desired Share on your px4-400d, then click Use for
Backup.
7. Time Machine will automatically create the sparsebundle image under the selected Share and
begin backing up your computer to your network storage device. After the initial backup, Time
Machine backs up files every hour.
Time Machine uses a single destination drive for backups. If you have previously set up another
drive for Time Machine backups and want to change to use the px4-400d network device, click
Select Disk, then choose the desired Share on your px4-400d.
One-touch Transferring of Content from a USB Device
One touch transfer of content is created on the QuikTransfer page. On the QuikTransfer page, you can set
the default destination Share for any automatically created QuikTransfer Copy Jobs.
QuikTransfer automatically copies all files from any USB external storage device plugged into your px4-
400d Network Storageto the destination Share when the QuikTransfer button is pressed.
Setting QuikTransfer
1. Select a destination folder for the default QuikTransfer Copy Job by clicking and selecting a
folder in the file browser. The file browser provides a way to select a Share and all its folders, or
just some of the folders under a Share.
2. Click Apply to save your setting.
Backing up and Restoring Your Content
Backing up to and Restoring from Your px4-400d Network Storage 95
 Loading...