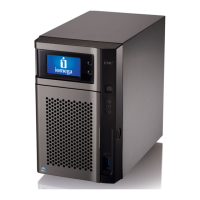
Adding New Drives to Your px4-400d Network Storage
The px4-400d can be powered on or off when installing or replacing hard drives. If you have purchased a
diskless device, you might want to install all of the hard drives at once (steps 1-4 below). In this case, it is
recommended that you power off the px4-400d while installing the drives. If you are replacing a drive that
has failed, it will be easiest to do so while the px4-400d is powered up. This will enable you to use the px4-
400d management interface to confirm that you are removing the correct drive.
Make sure you are installing drives qualified for use with your px4-400d. Refer to
http://support.lenovoemc.com for a list of approved drives.
The following instructions cover installing new hard drives (HDDs) or SSDs in your px4-400d while the
device is powered on:
1. Access the drive bays for your px4-400d and pull out an empty drive tray.
2. Mount the drive on the drive tray using the screws included with the drive.
3. Insert the drive tray containing the new drive back into the empty slot.
If the first drive installed in the px4-400d contains data, a dialog box will appear asking for
confirmation to overwrite the drive. Click Yes to proceed. Any existing data will be deleted. If the
px4-400d is unable to overwrite the existing data, refer to the LenovoEMC support site for
instructions for cleaning a hard drive (see https://lenovo-na-
en.custhelp.com/app/answers/detail/a_id/30456). After cleaning the disk, re-install it in your px4-
400d.
You will not see the confirmation dialog for additional drives even if they contain data.
4. If this is the first drive installed in your px4-400d, you will be re-directed to Device Setup. If you
are not re-directed to Device Setup, see Accessing Your Device If It's Not Discovered.
5. If your px4-400d is already set up, you will be re-directed to the management console.
6. From the px4-400d management console, select the Drive Management icon under All
Features.
7. Your px4-400d displays the new hard drives in the bays where they are mounted.
8. To create a RAID Array, you must install a minimum of two hard drives. You can remain on the
Drive Management page while mounting the second drive.
If you are installing drives that contain data, they will be overwritten when you select them on the
Drive Management page. If you encounter issues overwriting a drive, refer to https://lenovo-na-
en.custhelp.com/app/answers/detail/a_id/30456 for instructions on how to clean the drive.
9. When all new drives have been detected, click Add a Storage Pool.
You can create a Storage Pool using one drive if desired. You will not have any RAID protection
options and can only select None from the RAID dropdown list while configuring your Storage
Pool.
10. Complete the Storage Pool configuration options and select the desired drives on which to build
the Storage Pool by checking the boxes next to them. All drives in a Storage Pool must be the
same model, manufacturer, and capacity.
Drive Management
74 Adding New Drives to Your px4-400d Network Storage
 Loading...