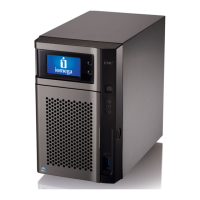
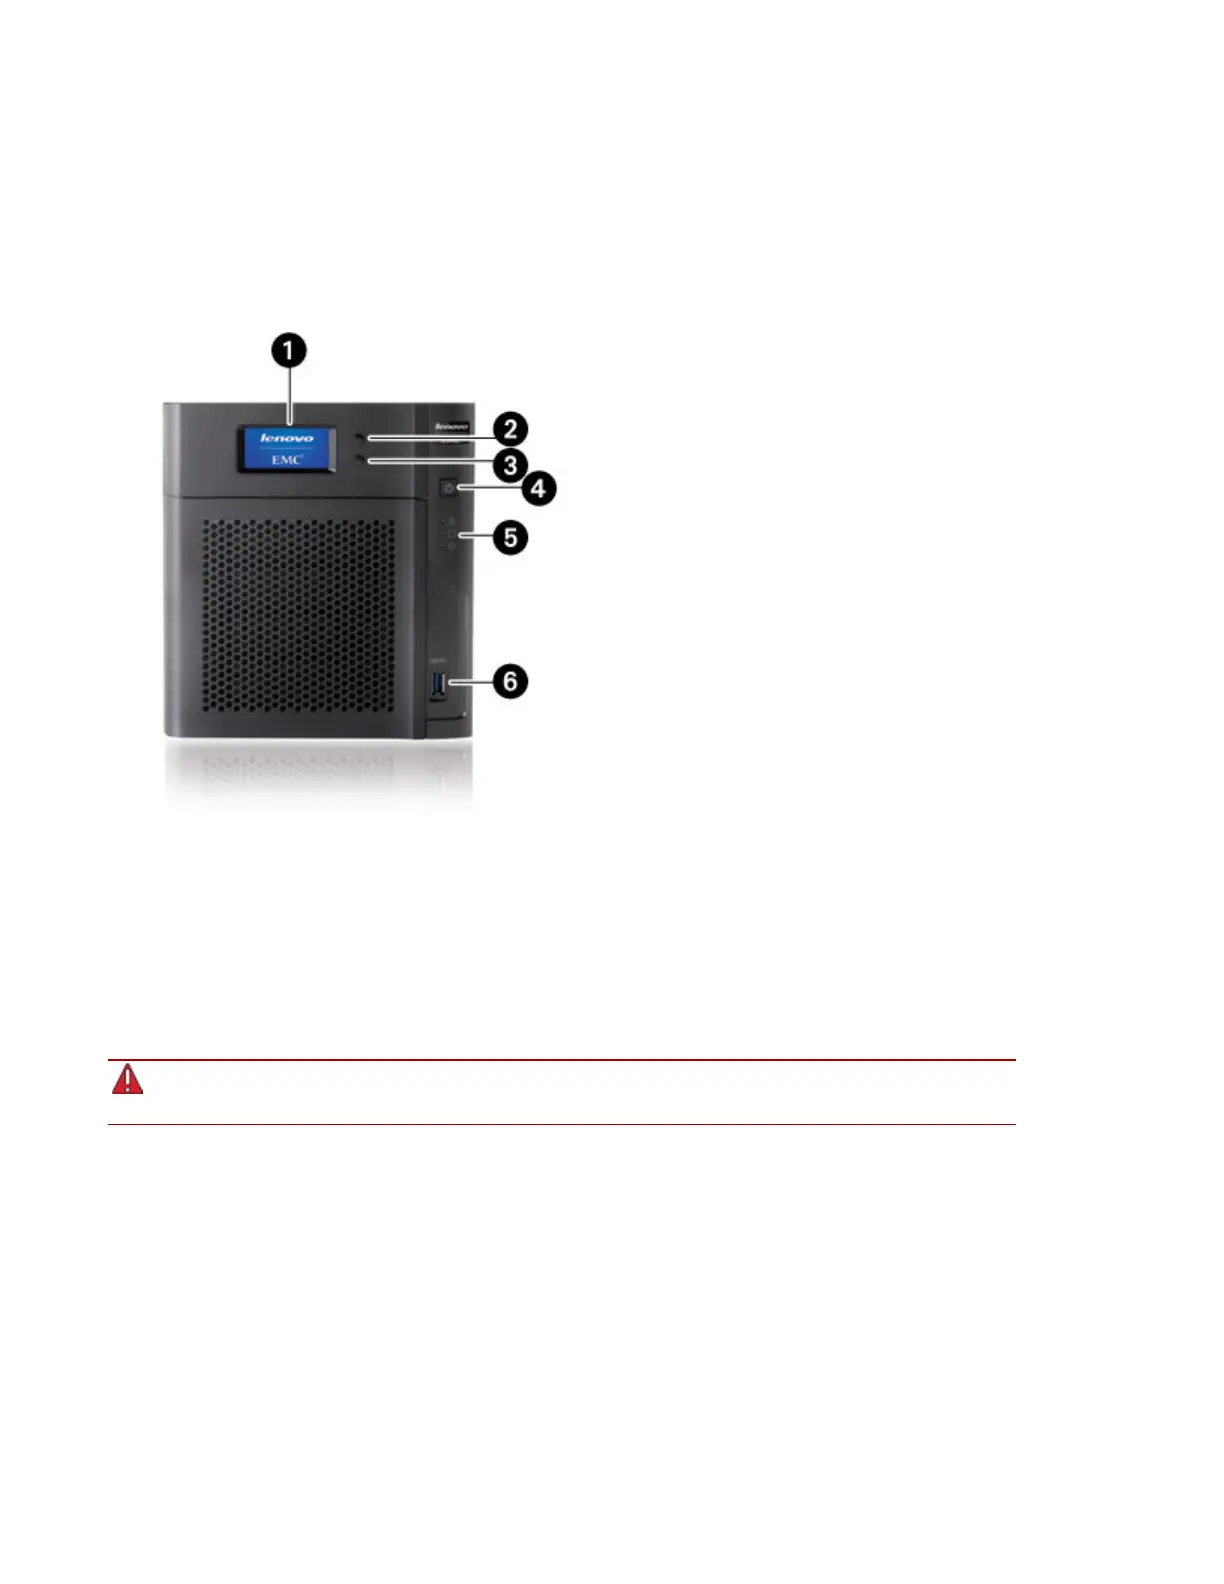
About the px4-400d Device Components
Front Panel
Controls, Status Indicators, and Ports
1. LCD Display — Scroll through the display screen to view the device name, free disk space, IP
address, and date and time. You can initiate a QuikTransfer Copy Job from the LCD and view or
dismiss any errors or warnings on the px4-400d without having to turn on your computer.
2. Next Button — Push the Next button to scroll to the next px4-400d info screen on the LCD display.
3. Select or Cancel Button — Push the Select or Cancel button to select a menu option on the LCD
display, or dismiss the current message.
4. Power Button — Press and release to power the px4-400d on or off.
Holding the power button for 4 seconds or more will result in a forced shutdown and could cause
data loss if data transfers are in process.
5. Status Indicators — three indicators from top to bottom:
System Status Indicator — Indicates system error.
● Flashing Red — System or drive error — LCD or system software indicates error.
● Solid Red — System error during boot.
Drive Activity Indicator — Displays the current status of drives in the px4-400d.
● Flashing Blue — Read and write activity occurring.
● Solid Red — Drive failure or drive error. LCD or system software indicates error.
Power Status Indicator — Displays the current operational status of the px4-400d.
● Solid White — unit is powered on; no faults.
Setting up Your px4-400d Network Storage
About the px4-400d Device Components 3
 Loading...