OPTIONAL PARTS
TC-15001-rev.3
5-7
To hold the snow protection hood securely on the outdoor unit against a strong wind or earthquake, a
VDIHW\URSHVKRXOGEHXVHGIRUUHLQIRUFHGLQVWDOODWLRQRIWKHKRRG8VHWKH¿HOGVXSSOLHGVDIHW\ZLUHURSHWR
prevent the outdoor unit from overturning.
Ɣ ,QVWDOOWKHVQRZSURWHFWLRQKRRGWRDYRLGIDFLQJWKHGLUHFWLRQRIDVHDVRQDORUVWURQJZLQG
Ɣ $SSO\WRXFKXSFRDWLQJRUVLOLFRQHVHDODQW¿HOGVXSSOLHGDWWKHVFUHZKROHVRIWKHRXWGRRUXQLWLQRUGHU
to prevent rusting.
Ɣ (YHQWKRXJKWKHXQLWVDUHFRPSULVHGRIVWDLQOHVVVWHHODQGRWKHUFRUURVLRQUHVLVWDQWPHWDOVWKH\PD\
rust if they are exposed to a salty environment, such as near a coastal region. Be attentive when
installing or maintaining the units.
Ɣ 7KHVQRZSURWHFWLRQKRRGLVRIDKHDY\ZHLJKW0RUHWKDQWZRSHUVRQVDUHUHTXLUHGIRULQVWDOODWLRQ%H
sure to wear protective equipment (such as gloves).
Ɣ 7KHVFUHZVDQGWKHVQRZSURWHFWLRQKRRGPXVWEHSURWHFWHGIURPVFUDWFKHVRUVFUDSHV7KHVHPD\EH
the cause of rusting. Handle the snow protection hood with care when installing or assembling.
Ɣ6HOHFWLRQRI,QVWDOODWLRQ3ODFH
(1) Install the outdoor unit at a suitable height with consideration for snow accumulation. Increase the
base height or additionally provide a frame under the unit (higher than snow accumulation), and install
the outdoor unit securely with anchor bolts.
(2) Secure enough service space with consideration for snow accumulation height and snow removal
operations.
(3) There must be no obstacles in the air discharge direction.
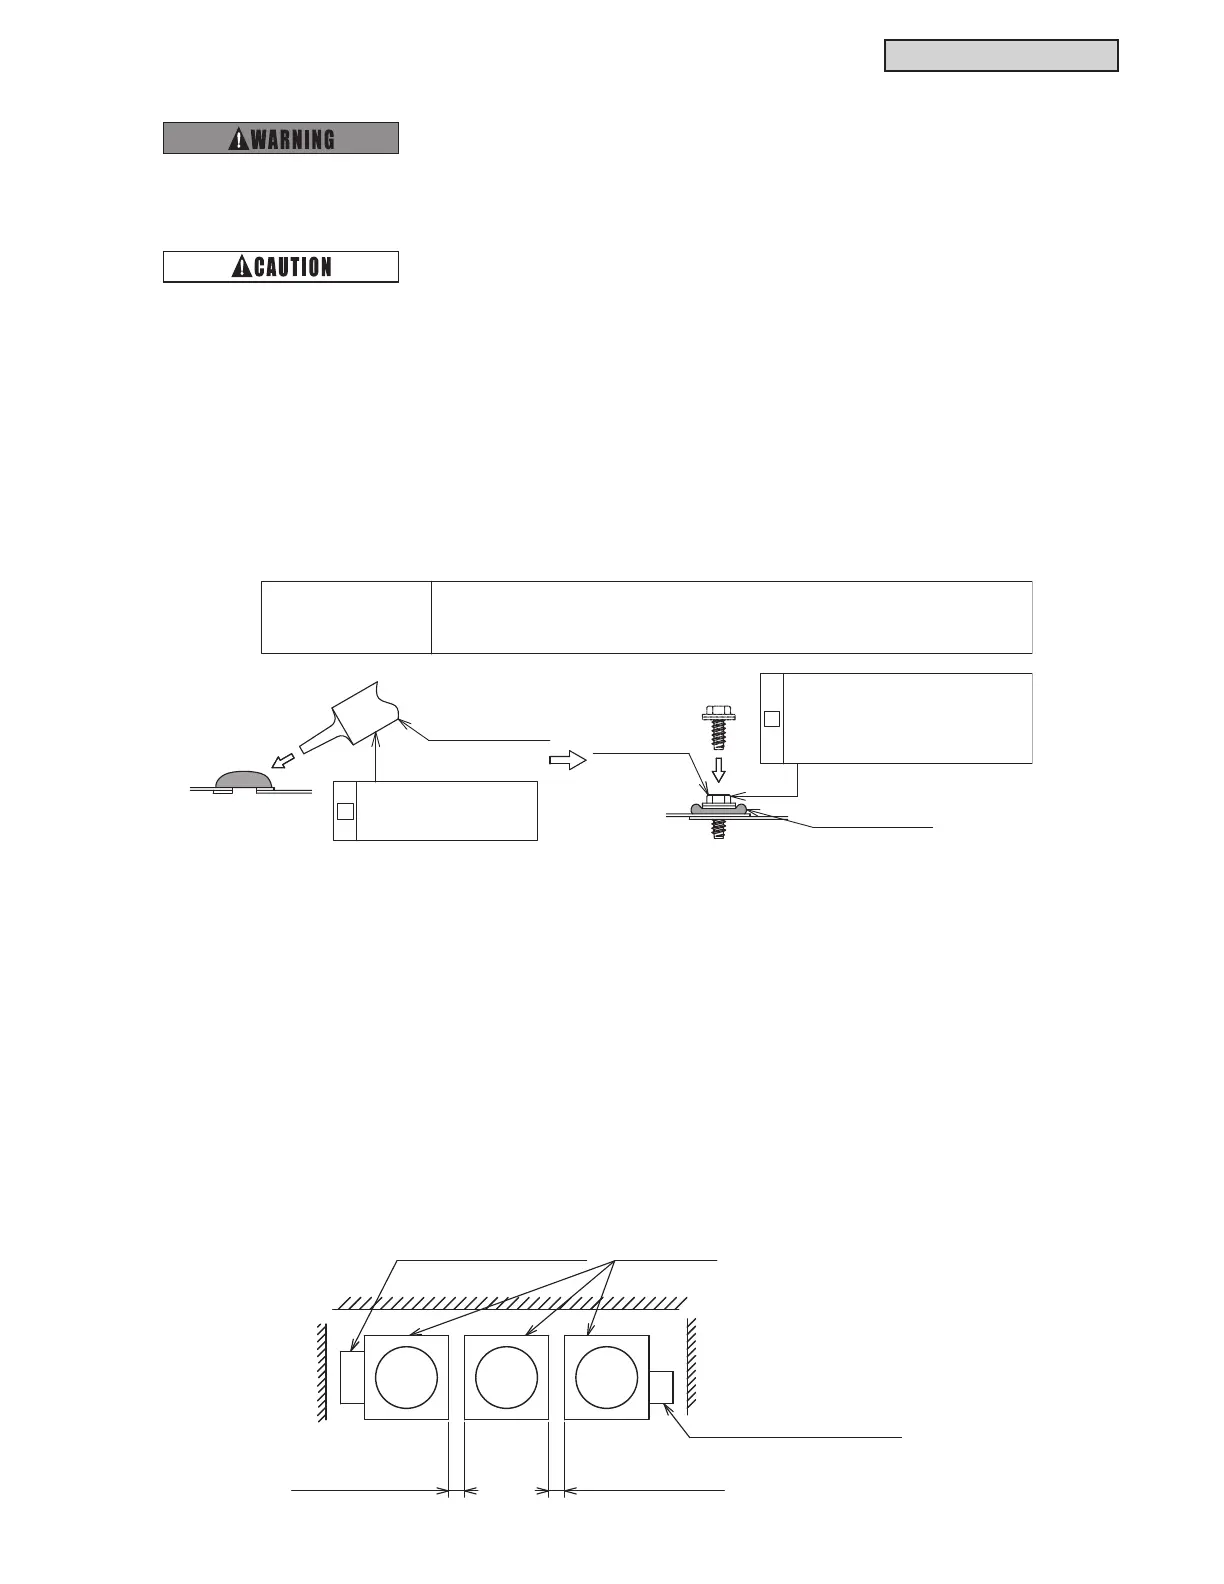
%HVXUHWRDSSO\WRXFKXSFRDWLQJRUFDXONLQJDJHQWIRUUXVWSURR¿QJZKHUHWKHUHDUHVFUHZV
(5) When multiple units are installed, provide service space as shown below.
< Service Space for Multiple Outdoor Units Installation >
< Sealing Procedures (Example) >
1
2
Silicone Sealant
(field-supplied)
(field-supplied)
Fill up the screw hole
with silicone sealant.
Preparation Articles
Silicone Sealant
Cloth (for wiping off surplus sealant)
Screw into the hole filled with
silicone sealant.
* Wipe off any excess with a
cloth.
Screw
(accessories)
Silicone Sealant
Hood for Left Side Air Inlet Outdoor Units
Min. 2 inches (50mm) Min. 2 inches (50mm)
Hood for Right Side Air Inlet
If no air inlet hood is provided
between outdoor units,
2 inches (50mm) or more space
is required for servicing.
 Loading...
