CONTROL SYSTEM
TC-15001-rev.3
6-39
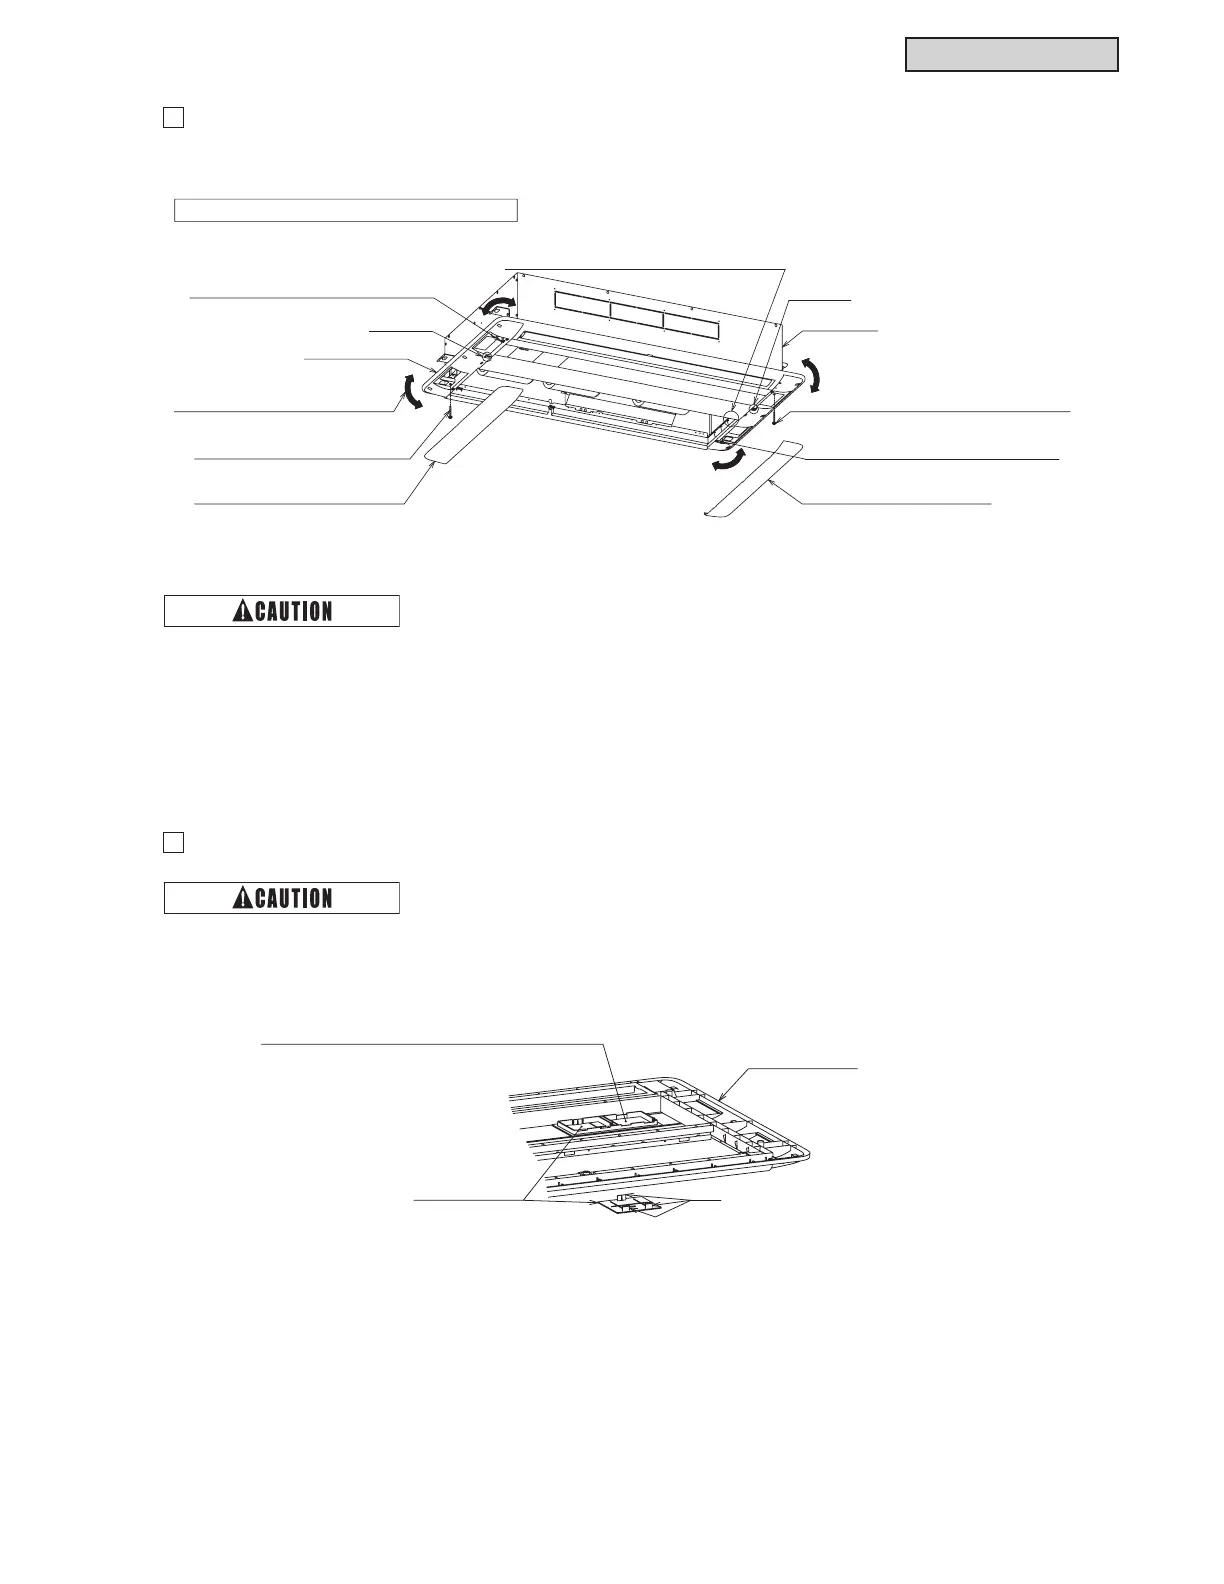
Follow the procedures from (1) to (5).
2
Optional Air Panel Removal
3
Controller Cover Removal
Letter “L”
Letter “R”
(3) Remove the panel securing screw at
the air intake side with the letter “L”.
(2) Remove the side pocket covers.
(two covers)
Side Pocket Cover (two covers)
Indoor Unit
Decorative Panel
(4) Loosen the panel securing screw
at the air intake side with the letter “R”.
(4) Loosen the panel securing screw
at the air outlet side with the letter “L”.
(3) Remove the panel securing screw
at the air outlet side with the letter “R”.
At least two (2) people are required for removing.
(1) Remove the connectors at the indoor unit side
and the decorative panel side.
(5) Twist the optional decorative panel
in a horizontal direction to remove.
Ɣ 'RQRWDSSO\H[FHVVLYHIRUFHUHPRYLQJWKHVLGHSRFNHWFRYHUV'RLQJVRPD\FDXVHGDPDJHRIWKH
FRXSOLQJKRRNVRIWKHVLGHSRFNHWFRYHUVRUPD\UHVXOWLQLQMXU\
Ɣ +ROGWKHGHFRUDWLYHSDQHOVHFXUHO\WRSUHYHQWLWIURPIDOOLQJZKHQLWLVUHPRYHG
Do not apply excessive force when removing the controller cover. Doing so cause of damage of the
FRXSOLQJKRRNVRIWKHFRQWUROOHUFRYHURUPD\UHVXOWLQLQMXU\
Decorative Panel
While pushing the three hooks
on the panel rear side with your fingers,
remove the control cover.
Attaching Position of Wireless Controller IR Receiver Kit
(Can be fixed on either right or left side.)
Controller Cover
(two pieces)
 Loading...
