Art. No. SC 1000 KNX
Assembling and connecting device with push-button extension module
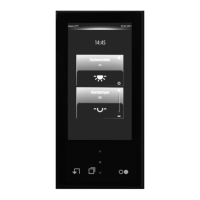
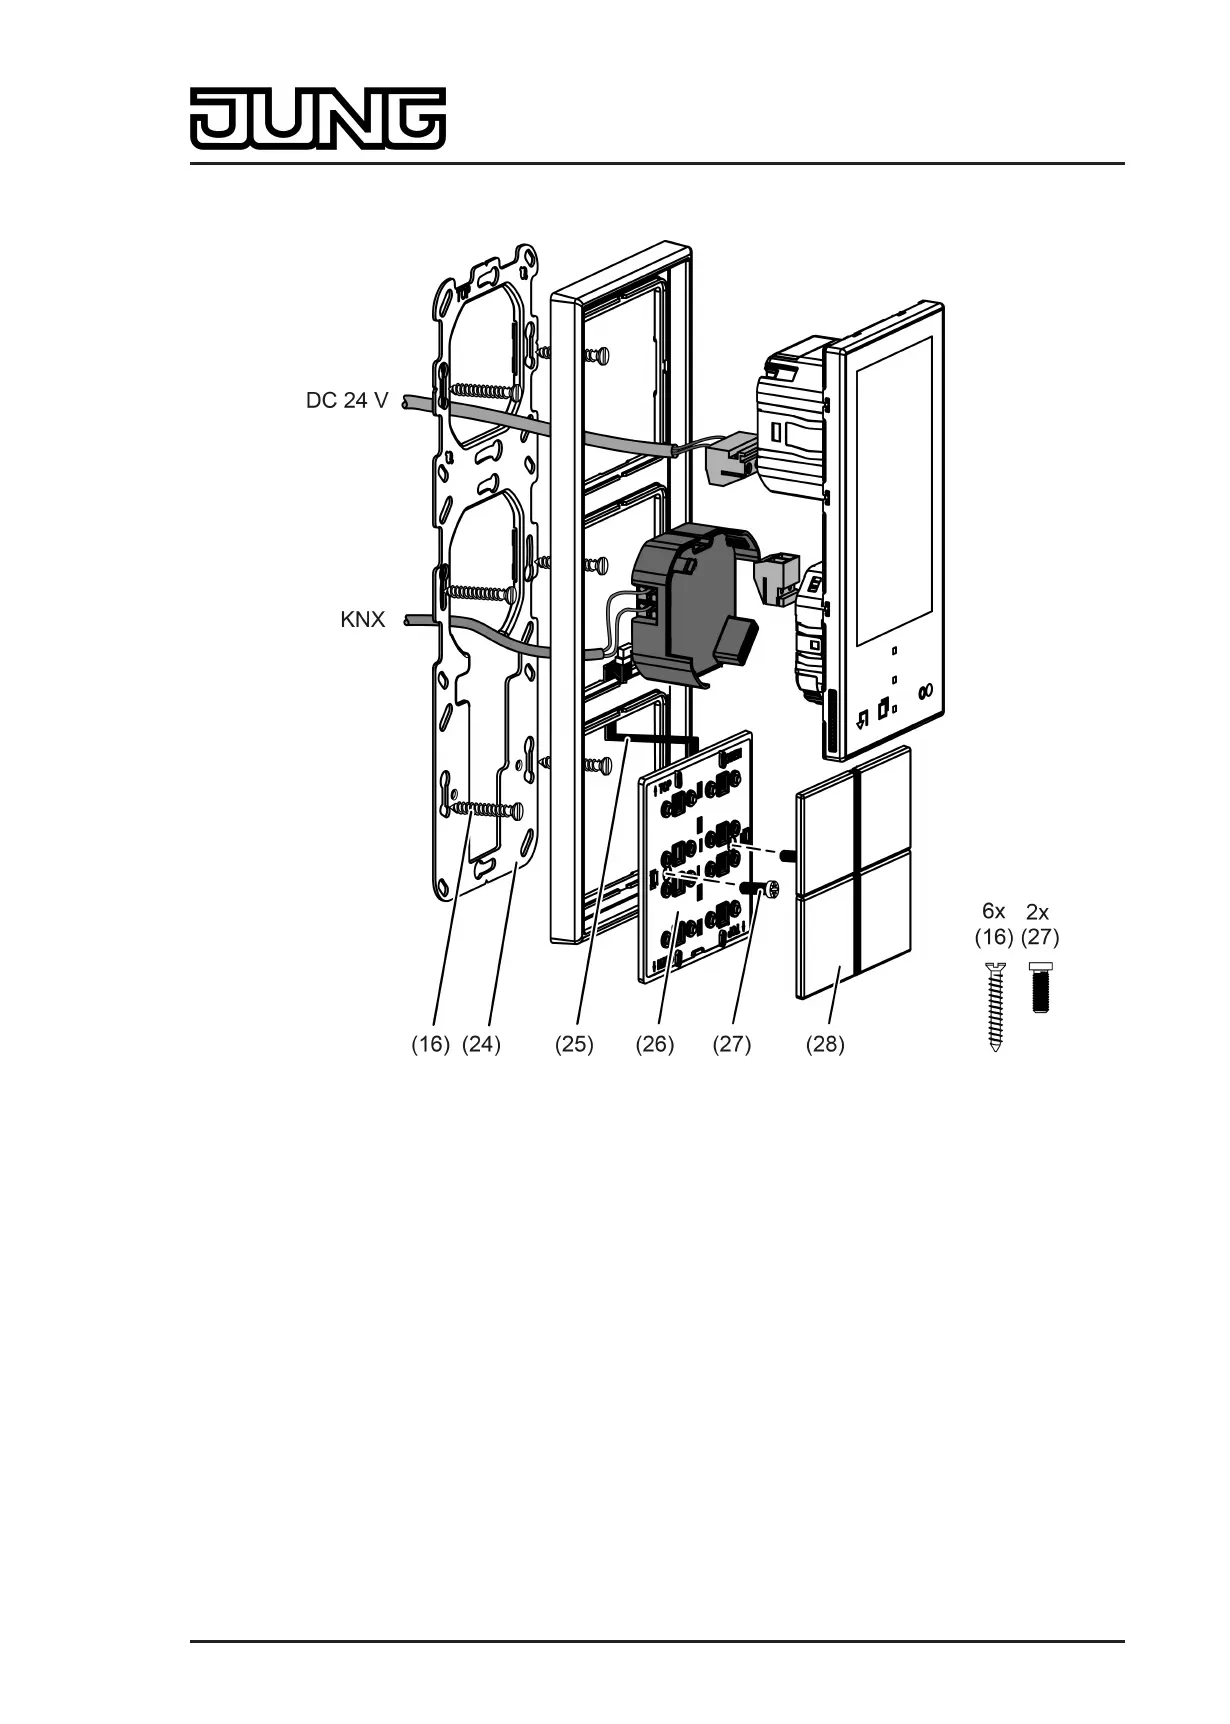
Figure 5: Device fitting with push-button extension module with 3-gang supporting frame
(16) Box screws
(24) Supporting frame 3-gang
(25) Connecting cable for push-button sensor extension module with plug
(26) Push-button extension module
(27) Fastening screws
(28) Design control surfaces for the extension module
Recommended installation height for the Smart Control: 1.40 m
One push-button extension module can be connected to each Smart Control.
Installation in three flush-mounted appliance boxes. Use 3-gang supporting frame from the
scope of supply of the Smart Control. Alternatively, no separate appliance box is necessary for
the push-button extension module. In this case, countersink the screws (27) into the wall, e.g.
with a ø 6 x10 mm hole. Use supporting frame as template.
Installation solely with frame from the LS ranges or FD design.
o Mount supporting ring (24) in the right orientation on the appliance boxes. Note marking
TOP. Use the enclosed box screws (16).
Page 13 of 347
Installation, electrical connection and operation
 Loading...