• Two grounding screws to secure the grounding lug
• LCD6-14A-L grounding lug
• A Phillips (+) screwdriver, number 2 (not provided)
• An electrostac discharge (ESD) grounding wrist strap (not provided)
To meet safety and electromagnec interference (EMI) requirements and to ensure proper operaon,
you must ground the router properly before connecng power.
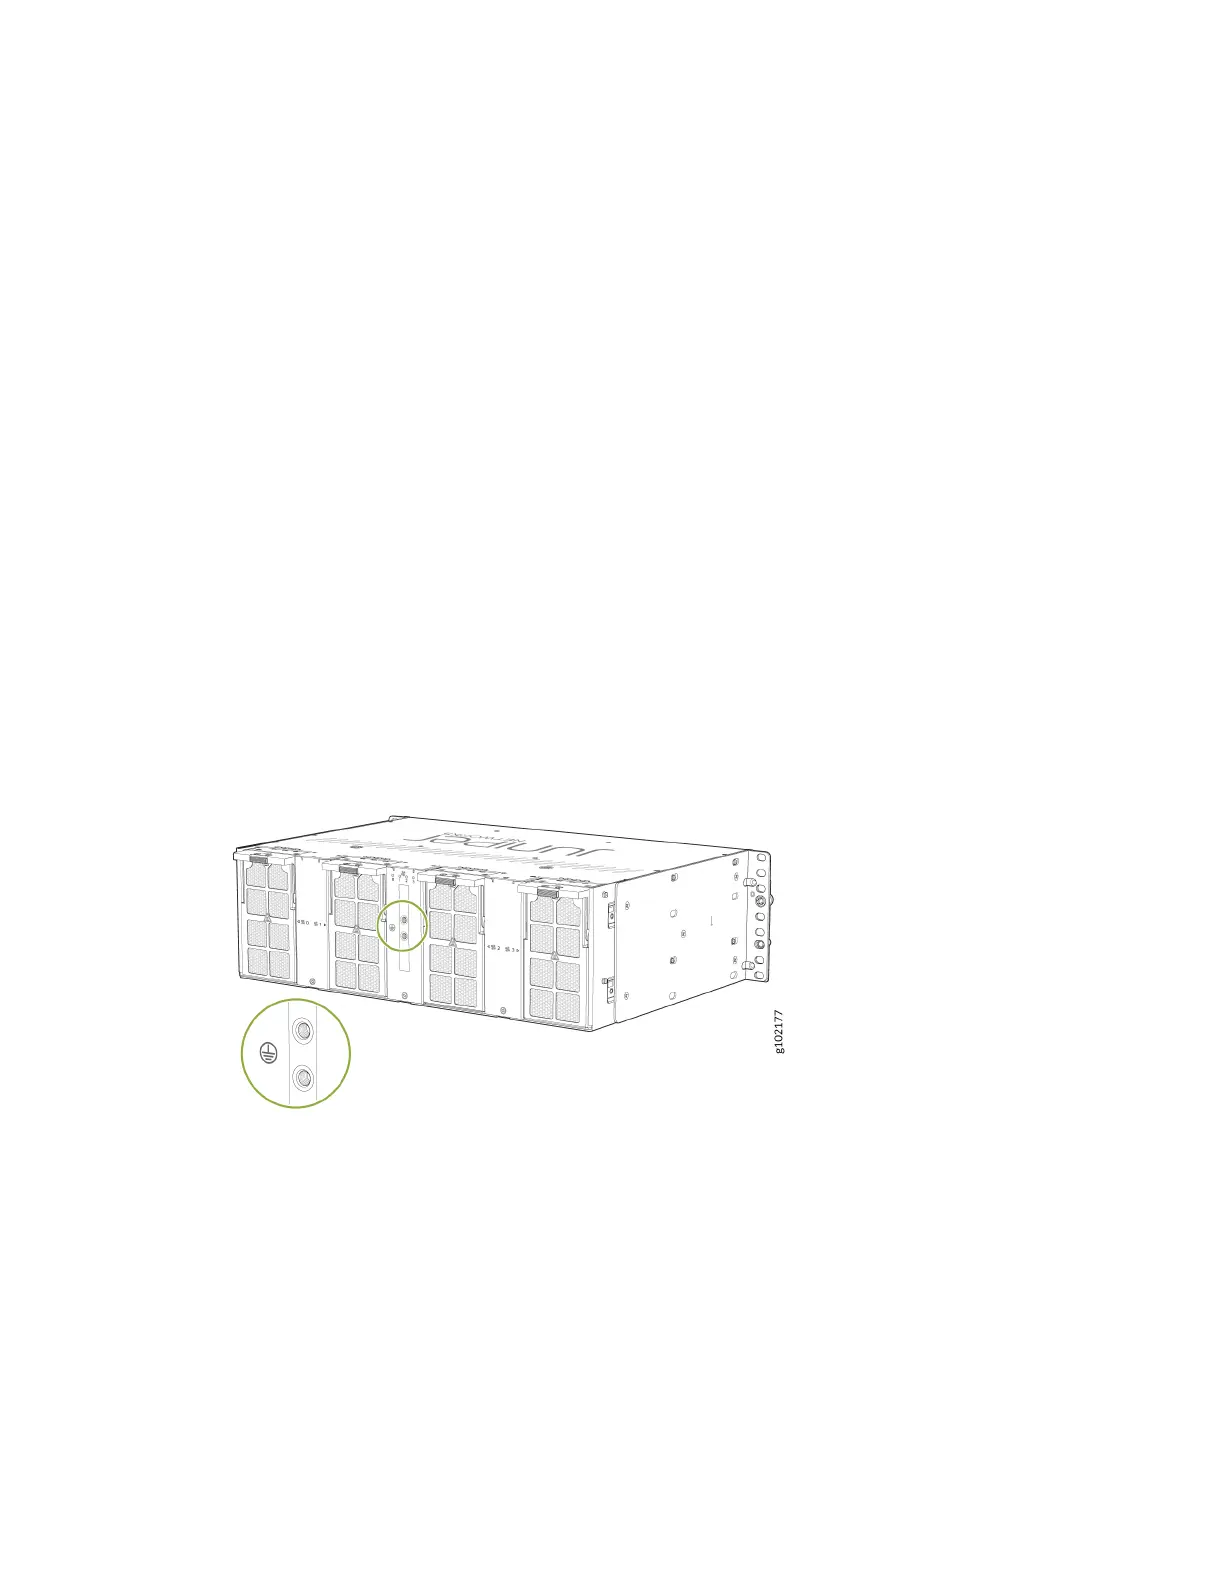
You must install the ACX7348 in a restricted-access locaon and ensure that the chassis is always
properly grounded. The ACX7348 has a two-hole protecve grounding terminal provided on the chassis
(see Figure 36 on page 80). Under all circumstances, use this grounding connecon to ground the
chassis. For AC-powered systems, you must also use the grounding wire in the AC power cord along
with the two-hole grounding lug connecon. This tested system meets or exceeds all applicable EMC
regulatory requirements with the two-hole protecve grounding terminal.
Before you connect earth ground to the protecve grounding terminal of an ACX7348 router, ensure
that a licensed electrician has aached an appropriate grounding lug to the grounding cable.
Figure 36: Protecve Grounding Terminal on the ACX7348 Router
To ground the ACX7348 router:
1. Verify that a licensed electrician has aached the cable lug that is provided with the router to the
grounding cable.
2. Ensure that all grounding surfaces are clean and brought to a bright nish before you make grounding
connecons.
3. Connect the grounding cable to a proper earth ground.
4. Place the grounding cable lug over the two-hole protecve grounding terminal on the rear side of the
chassis (see Figure 37 on page 81).
80