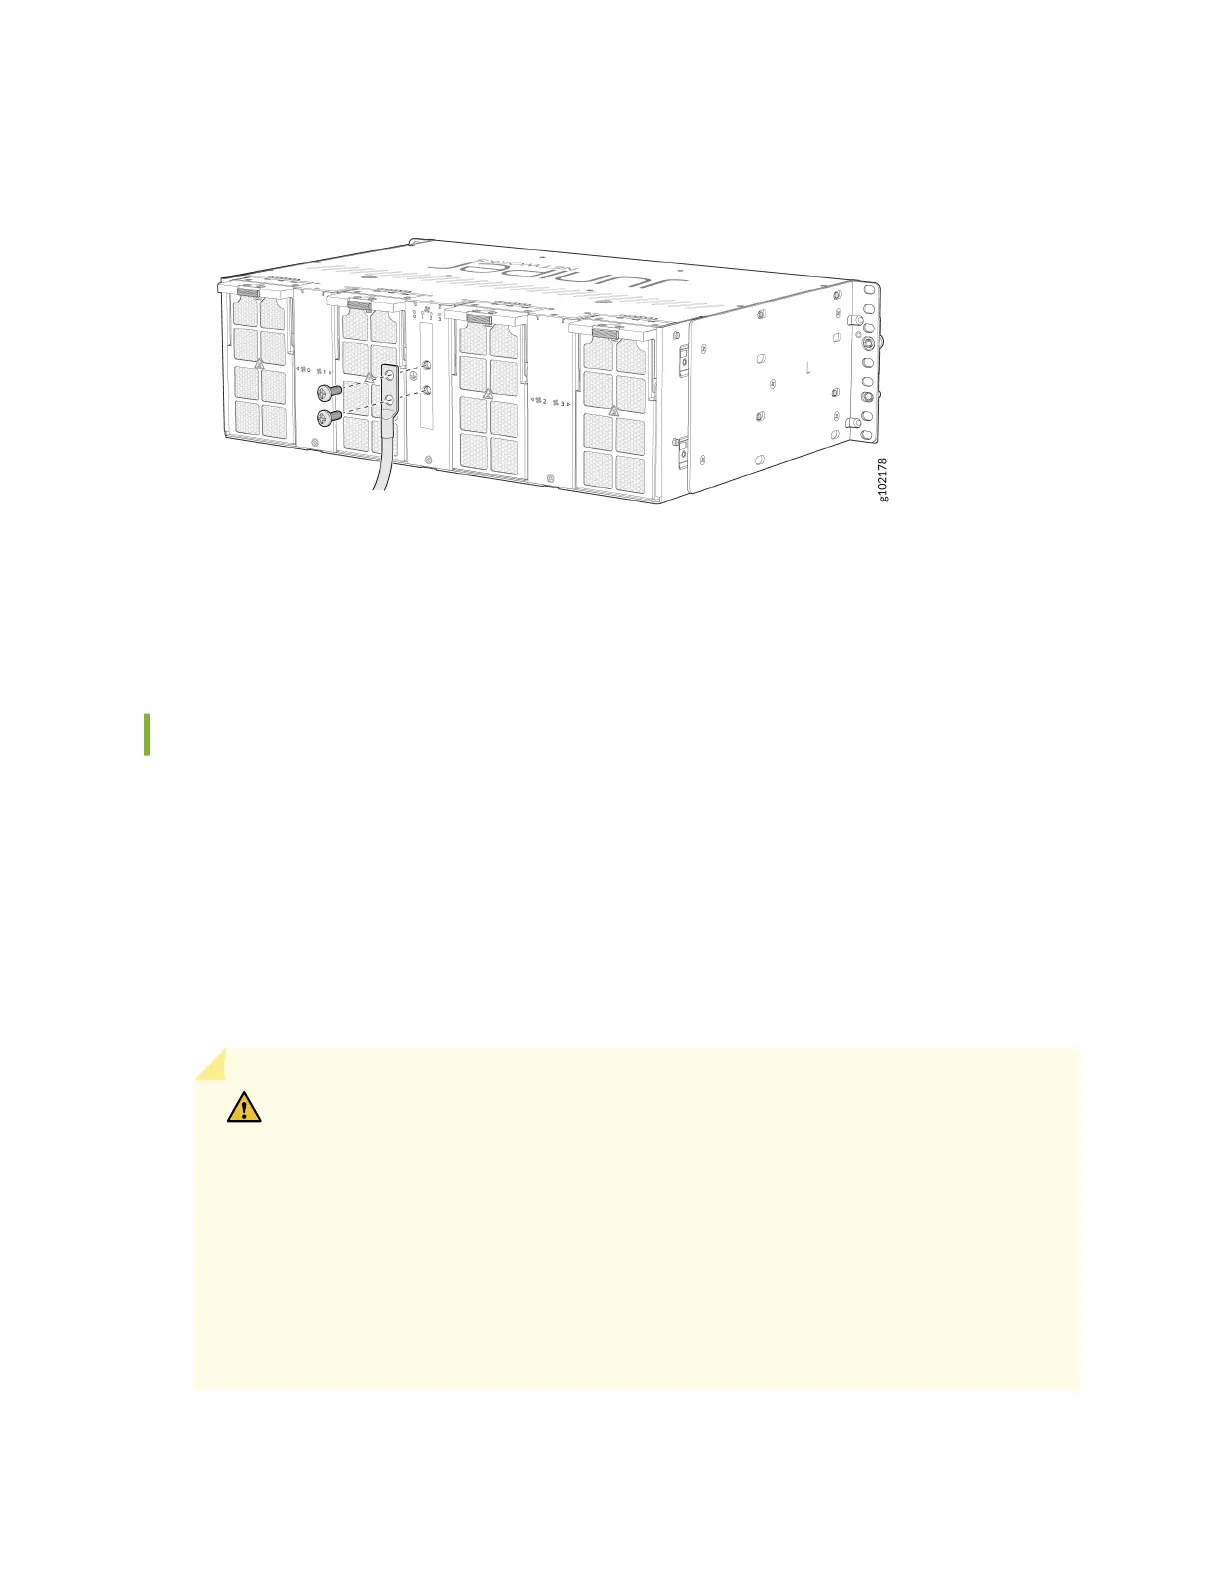
Figure 37: Connect the Grounding Cable to the ACX7348 Router
5. Secure the grounding cable lug with the screws.
6. Dress the grounding cable and verify that it does not touch or block access to router components,
and that it does not drape where people could trip over it.
Connect AC Power to an ACX7348 Router
Ensure that you have a power cord appropriate for your geographical locaon available to connect AC
power to the router.
Before you begin connecng AC power to the router:
• Ensure that you have taken the necessary precauons to prevent electrostac discharge (ESD)
damage (see Prevenon of Electrostac Discharge Damage).
• Ensure that you have connected the router chassis to earth ground.
CAUTION: Before you connect power to the router, a licensed electrician must aach
a cable lug to the grounding and power cables that you supply. A cable with an
incorrectly aached lug can damage the router (for example, by causing a short circuit).
To meet safety and electromagnec interference (EMI) requirements and to ensure
proper operaon, you must connect the chassis to earth ground before you connect it
to power. Under all circumstances, use the protecve grounding terminal on the router
chassis to connect to the earth ground. The router gains addional grounding when
you plug the PSM in the router to a grounded AC power outlet by using the AC power
cord appropriate for your geographical locaon.
• Install the power supply module (PSM) in the chassis.
81