20
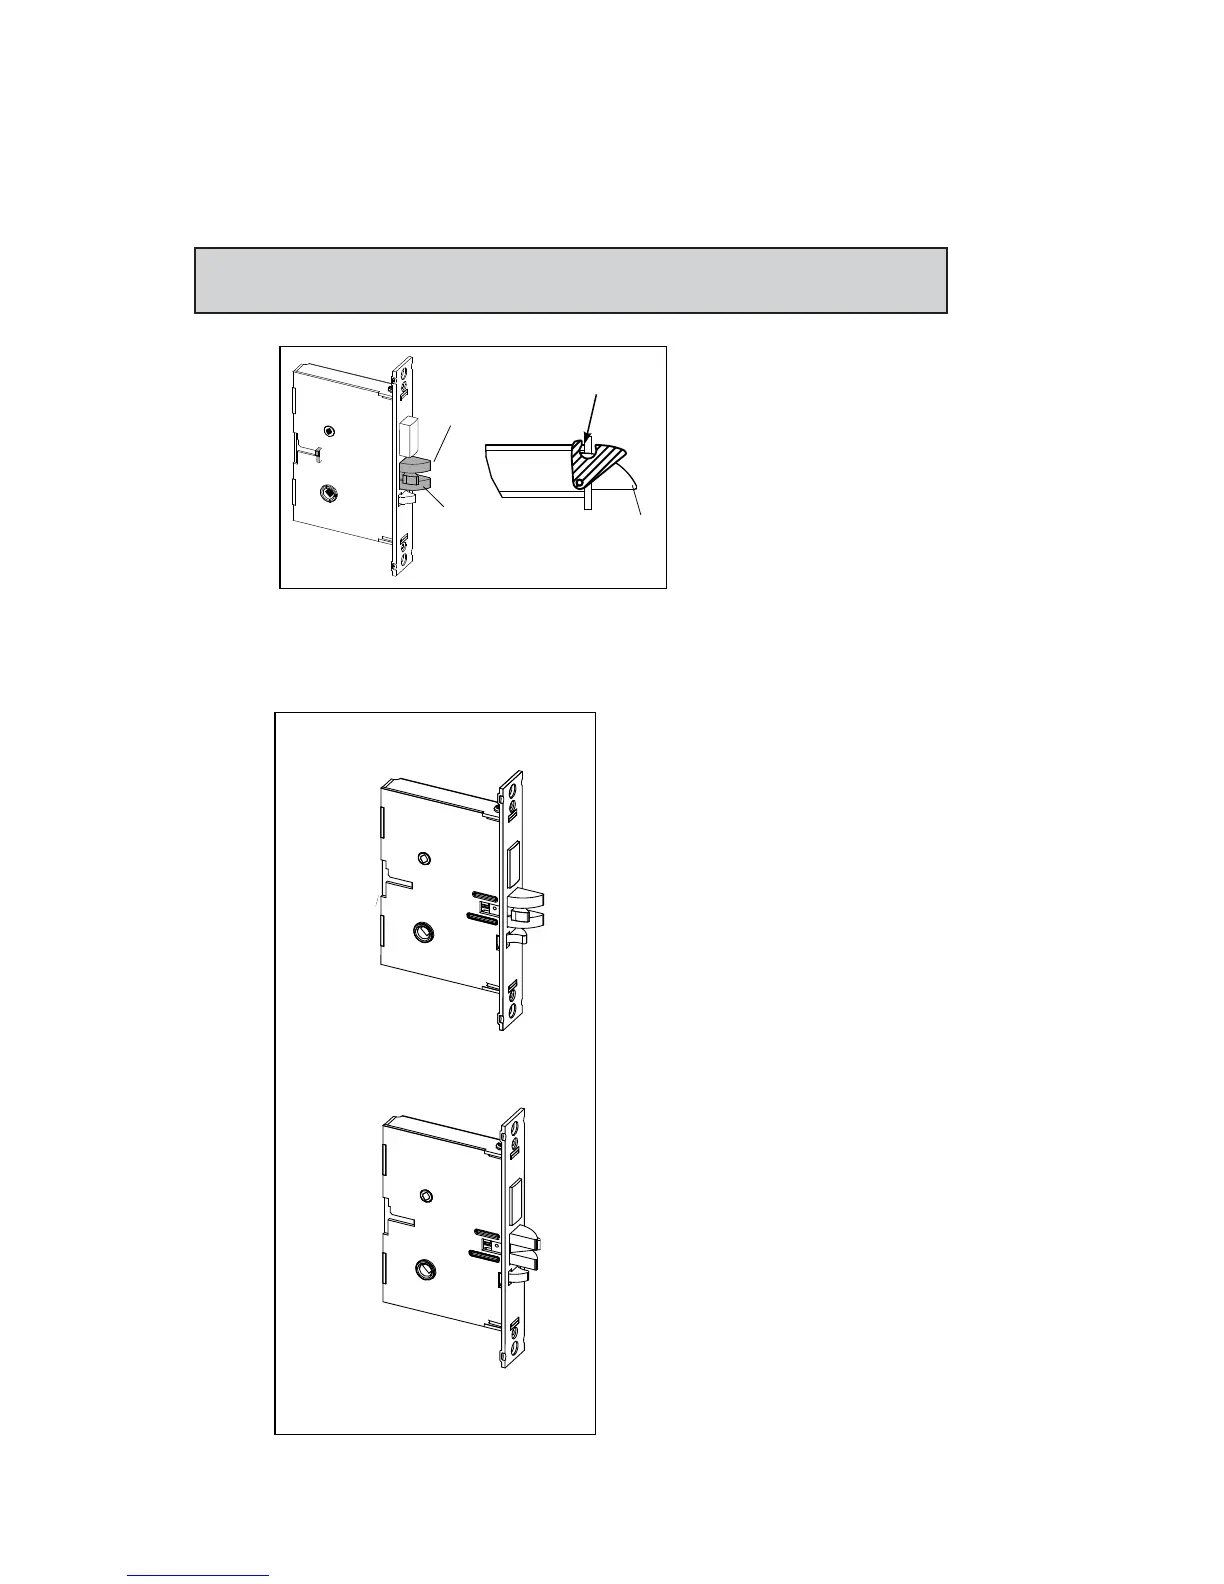
f. The mortise should look like the diagram below. (Check the orientation
of the latch bolt and auxiliary latch.) Check the bevel of the mortise and
change it if required as described in section B-4, paragraph 6.
For LH (left hand) and RHR
(right hand reverse)
For RH (right hand) and
LHR (left hand reverse)
ASM
W
V
W
V
Only apply to mortise no deadbolt,
auto-deadbolt and armed automatic deadbolt
e. Release the latch bolt (L). Position the latch bolt so that the bottom
tooth of the anti-friction latch (F) remains inside the mortise case as
shown.
Note: If the tooth of (F) is outside the mortise, you will not be able to re-
assemble the faceplate on the mortise.
L
F
L
F (tooth)
mortise
bottom view