9
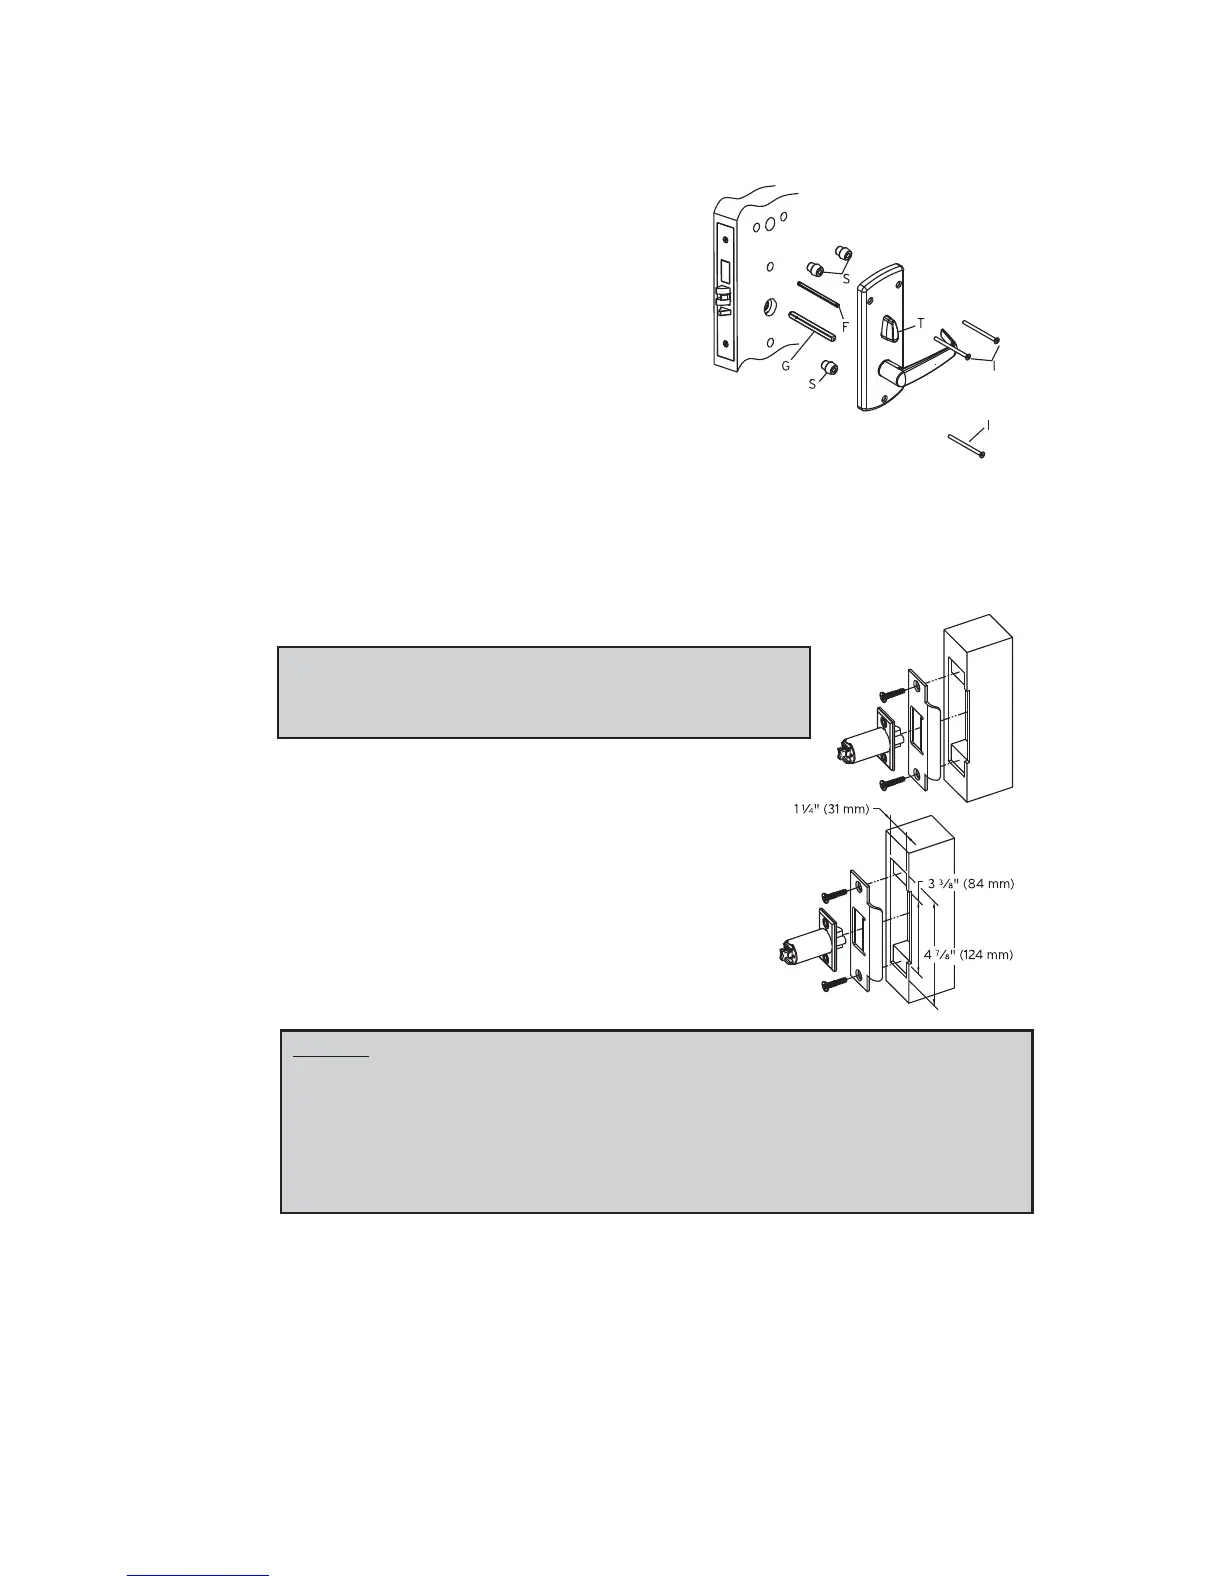
A-5. INSTALLING THE STRIKE
Note: Use only the strike and strike box supplied. The
use of non-approved parts will result in a functionality
problem and may void the warranty.
1. Mark location of strike on the door frame, making
certain that the strike opening is aligned with
latch bolt.
2. Mortise doorframe for strike
3
⁄32" (3 mm)
deep minimum to dimensions shown. Make
cut out for dust box. Secure strike to the
door frame using two 1" (25 mm)
combination screws.
Caution
: Check the operation of the latch by making sure that the deadlatch
stops against the strike as shown and does not slide into the strike opening
when the door is closed. If that situation occurs, then a total lockout may
occur. This will void our warranty of the complete lock mechanism. If
necessary, correct the door over-travel by using the rubber bumpers as
described in Section P (Installing Rubber Bumpers).
5. Put the thumbturn (T) in a vertical
position. Assemble 3 spacers (S) on
the door (for recent models only).
Place the inside trim assembly on the
door so that the upper and lower
spindles (F) and (G) engage the
thumbturn and the inside lever. Fasten
to the outside housing using the three
1/8" hex drive mounting screws (I).
Install the screws without tightening.
Verify the inside lever and thumbturn
operates smootly. If not move the
inside and outside housings slightly.
Then tighten the screws.