GETTING STARTED
:>/:::::;
CONTROL
ADJUST A
- KEYPAD DISABLED
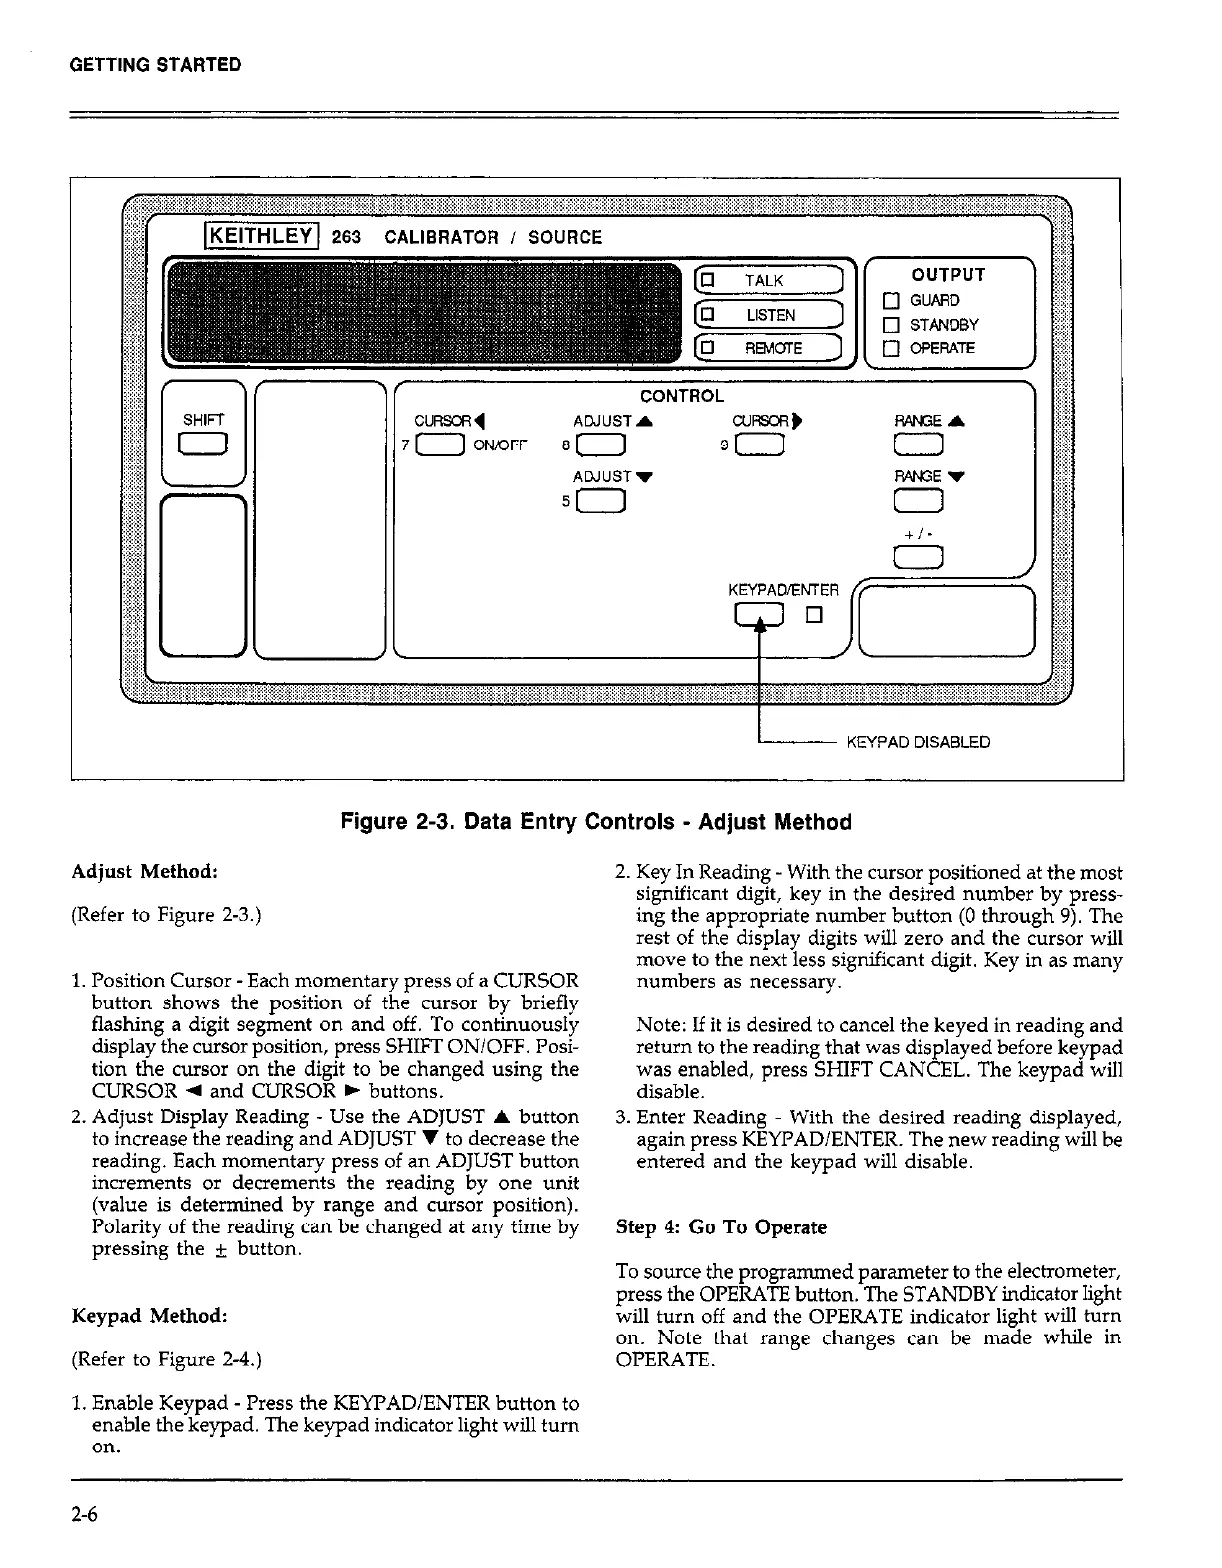
Figure 2-3. Data Entry Controls - Adjust Method
Adjust Method:
(Refer to Figure Z-3.)
1. Position Cursor-Each momentary press of a CURSOR
button shows the position of the cursor by briefly
flashing a digit segment on and off. To continuously
display the cursor position, press SHIFT ON/OFF. Posi-
tion the cursor on the digit to be changed using the
CURSOR 4 and CURSOR b buttons.
2. Adjust Display Reading - Use the ADJUST A button
to increase the reading and ADJUST V to decrease the
reading. Each momentary press of an ADJUST button
increments or decrements the reading by one unit
(value is determined by range and cursor position).
Polarity of the reading can be changed at any time by
pressing the & button.
Keypad Method:
(Refer to Figure Z-4.)
1. Enable Keypad - Press the KEYPAD/ENTER button to
enable the keypad. The keypad indicator light will turn
OIL
2. Key In Reading - With the cursor positioned at the most
significant digit, key in the desired number by press-
ing the appropriate number button (0 through 9). The
rest of the display digits will zero and the cursor will
move to the next less significant digit. Key in as many
numbers as necessary.
Note: If it is desired to cancel the keyed in reading and
return to the reading that was displayed before keypad
was enabled, press SHIFT CANCEL. The keypad will
disable.
3. Enter Reading With the desired reading displayed,
again press KEYPAD/ENTER. The new reading will be
entered and the keypad will disable.
Step 4: Go To Operate
To source the programmed parameter to the electrometer,
press the OPERATE button. The STANDBY indicator light
will turn off and the OPERATE indicator light will turn
on. Note that range changes can be m&ie while in
OPERATE.
2-6