Detaching the Rotary Harvesting Unit
KM00321,0000279 1918FEB101/1
KM00321,0000263 1918FEB101/1
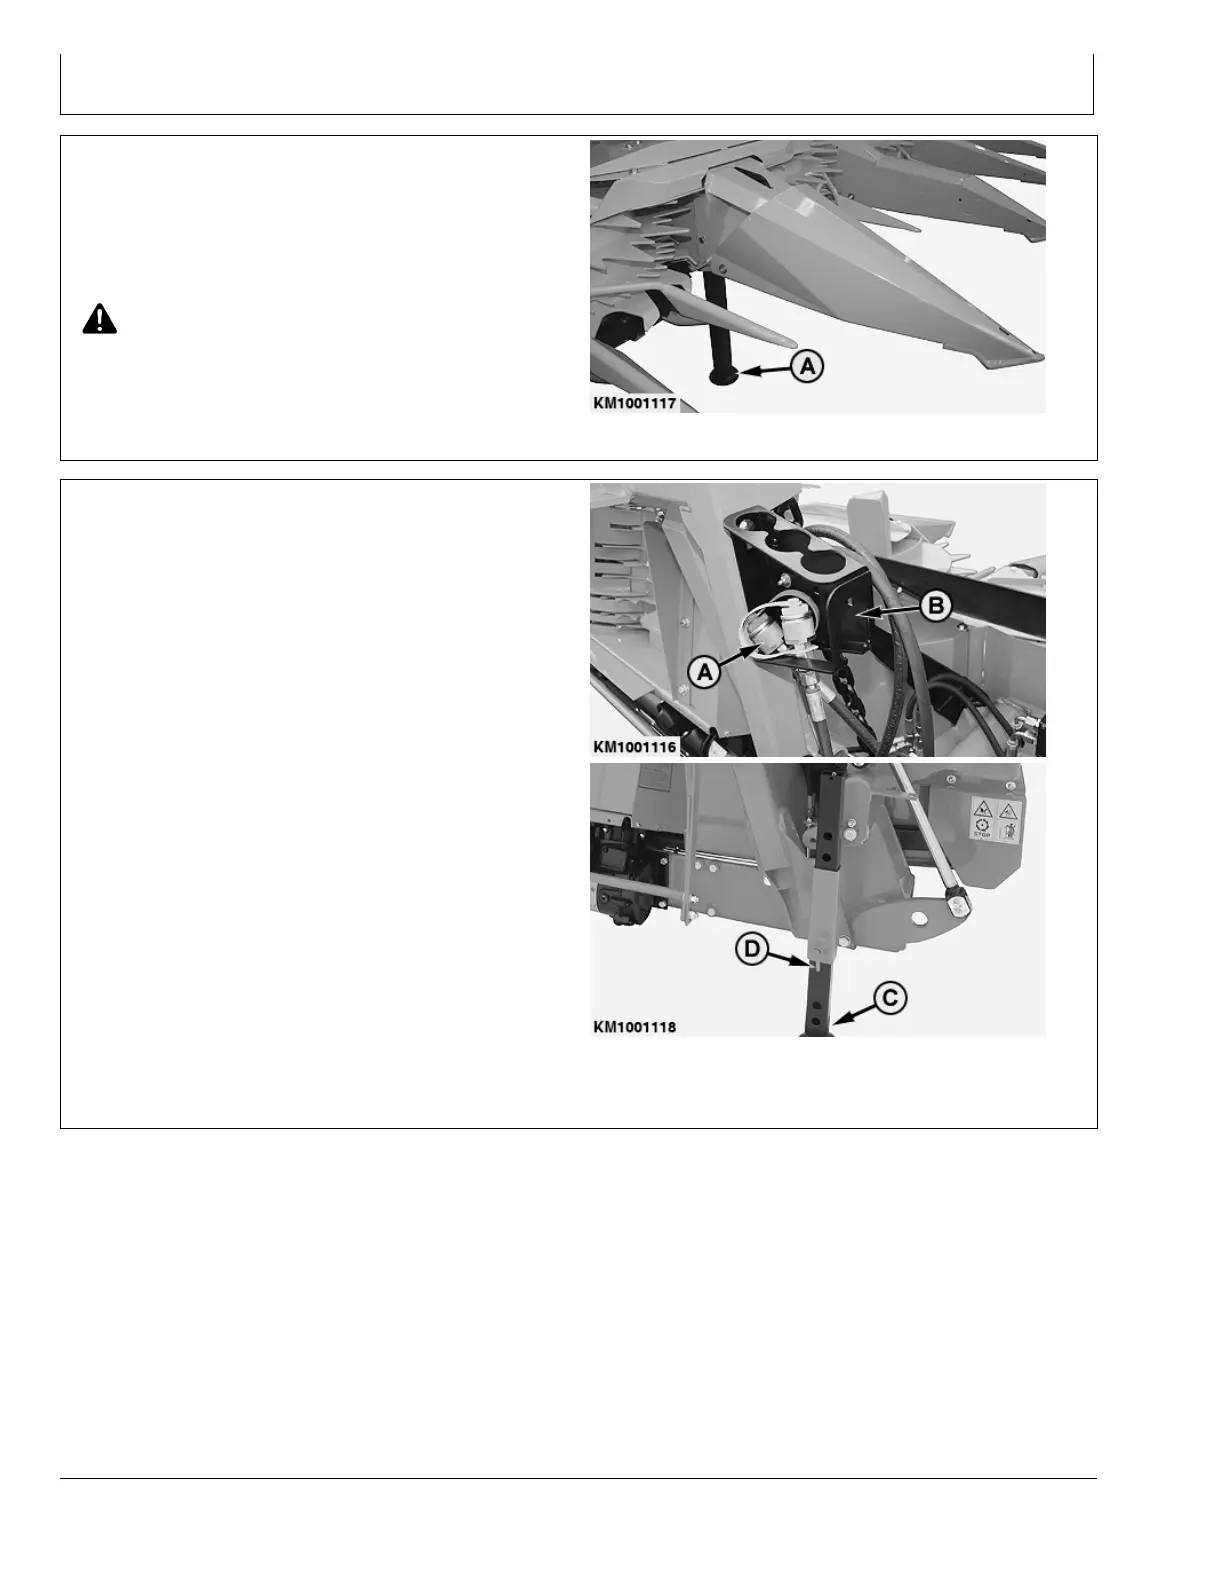
Install Front Jackstand (Except on
Rotary Harvesting Units for CLAAS
Forage Harvesters)
Before detaching the rotary harvesting unit, remove the
dummy plug and install front jackstand (A).
CAUTION: When working underneath the rotary
harvesting unit, it must be supported securely.
A—Jackstand
KM1001117 —UN—18FEB10
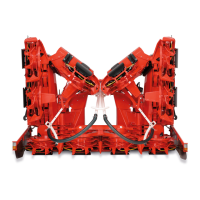
Detach Rotary Harvesting Unit
NOTE: Fold the rotary harvesting unit before
setting it down.
1. Lower the rotary harvesting unit completely onto a flat
level surface.
2. Shut off the forage harvester’s engine, remove the key
from the ignition and apply the park brake.
3. Disconnect hydraulic couplers (A) from the forage
harvester and store them in the provided support (B).
4. Pull off the drive shaft.
5. At left and right, lower jackstands (C) and lock them
at a suitable height. To do this, pull out springloaded
pin (D) and let it reengage when the jackstand has
reached the correct height.
NOTE: Leave the rotary harvesting unit standing at
a height that allows the unit to be reattached
to a forage harvester at a later time. Never
select a height that is too low.
6. Open the locking device on the attaching frame.
7. Start the forage harvester, lower the feed roll housing
further and drive out of the rotary harvesting unit’s
attaching frame.
A—Hydraulic couplers
B—Bracket
C—Jackstand
D—Pin
KM1001116 —UN—18FEB10KM1001118 —UN—18FEB10
401
040810
PN=50