Section 8
High Pressure Water System
20479291
2-2012/Rev 04
8-22
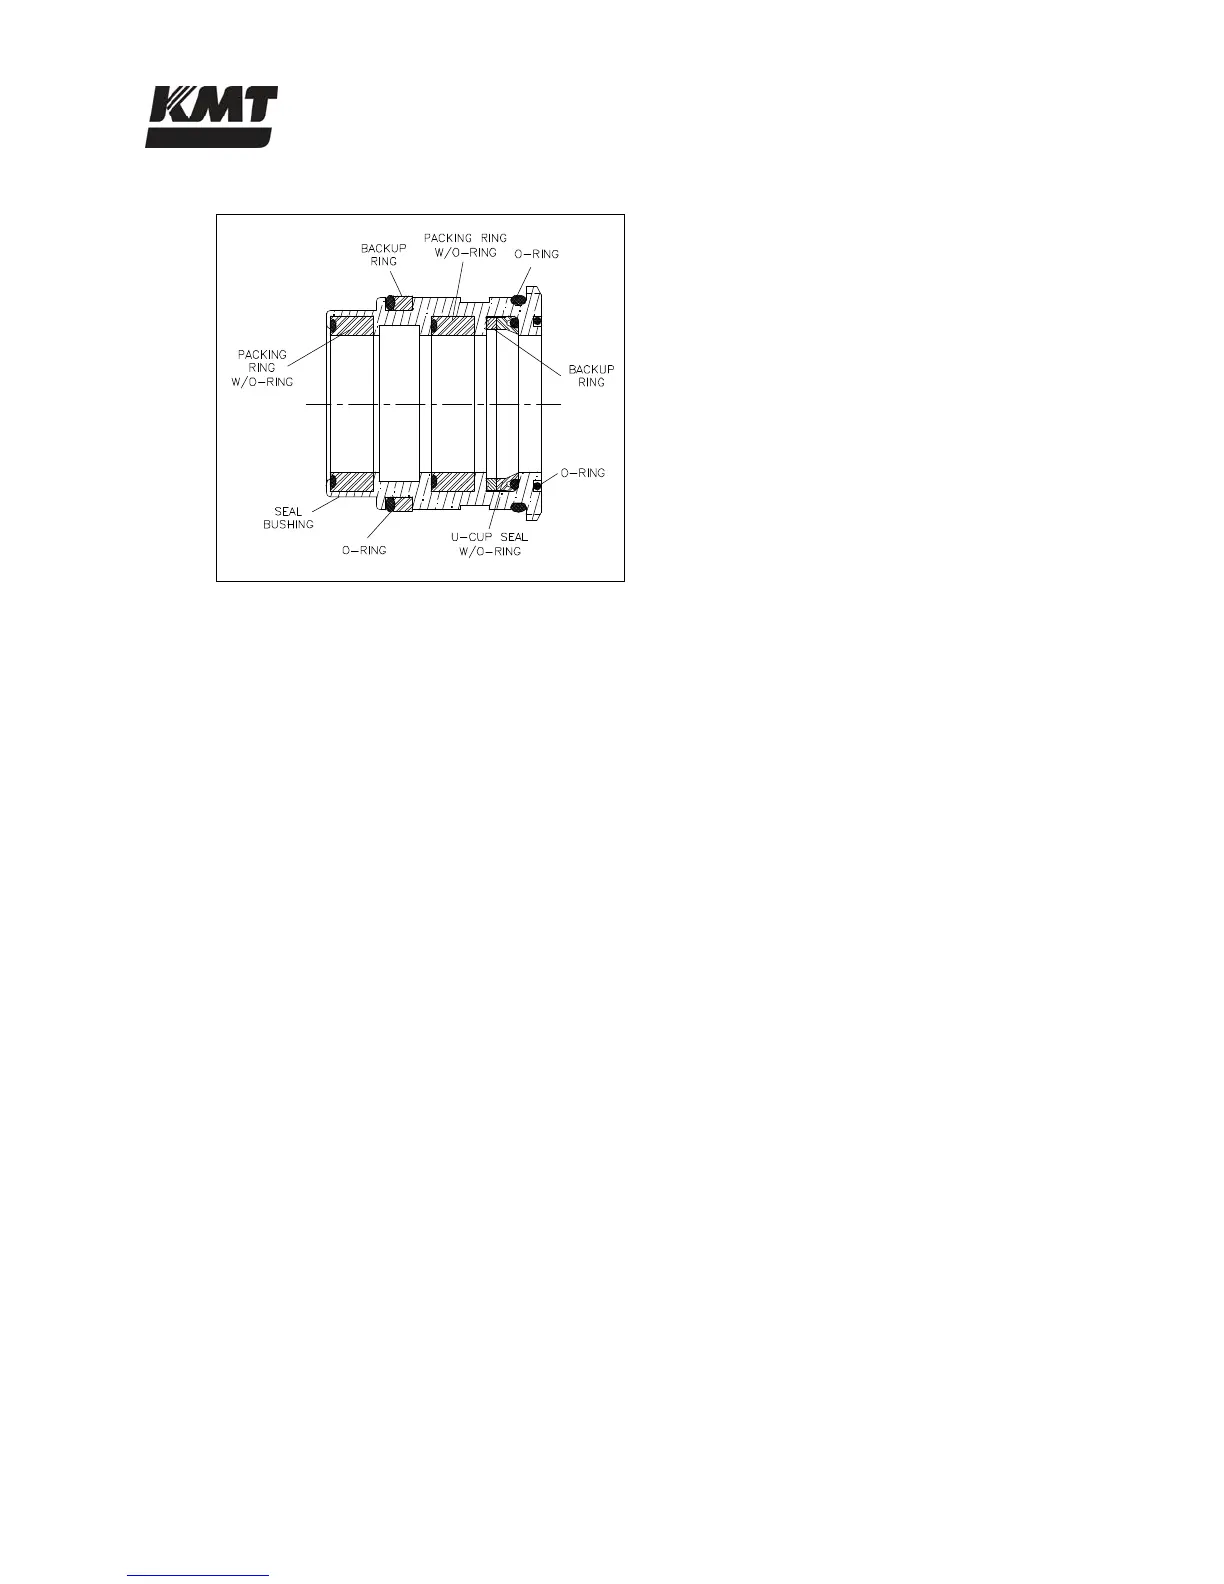
Figure 8-18: Hydraulic Cartridge Seal
1. Carefully remove the worn seals and o-rings from the cartridge by pushing them with a
plastic or wooden dowel, or similar object. Remove the seals closest to the open ends
first, and work toward the center.
2. Inspect the seals for unusual wear, deformation or cuts. Note any unusual buildup of solid
material or debris creating possible leak paths.
3. Inspect the surface of the cartridge body for scratches, deformation, signs of metal-to-
metal contact or other unusual wear. Carefully examine the surface of the grooves on the
inside diameter. Note any scratches in the axial direction that could create a leak path.
4. Apply FML-2 grease to the inside and outside diameter of the cartridge body, and to the
individual seal components.
5. Install the seals, starting in the center and working toward the ends. See Figure 8-18 for
the proper orientation of the u-cup seals. If available, use the seal installation tool to
install the u-cup seals. See Figure 8-23, Pneumatic Valve Seal Tools.
6. Verify that the u-cup o-rings are properly positioned after installation.
7. When the seal components are properly installed, apply FML-2 grease to the exposed
surfaces of the seals and slide the hydraulic cartridge seal over the plunger, into the cavity
of the hydraulic cylinder head.
8. Thoroughly clean the bushing retainer flange, including the cross-drilled weep holes.
Install the retainer flange over the plunger.
9. Install the retaining ring, ensuring the retaining ring fully seats inside the groove in the
hydraulic cylinder head.
The o-rings on the hydraulic cartridge will take up clearance. Tap lightly on the bushing
retainer flange with the plunger removal tool to compress the o-rings enough to start the
retaining ring in the groove. Use a flat blade screwdriver to push on the outer edge of the
retainer flange while working one end of the retaining ring into the groove. The retainer
flange should tilt or tip enough to allow the retaining ring to move into the groove.
Continue working the ring into the groove while tilting the retainer flange until the ring is
fully seated.
 Loading...