Appendices
291
Installing the EXB-MOSS
Before you perform the installation, be sure to read the fore-
going section “Safety precautions” and “Please note when
installing an option board/memory.”
While performing the installation, be careful of any
sharp or pointed edges of the TRITON STUDIO or the
option board.
You must leave the AC power cable disconnected until
you have completed all steps of installing the option
board.
1 You will need a “+” (plus) screwdriver, and some maga-
zines or other material (to prevent damage to the joystick
and knobs etc.: see diagram below).
2 Turn off this instrument, and disconnect the AC power
cable and any other cables by which other devices are
connected.
3
Make sure that the EXB-PCM/sample memory (RAM) slot
cover is closed, and that the screw has been tightened.
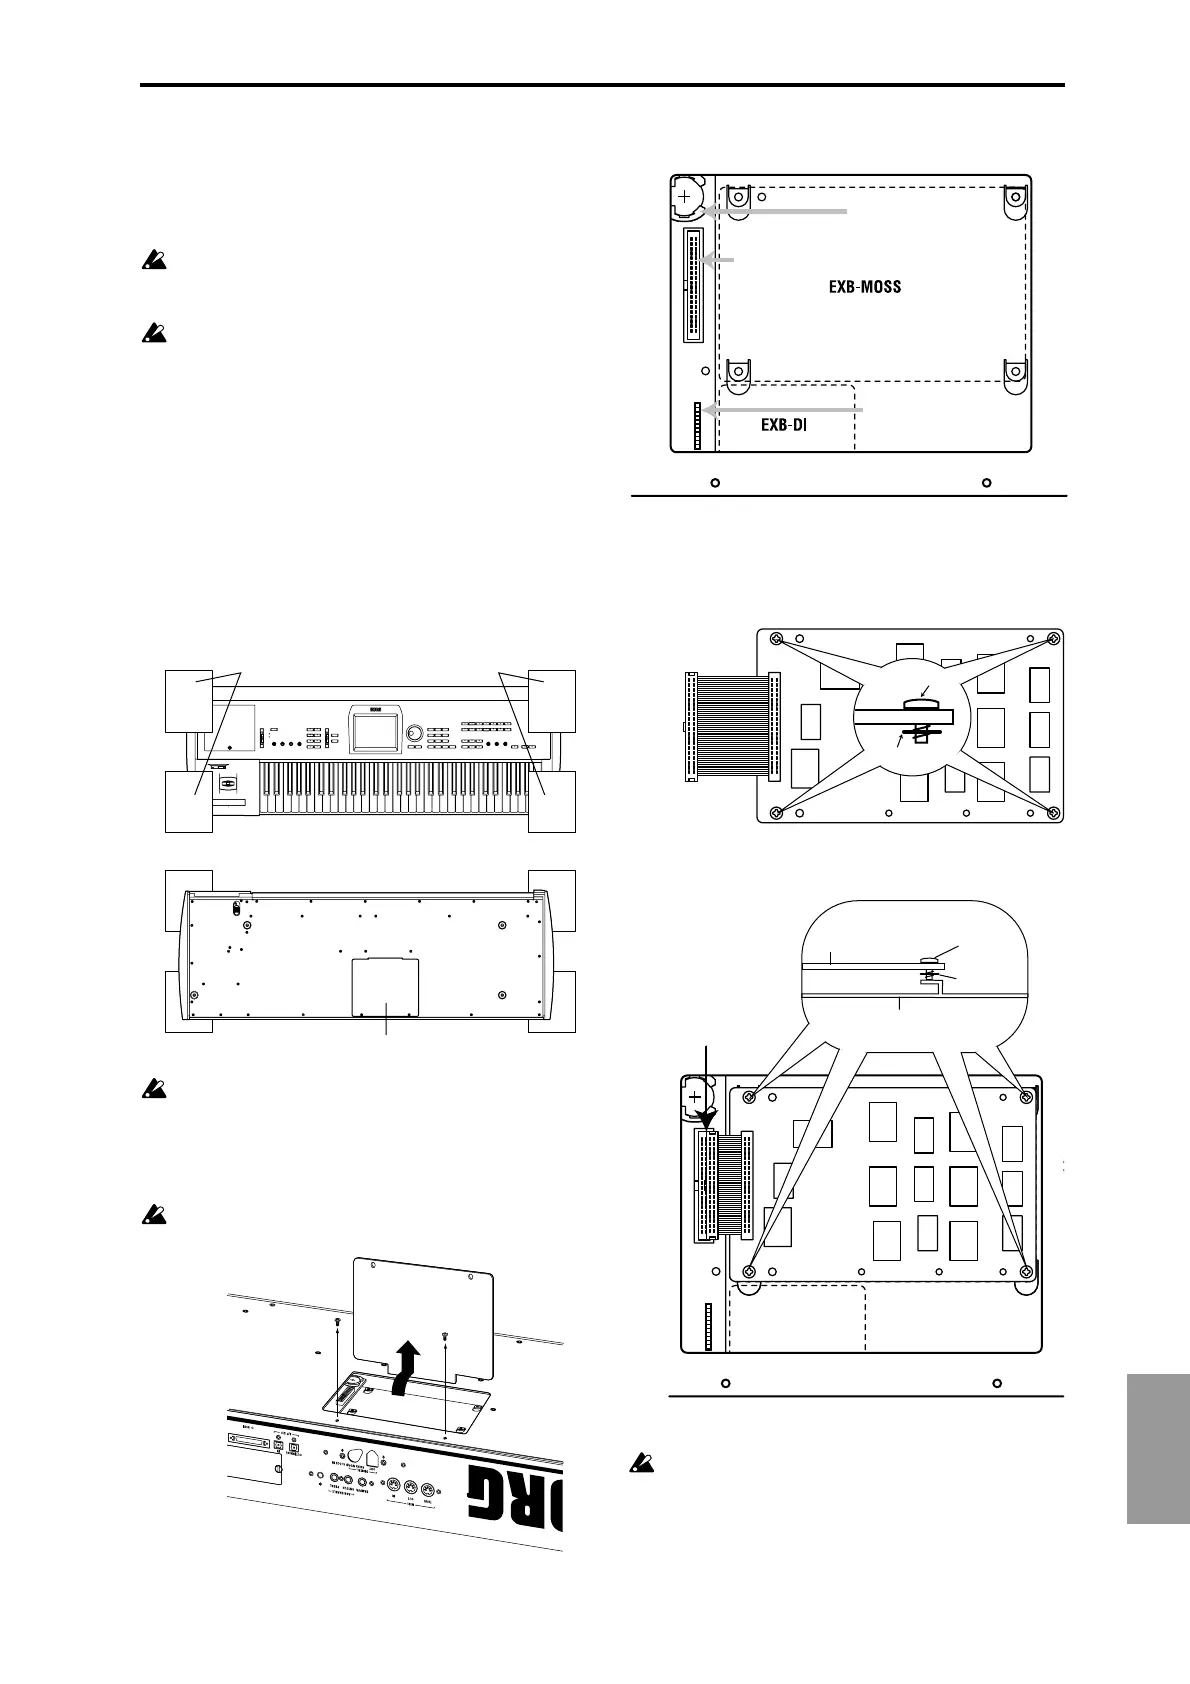
4 As shown below, place four books or magazines on your
work surface to prevent damage to the joystick or knobs,
and place the instrument upside down on top of them.
When you turn over the instrument, be careful not to
lose your balance and drop the instrument.
5 Using a screwdriver, remove two screws from the EXB-
MOSS/EXB-DI cover, raise the cover, and pull it out of
the slit.
When raising the cover, pull it out without forcibly
pushing it backward.
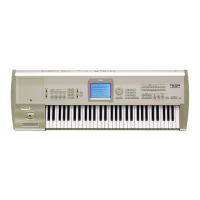
6 Verify the installation location.
7 Remove the EXB-MOSS from its packing pouch.
8 Note that screws and washers are attached to the four
corners of the board.
9 Use the four screws to attach the EXB-MOSS to the corre-
sponding brackets inside the TRITON STUDIO.
Before the screws are tightened, the EXB-MOSS will
float slightly above the brackets. If at this time you
apply excessive force to the EXB-MOSS, the screws or
washers may come out.
View from below
Place at each corner to avoid the joystick or knobs
EXB-MOSS/EXB-DI cover
Rear panel
EXB-MOSS connector
Calendar battery holder
EXB-DI connector
When cover is removed
Screw
Washer
Rear panel
Screw
Washer
Chassis to which the board is
being installed
EXB-MOSS
Connector