Appendices
293
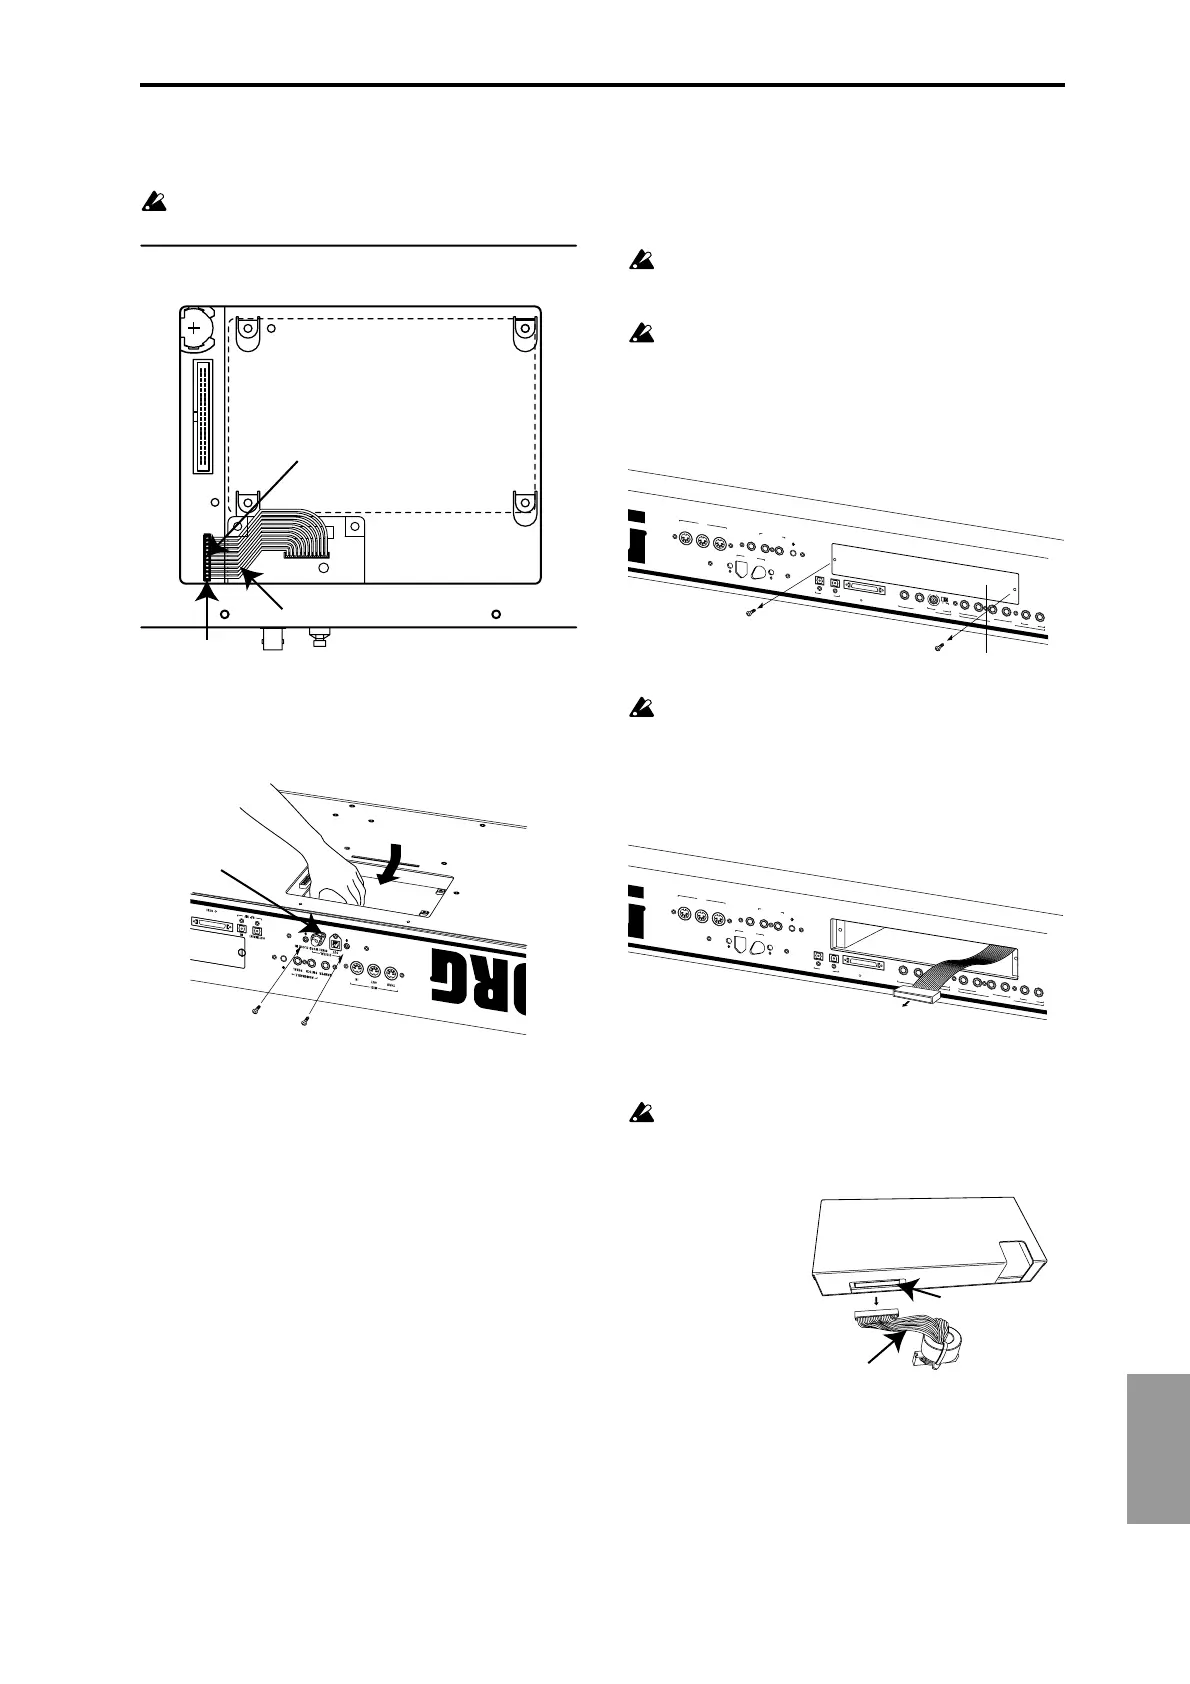
6 Attach the cable as shown in the diagram. Firmly press
the cable all the way into the connector.
Do not touch any part of the circuit board other than
the connector to which you are connecting the cable.
7 With the connectors of the EXB-DI protruding from the
rear panel of the TRITON-Rack, support the EXB-DI with
one hand and use the two screws you removed to fasten
the EXB-DI from the rear of the TRITON-Rack.
8 Reversing the procedure described in steps 1–5 of
“Installing the EXB-MOSS,” reattach the EXB-MOSS/
EXB-DI cover.
9 After you have completed all the above steps, turn on the
power and verify that the EXB-DI has been installed cor-
rectly. (“Checking after installation” ☞p.287)
Installing the EXB-mLAN
Before you perform the installation, be sure to read the fore-
going section “Safety precautions” and “Please note when
installing an option board/memory.”
While performing the installation, be careful of any
sharp or pointed edges of the TRITON STUDIO or the
option board.
You must leave the AC power cable disconnected until
you have completed all steps of installing the option
board.
1 Remove two screws from the mLAN cover plate that cov-
ers the EXB-mLAN installation slot on the rear panel,
and remove the mLAN cover plate.
The two screws you removed will be used to fasten the
EXB-mLAN in place. The cover you removed should be
kept in a safe place, since it will be needed if you later
decide to remove the EXB-mLAN.
2 From the TRITON STUDIO, pull out the cable that will
be connected to the EXB-mLAN.
3 Remove the EXB-mLAN from its bag.
4 Disconnect the cable from the EXB-mLAN connector.
The cable you disconnected should be kept in a safe
place. This cable may be required for connection if the
EXB-mLAN is installed in another device that can use
it.
Rear panel
Press all the way in
Connector
Cable
EXB-DI
4
8
k
H
z
W
O
R
D
C
L
O
C
K
IN
O
U
T
D
IG
IT
A
L
O
U
T
(
M
A
IN
)
IN
S
/P
D
IF
S
C
S
I
S
W
IT
C
H
P
E
D
A
L
D
A
M
P
E
R
T
H
R
U
O
U
TIN
M
I
D
I
A
S
S
IG
N
A
B
L
E
LEVEL
2
1
M
IC
L
IN
E
A
U
D
IO
IN
P
U
T
(
INDIVIDUAL
)
(
MAIN
)
2
1
R
L
/M
O
N
O
4
3
A
U
D
IO
O
U
T
P
U
T
MAX
MIN
mLAN cover plate
4
8
k
H
z
W
O
R
D
C
L
O
C
K
IN
O
U
T
D
IG
IT
A
L
O
U
T
(
M
A
IN
)
I
N
S
/P
D
IF
S
C
S
I
S
W
IT
C
H
P
E
D
A
L
D
A
M
P
E
R
T
H
R
U
O
U
T
IN
M
ID
I
A
S
S
IG
N
A
B
L
E
LEVEL
21
M
IC
L
IN
E
A
U
D
IO
IN
P
U
T
(
INDIVIDUAL
)
(
MAIN
)
2
1
R
L
/M
O
N
O
43
A
U
D
IO
O
U
T
P
U
T
MAX
MIN
EXB-mLAN connector
Cable