2DF
1-6-21
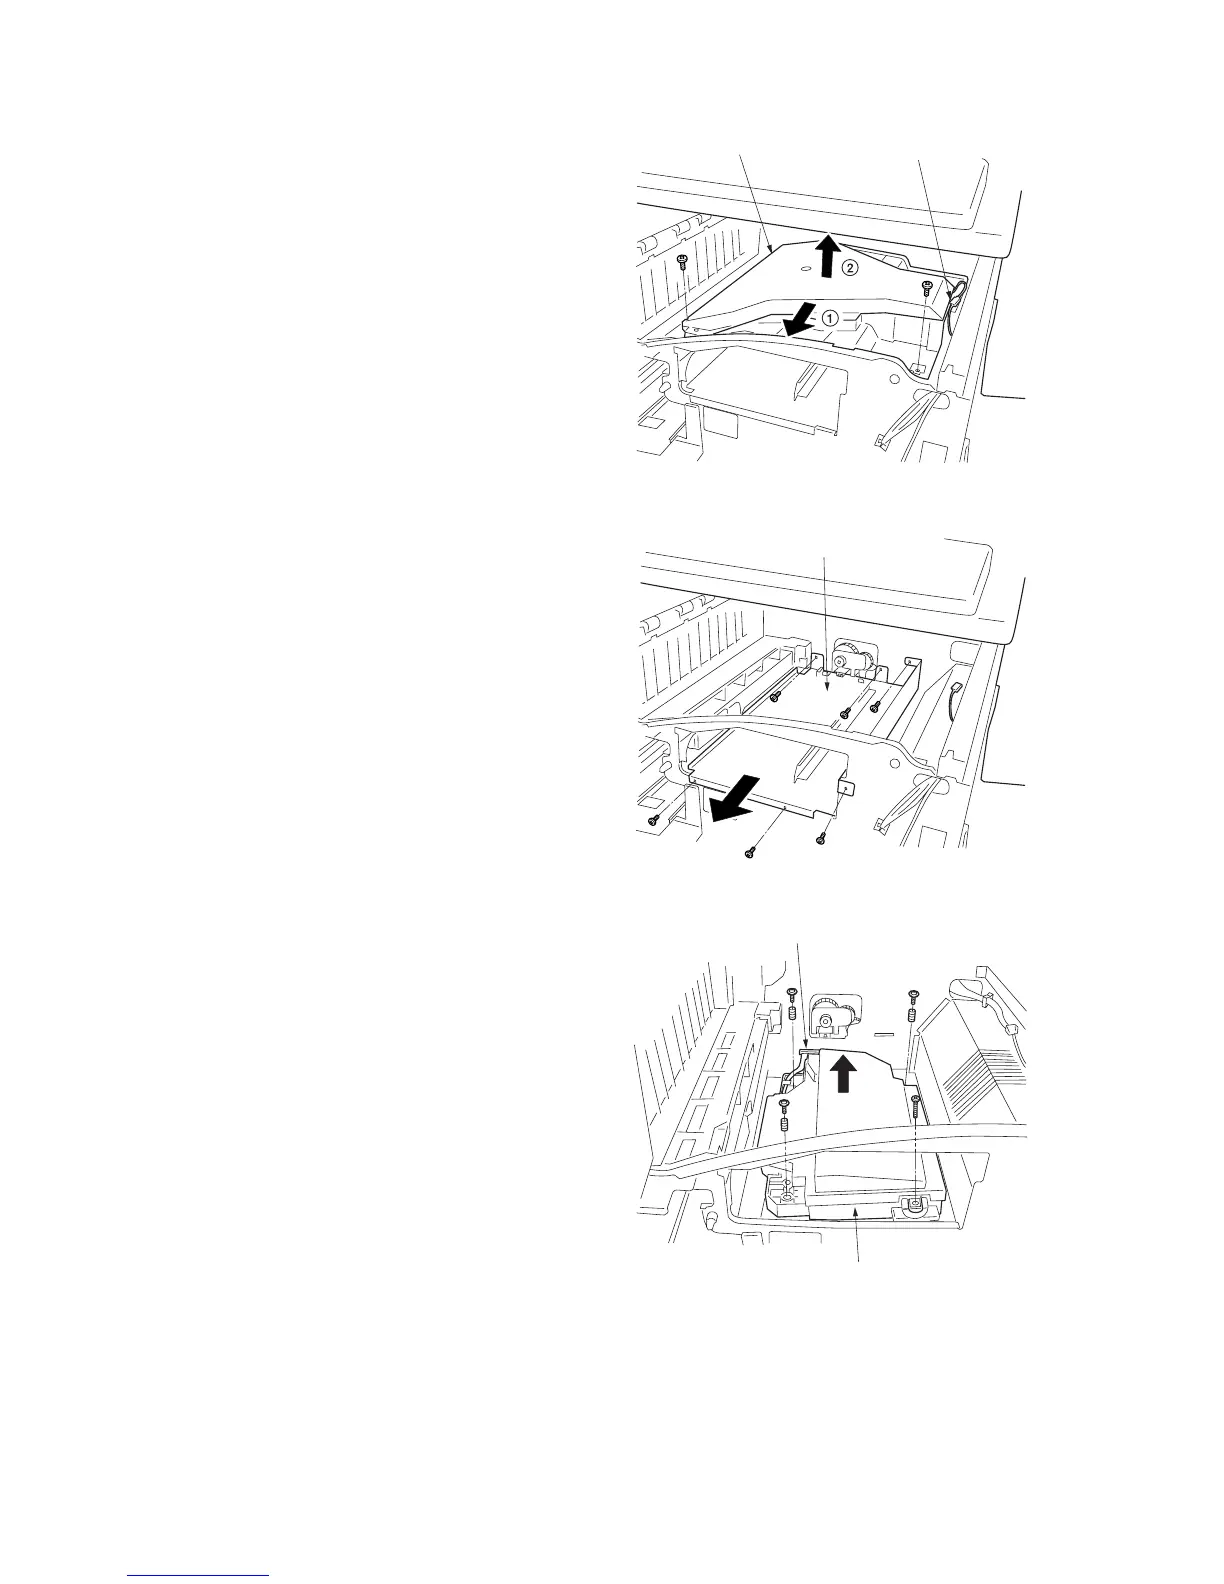
5. Remove the two screws and detach the
connector and then remove the fan duct.
Figure 1-6-41
6. Remove the six screws holding the toner
container retainer and then the retainer.
Figure 1-6-42
7. Remove the four screws and detach the
connector and then remove the laser scanner
unit.
8. Replace the laser scanner unit and refit all
the removed parts.
Figure 1-6-43
Fan duct
Connector
Toner container retainer
Laser scanner unit
Connector

 Loading...


