2DF
1-3-24
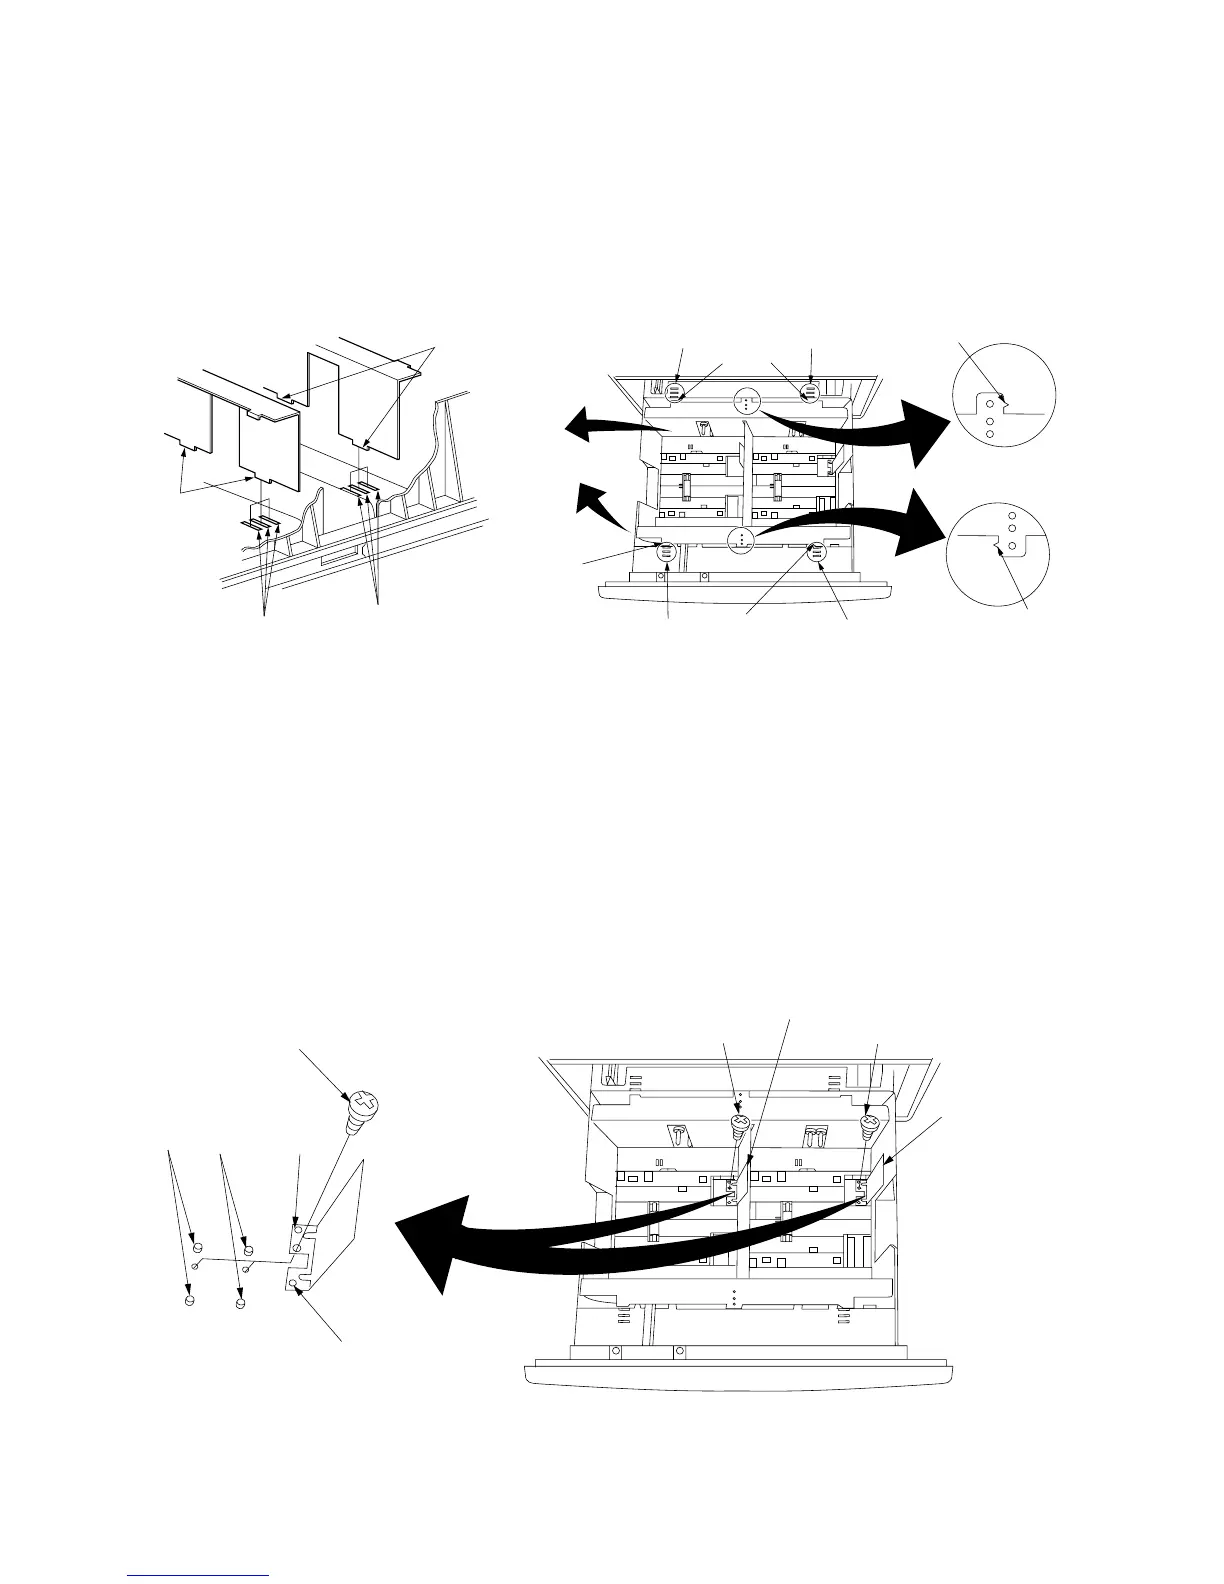
Figure 1-3-35
Figure 1-3-36
A4
LT
B5
A4
LT
B5
Size indicator
Size indicator
Upper tabs
Upper tab
Upper tab
Lower tabs
Lower tabs
Upper slots
Upper slots
Upper slots
Upper slots
Lower slots
Lower slots
B5
A4
Longitudinal size adjuster
Longitudinal size adjuster
Screw
Screw
Screw
A4 pins
Pin hole
Pin hole
B5 pins
4. Insert the upper tabs and lower tabs of the
front and rear lateral size adjusters into the
upper slots and lower slots respectively such
that the size indicators point to the size of
paper to be used. Secure the lateral size
adjusters using the screw for each.
5. Move the front and rear sliders (two at each
point) outward until they make contact with
the lateral size adjusters.
Steps 6 to 9 are for metric specifications only.
6. Remove the screw from each of the left and
right longitudinal size adjusters.
7. Align the pin holes in the left and right
longitudinal size adjusters with the A4 pins or
B5 pins according to the size of paper to be
used. Secure the adjusters using the screw
for each.
8. Connect the copier power plug to the wall
outlet and turn the copier main switch on.
9. Run maintenance item 208 and set the paper
size for the large paper deck (B5/A4).
10. Load paper into the drawer and make a test
copy to check the operation.

 Loading...


