CHAPTER 7 OPTIONAL EQUIPMENT
7-5
Press the [Start] key. Scanning of the originals will start.
The number of scanned originals will be displayed.
NOTE
• Repeat this operation for all originals when using the platen.
After all the originals have been scanned, press the
[Scanning finished] key.
Copying will begin and the copies will be automatically
stapled and ejected face down onto the tray.
Remove all of the finished copies from the tray.
44
44
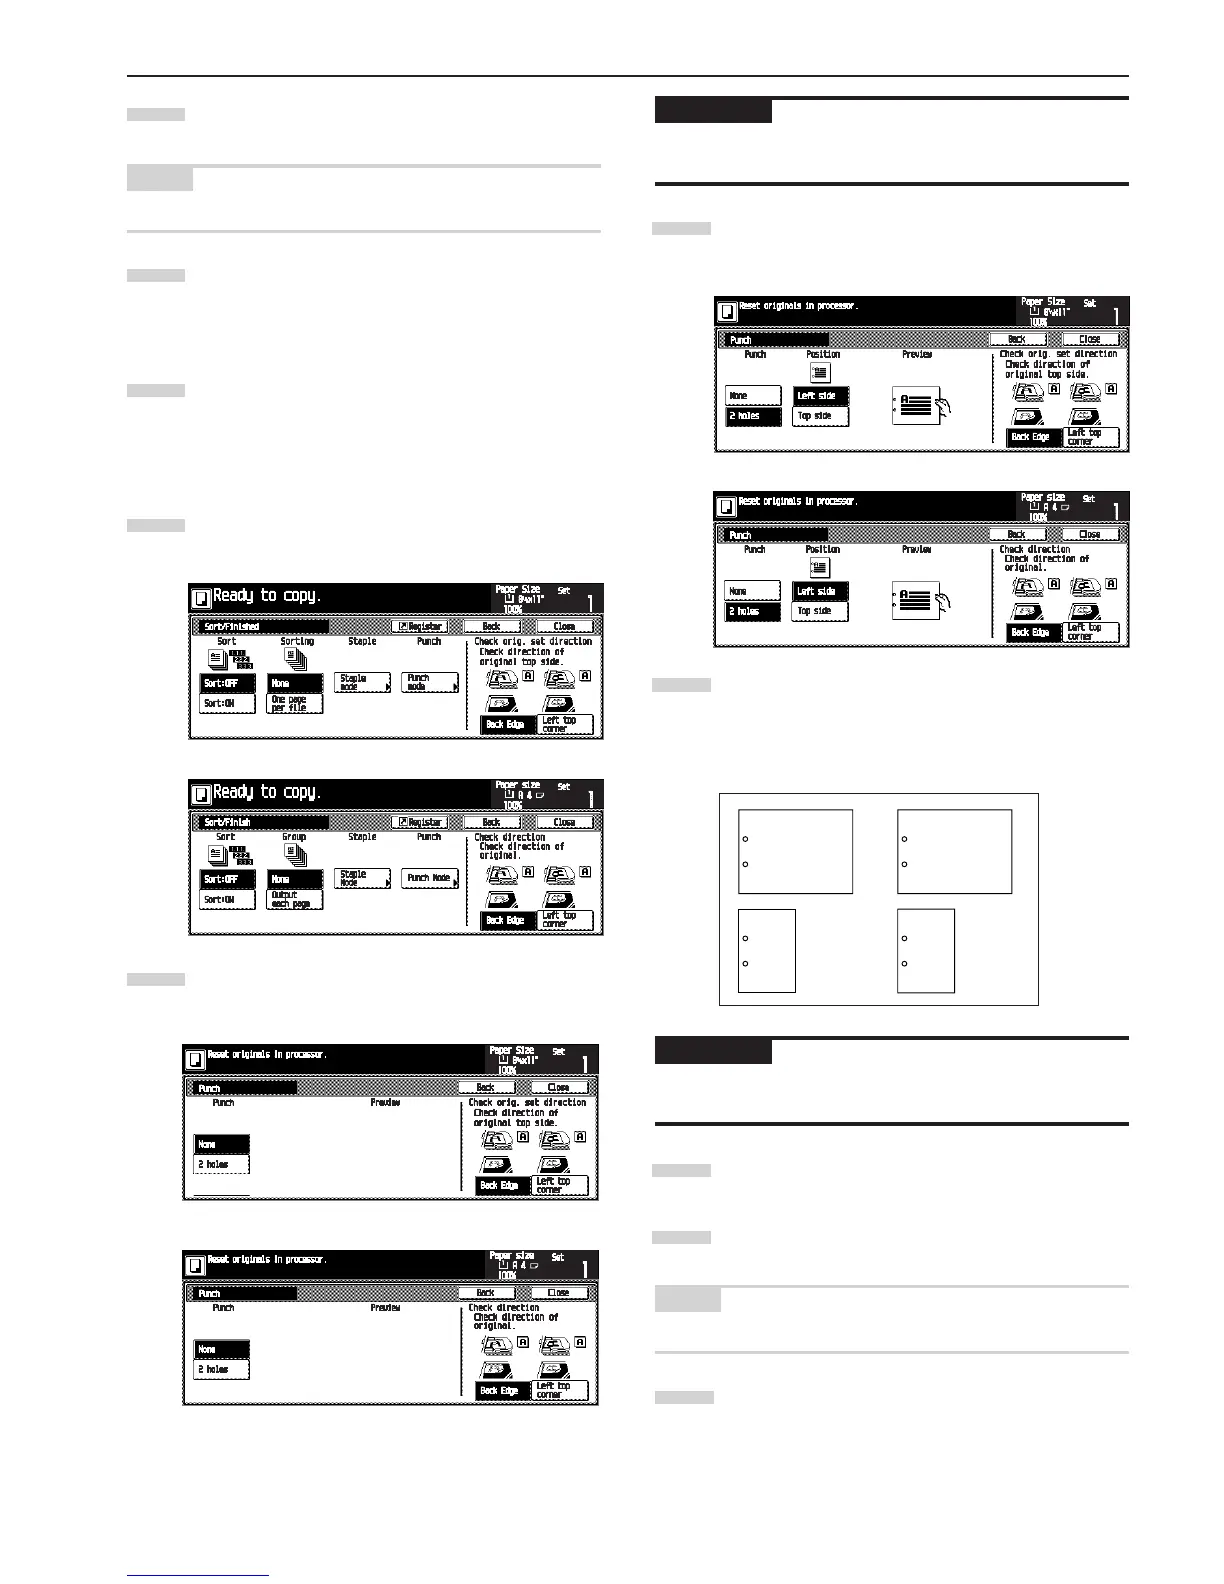
4 Copying in the Hole Punch mode (optional)
Copies can be automatically hole punched.
Press the [Sort/Finished] key.
The “Sort/Finished” screen will appear.
Press the [Punch mode] key.
The hole “Punch” screen will appear.
IMPORTANT
• When the optional punch unit is not installed, the [Punch mode]
key will not appear.
Touch the [2 holes] key. The staple position set screen
will appear.
Press the key that corresponds to the desired position
of holes.
* Hole punching will be accomplished as shown in the
illustration (as viewed from the front of the copies).
IMPORTANT
• The position of the holes on each page may differ very slightly
due to the fact that holes are punched in one sheet at a time.
Set the originals to be copied.
Press the [Start] key. Scanning of the originals will start.
The number of scanned originals will be displayed.
NOTE
• Repeat this operation for all originals when using the platen.
After all the originals have been scanned, press the
[Scanning finished] key.
Copying will begin and the copies will be automatically
punched and ejected face down onto the tray.
1
2
6
7
5
Inch specifications
Metric specifications
Inch specifications
Metric specifications
4
5
A
A
A
A
6
3
Inch specifications
Metric specifications
7
7
7
7
7

 Loading...


