Service Manual JET3
122 Rev. 1.0
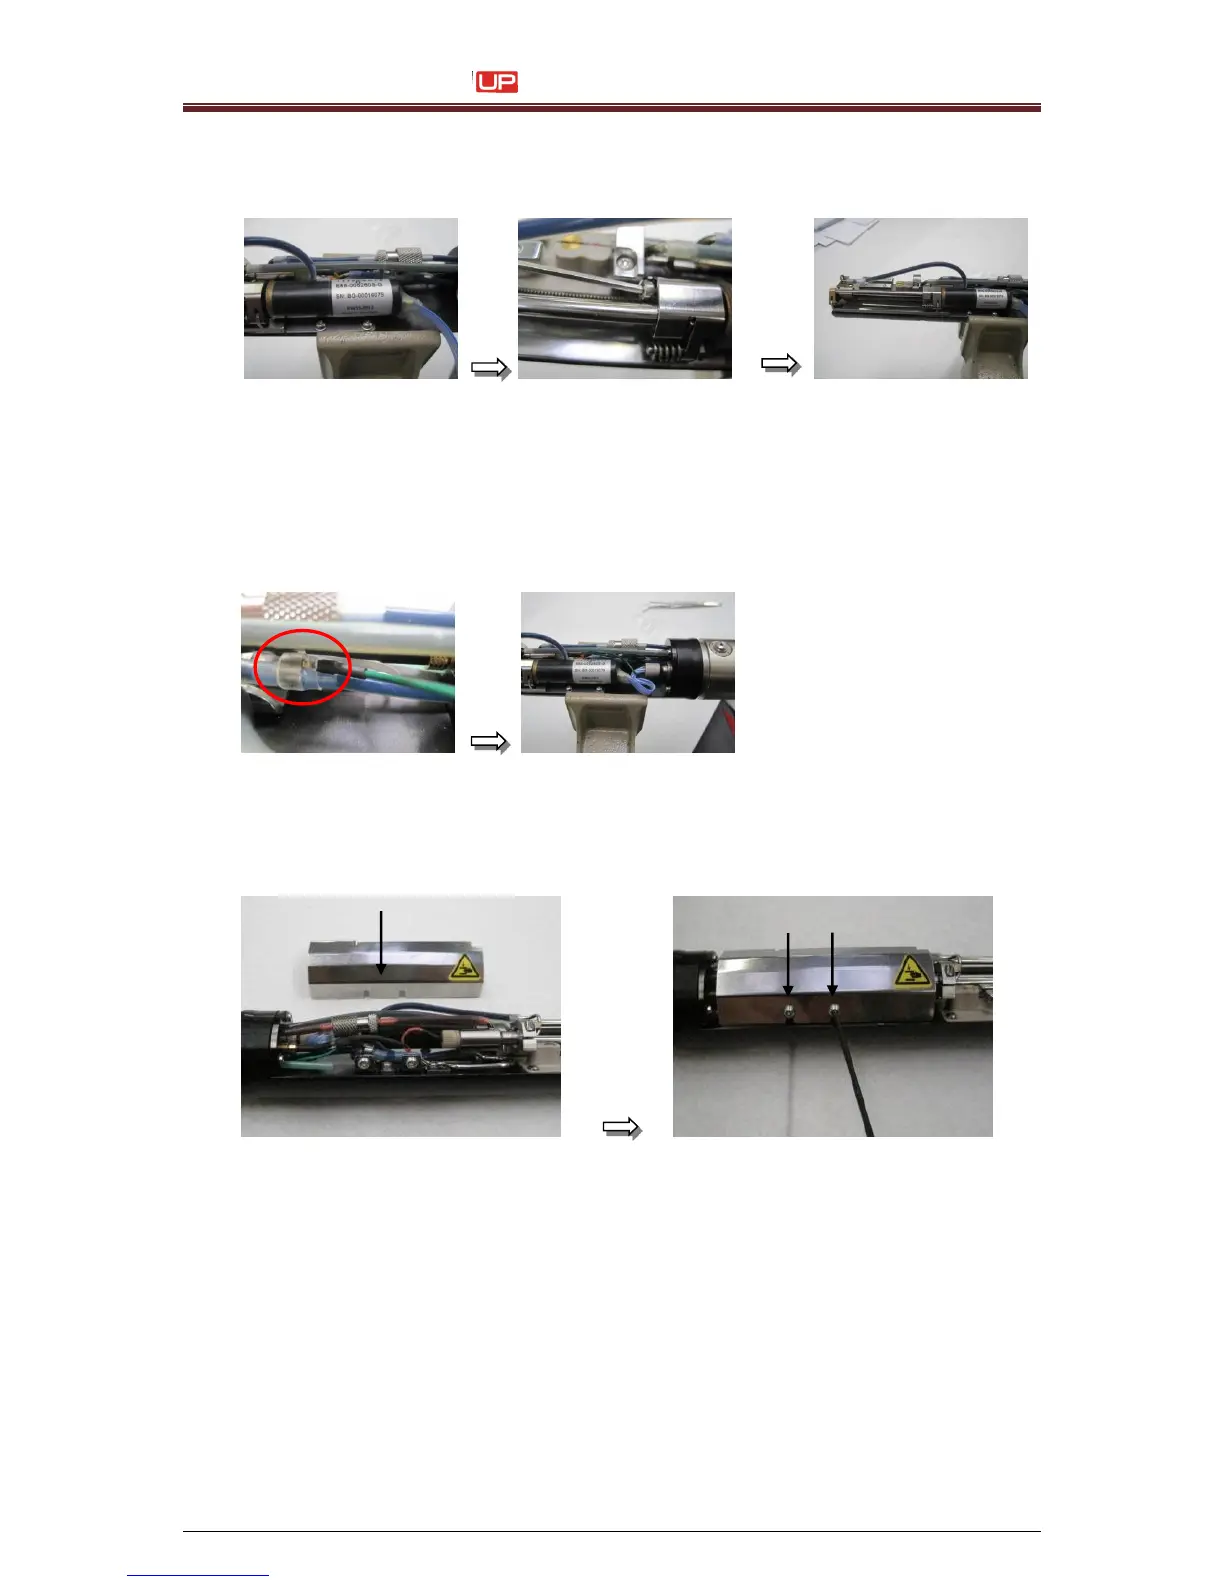
12. The motor should be positioned that the lable is on the top of the motor.
Fix the motor in this position with the attached cylinder head screw.
13. Plug in the connector of the ink flow sensor by using the tweezers. Maybe the heat
shrink tube must be widen more. When the connector is in position the heat shrink tube
must be shrunk again. Therefore use a hot air gun.
CAUTION: Because of the heat the tubes and other parts can be damaged.
Pay attention!
Plug in the motor connector.
14. Mount the inner head cover
CAUTION:
Watch out that no tubes or cables are damaged by the inner head cover!
15. Switch on the printer again. During the initialization the printer will close the nozzle and
set´s the zero point for the head motor. Check the ink stream adjustment.
16. Exchange of the head motor is finished now.