3.Pressthetwotabsontheintrusionswitchtowardseachotherandcarefullypullouttheintrusionswitch
atthesametimetoremoveitfromtheframe.
Figure58.Removingtheintrusionswitch
Installingtheintrusionswitch
Toinstalltheintrusionswitch,dothefollowing:
1.Prepareyourserverandremovetheservercover.See“Preparingyourserverinadvanceandremoving
theservercover”onpage57
.
2.Ifneeded,removetheoldintrusionswitch.See“Removingtheintrusionswitch”onpage87.
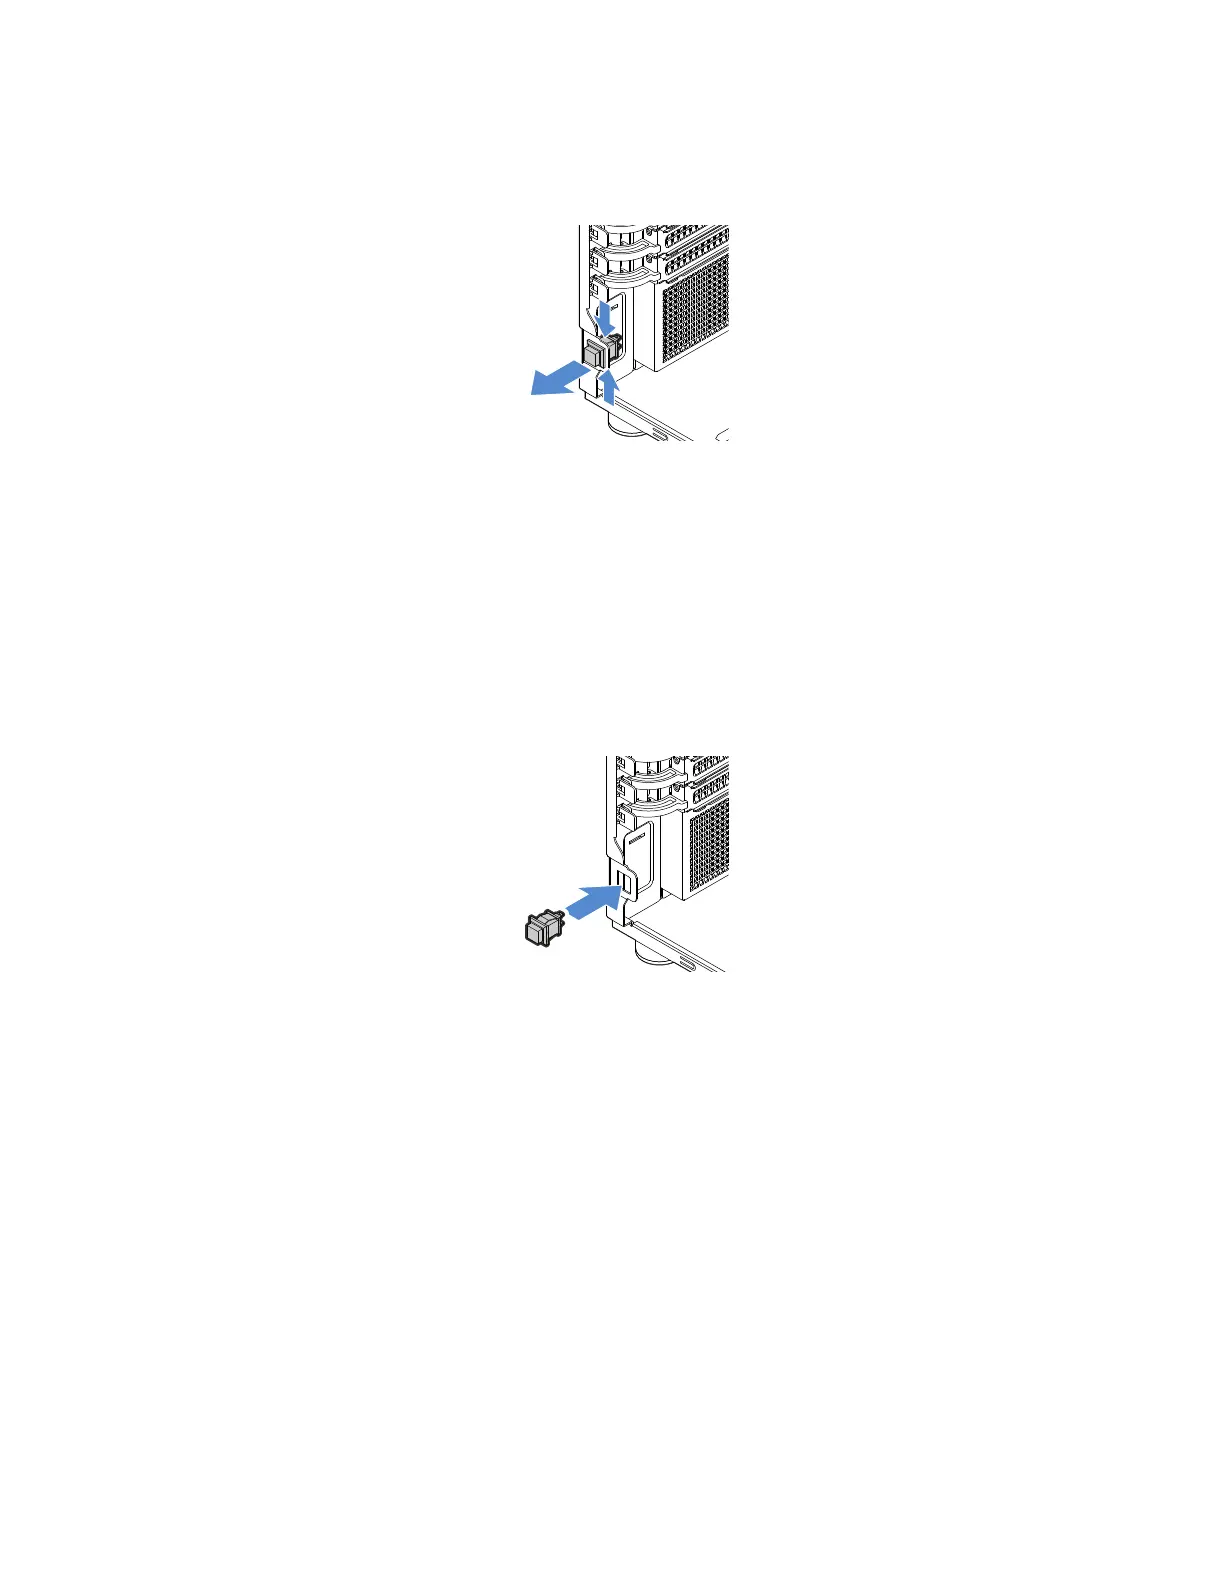
3.Insertthecableofthenewintrusionswitchandthenthetabontheintrusionswitchframeintothe
correspondingholeinthechassis.Then,pushtheintrusionswitchinuntilitissecurelyseated.
Figure59.Installingtheintrusionswitch
4.Connectthecableofthenewintrusionswitchtothebranchconnectoronthefrontpanelconnector2
thatisconnectedtothesystemboard.See“Systemboardcomponents”onpage33.
Frontpanelboardassembly
•“Removingthefrontpanelboardassembly”onpage88
•“Installingthefrontpanelboardassembly”onpage89
Note:ThefrontpanelboardassemblyissensitivetoESD.Ensurethatyoureadandunderstand“Handling
static-sensitivedevices”onpage56firstandcarefullyperformtheoperation.
Removingthefrontpanelboardassembly
Toremovethefrontpanelboardassembly,dothefollowing:
1.Prepareyourserverandremovetheservercover.See“Preparingyourserverinadvanceandremoving
theservercover”onpage57
.
2.Removethefrontbezel.See“Removingthefrontbezel”onpage59.
88ThinkServerTS460UserGuideandHardwareMaintenanceManual