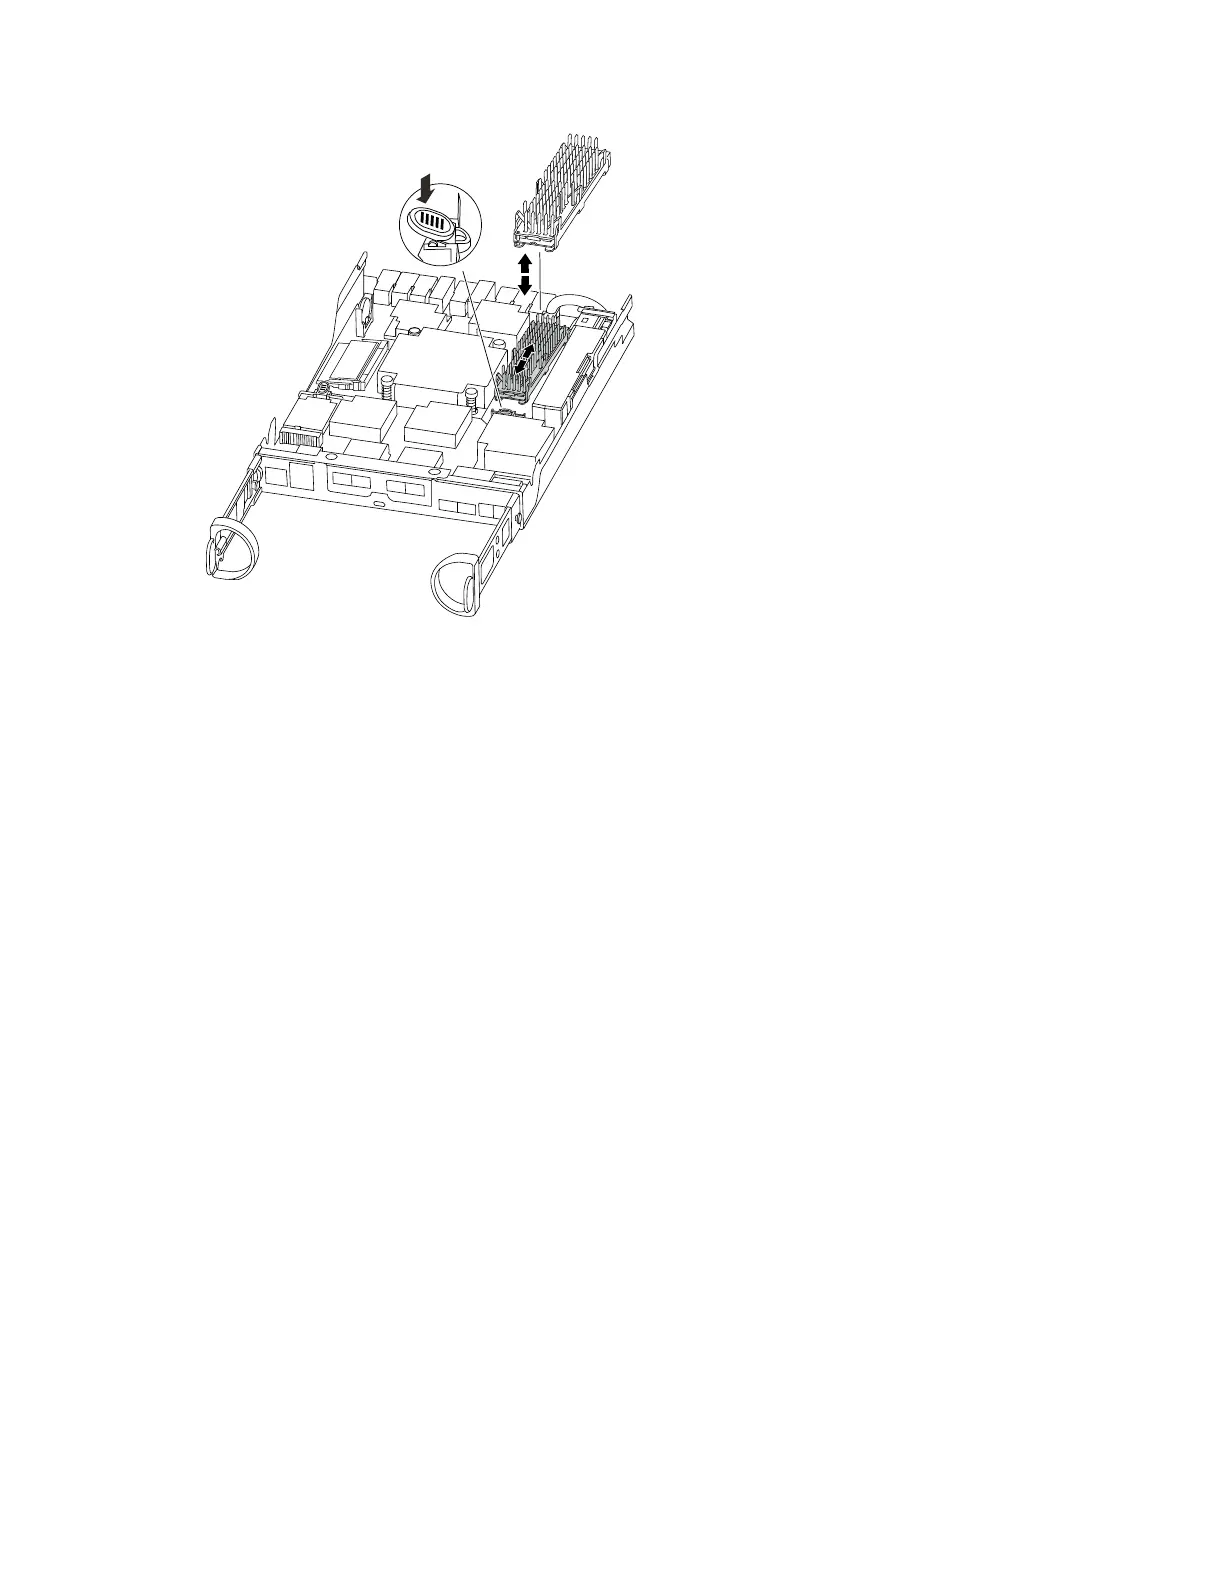
Step 2. Gently pull the caching module straight out of the housing.
Step 3. Insert the new caching module in the controller, and then align the edges of the caching module
with the socket housing and gently push it into the socket.
Step 4. Verify that the caching module is seated squarely and completely in the socket. If necessary,
remove the caching module and reseat it into the socket.
Step 5. Reseat and push the heatsink down to engage the locking button on the caching module housing.
Step 6. Close the controller module cover, as needed.
Installing the controller
After you install the components from the old controller module into the new controller module, you must
install the new controller module into the system chassis and boot the operating system.
For HA pairs with two controller modules in the same chassis, the sequence in which you install the controller
module is especially important because it attempts to reboot as soon as you completely seat it in the
chassis.
Step 1. If you are not already grounded, properly ground yourself.
Step 2. If you have not already done so, replace the cover on the controller module.
Step 3. Align the end of the controller module with the opening in the chassis, and then gently push the
controller module halfway into the system.
Note: Do not completely insert the controller module in the chassis until instructed to do so.
Step 4. Cable the management and console ports so that you can access the system to perform the tasks
in the following sections.
Step 5. Complete the reinstallation of the controller module:
50 ThinkSystem DM3000x and DM5000x Hardware Installation and Maintenance Guide
 Loading...


